Managing files on your Mac often requires compressing them into a zip format or extracting their contents. Zipping folders is a convenient way to reduce file size, bundle multiple files together, and make sharing simpler.
Unzipping, on the other hand, allows you to access the contents of compressed files quickly and efficiently. Macs come with built-in tools that make zipping and unzipping folders a breeze, eliminating the need for additional software.
In this guide, we’ll walk you through the comprehensive step-by-step process on how to zip or unzip folders on Mac.
Also Read: How To Delete A User Account On Mac
How To Zip / Unzip Folders On Mac
How To Zip a Folder
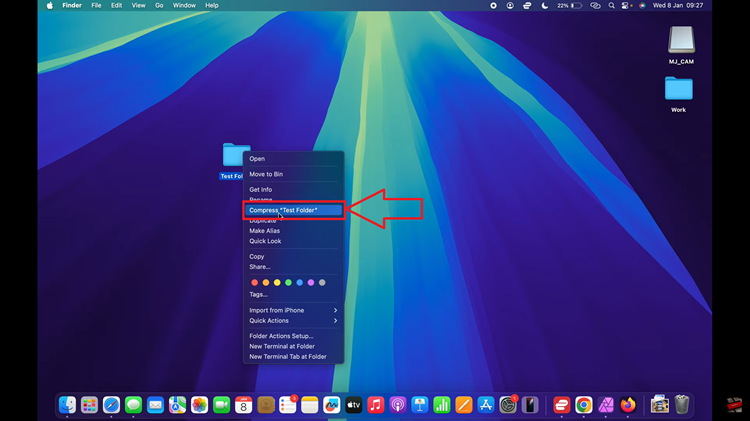
Zipping a folder helps reduce its size and makes it more manageable for sharing or storing. First, locate the folder you want to compress. Right-click on it. In the menu that appears, select the option that says Compress “Folder Name”.

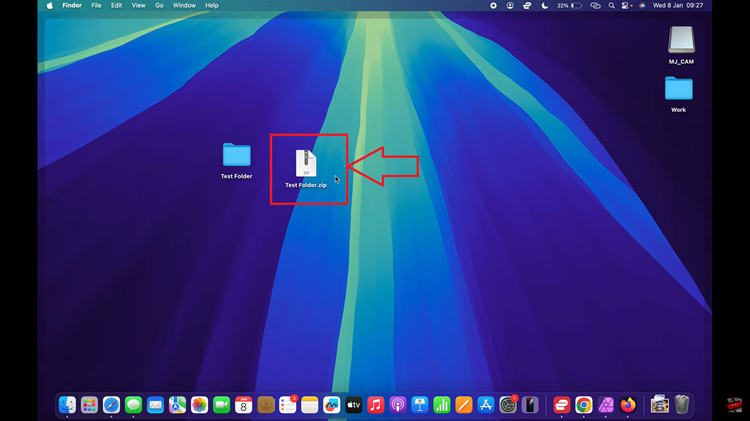
A zip file will be created in the same location as your original folder. It will have the same name as the folder but will end in .zip. You can now easily move or send this file.

How To Unzip a Folder
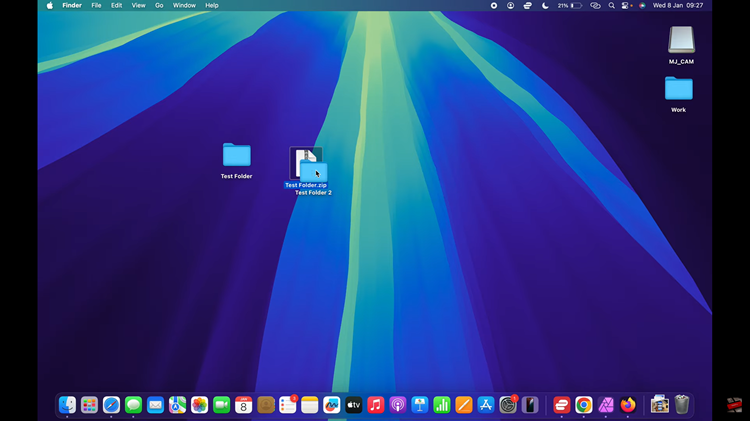
When you receive a zip file or want to access the contents of a compressed folder, you can unzip it with just a couple of clicks. Simply locate the zip file you want to unzip. Double-click on the file, and your Mac will automatically extract the contents. You can now view, edit, and organize the files as needed.

Zipping and unzipping files on your Mac is a simple and efficient way to manage your folders. Whether you’re sending multiple files or organizing large amounts of data, the built-in compression tools make these tasks effortless.
Watch: How To Connect Hollyland Lark M2 Wireless Microphone To Chromebook

