Taking screenshots is an essential task for many Mac users, whether you’re capturing important information, sharing a visual reference, or saving content for later use.
While Windows has a specific Snipping Tool, macOS offers its own efficient methods for capturing screenshots directly from your keyboard.
In this guide, we’ll walk you through the comprehensive step-by-step process on how to use the snipping tool on your Mac.
Also Read: How To Recover Recently Deleted Messages On Mac
How To Use Snipping Tool On Mac
To start taking screenshots on your Mac, simply press Shift + Command + 4 on your keyboard. This keyboard shortcut activates the built-in screenshot feature. You’ll also notice that your mouse pointer will change into a crosshair cursor.
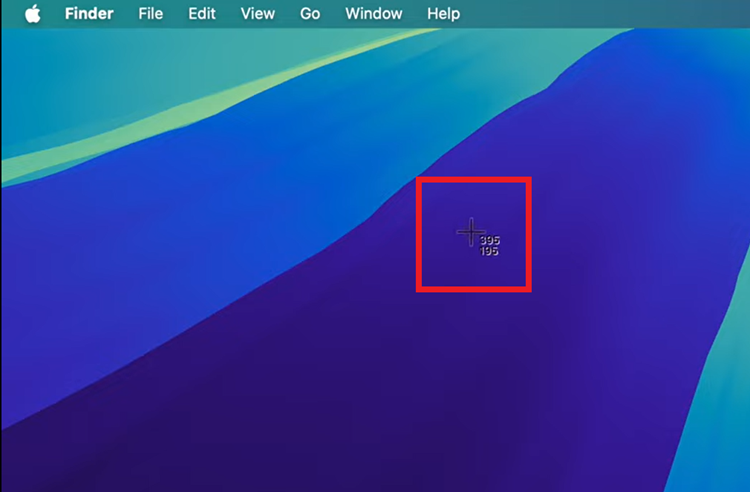
Once the crosshair cursor appears, click and drag your mouse across the screen to select the portion you want to capture. You can easily adjust the area by holding the mouse button and moving your cursor. When you’re satisfied with the area you’ve selected, release the mouse button.

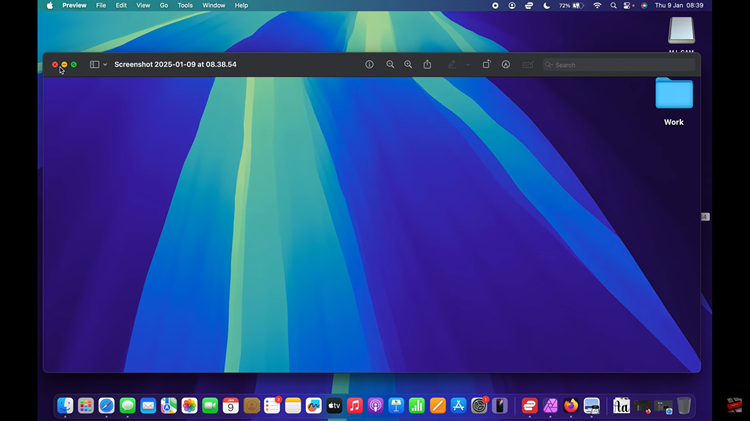
Your Mac will automatically capture the screenshot. The file will be saved to your desktop by default. You can also press Control while dragging to copy the screenshot to your clipboard instead of saving it as a file. Simply double click on it to view the capture.
The Snipping Tool on Mac is an easy and versatile way to take screenshots of your screen, whether it’s a portion of your screen, an entire window, or your whole desktop. By familiarizing yourself with these shortcuts, you’ll be able to quickly and effectively capture your screen without any extra hassle.

