The Logitech MX Master 3S is renowned for its class-leading and precise ergonomic design, along with its customizable features. Among such features, one of the shining capabilities is gesture control, in which you can simplify multiple tasks and navigate your computer with ease by using just a few moves of your hand.
Whether editing documents, jumping between applications, or browsing the web, using those gestures can significantly enhance your ability to work more efficiently and also improve overall computing. In this tutorial, we will walk you through how to use gestures on the Logitech MX Master 3S.
By the end of this article, you’ll be equipped with the knowledge to make the most out of this powerful feature. Lets begin.
Watch: How To Install LogiOptions+ On Windows PC
Use Gestures On Logitech MX Master 3S
Beforehand, you’ll need to install the ‘Logi Options+ App‘ on your PC. Head to the Logitech software download site and install the software. Once installed, launch the app and select your mouse on the home page. Then, click on the ‘Buttons‘ option from the menu that appears to proceed.
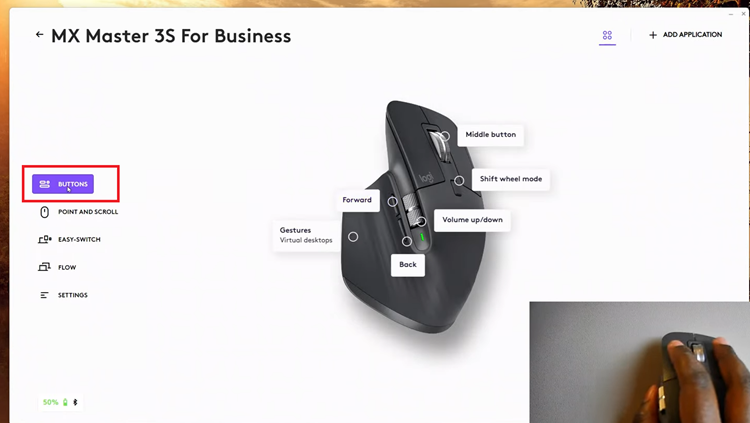
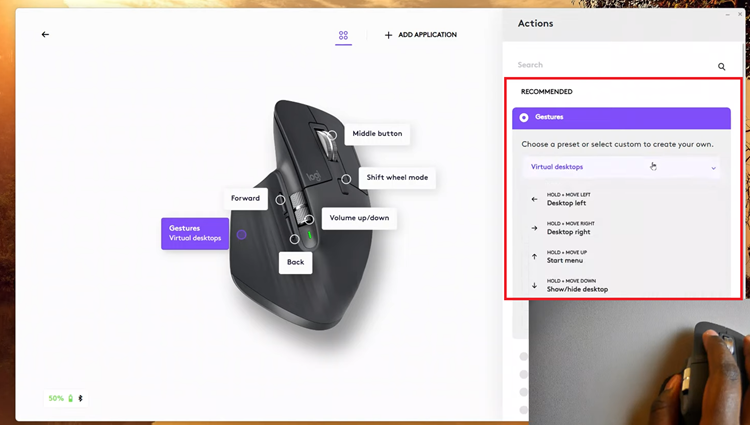
Following this, click on the ‘Gestures‘ and you’ll see all gestures that are currently available for your Logitech mouse. From here you can decide to choose an existing preset, or you can create your own gestures.
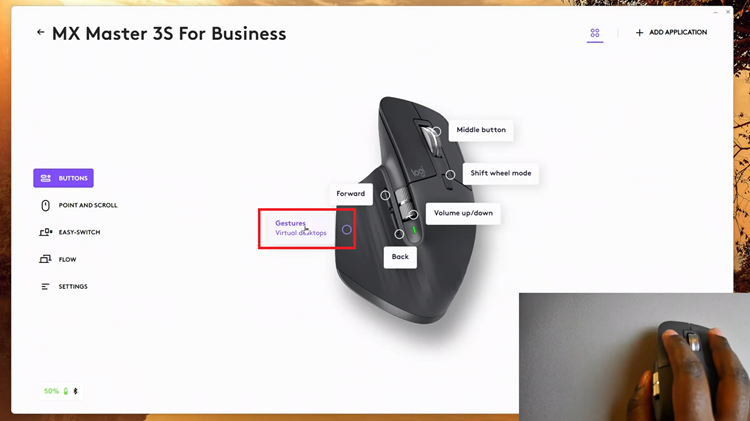
In addition, you’ll see a brief description of how to use the gestures that are available on your mouse. At this point, choose the preset and perform the gestured displayed on the app.
In conclusion, the gesture control feature on the Logitech MX Master 3S offers a powerful way to streamline your workflow and boost productivity. By enabling and customizing gestures, you can navigate your computer with ease, switch between applications, and execute tasks with a few simple movements.
Read: How To Change Default Browser App On Samsung Galaxy A16
