As iPads evolve, they tend to become more and more powerful work and entertainment machines. However, with a general lack of options internally for storage, especially on low-tier versions, it usually comes a time when you run out of space for your files, applications, videos, and photos. Fortunately, iPads running iPadOS 13 and onwards have support for SSDs as external storage.
Furthermore, connecting an external SSD to your iPad is one of those easy and powerful means through which you can manage big files, back up, and enhance overall productivity without depending upon cloud services. In this detailed guide, we will walk you through everything you need to know about using an external SSD with your iPad.
Let’s dive in and get started.
Watch: How To Get YouTube Channel Verification Badge
Use External SSD With iPad
Choose Right SSD
One key thing you should consider when choosing an SSD to connect with your iPad is the kind of port your iPad offers. Although Apple introduced the USB-C port on the iPad Pro models in 2018, most other iPads, including standard iPads, iPad Air, and iPad mini, remain reliant on the Lightning port.
Connect SSD To iPad
It’s pretty easy to connect one if you’re using an iPad with a USB-C which is any of the current Pro models. For connections, most modern external SSDs sport a USB-C connector that will let you plug the SSD directly into the USB-C port on the iPad without extra accessories.
If your iPad still has a Lightning port, things are set up differently. Since these Lightning ports are less versatile than USB-C, you’ll want to use a Lightning to USB Camera Adapter for your external SSD.
Transfer Files
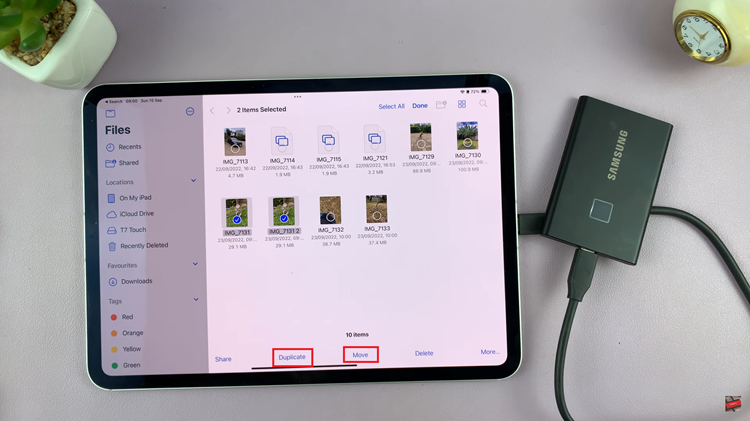
Once the external SSD is connected, locate and tap the ‘Files’ app on your iPad. Then, under the location section, find your external SSD and tap on it to proceed. Following this, find and select the folder or files you’d like to transfer from your SSD to the iPad. Now, from the options that appear, below the screen, tap on “Move” or “Duplicate.”
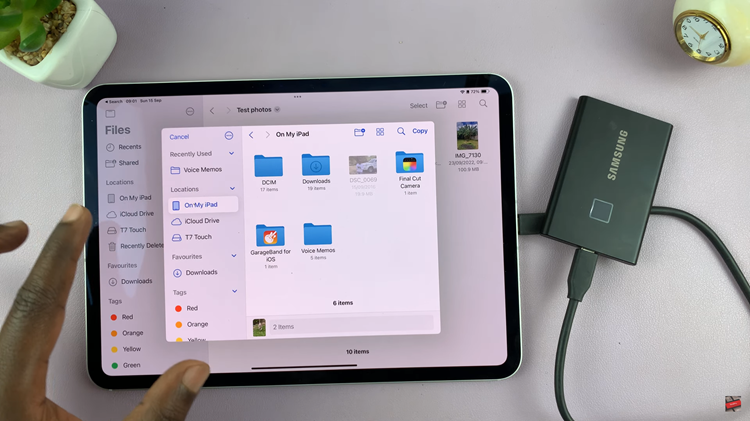
At this point, find the location on your iPad, then tap on “Copy” to transfer the files. The selected files will be moved to the designated location.
Transfer Photos Directly From Photos
Begin by launching the Photos app on your iPad. Then, select the files you’d like to transfer to your external SSD. Tap on the ‘Share’ button (bottom left corner) and select “Save To Files” from the options that appear.
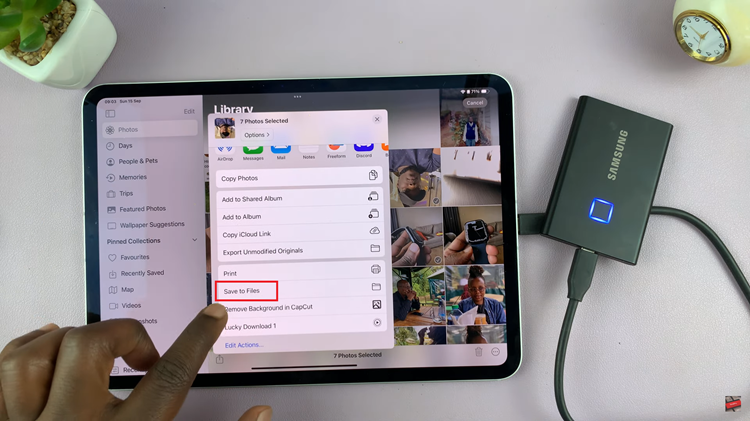
Now, choose the desired location on your SSD and tap on “Save” to transfer the photos.
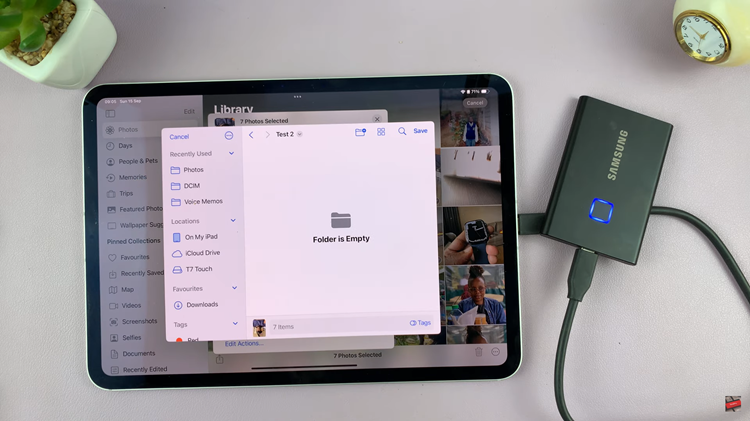
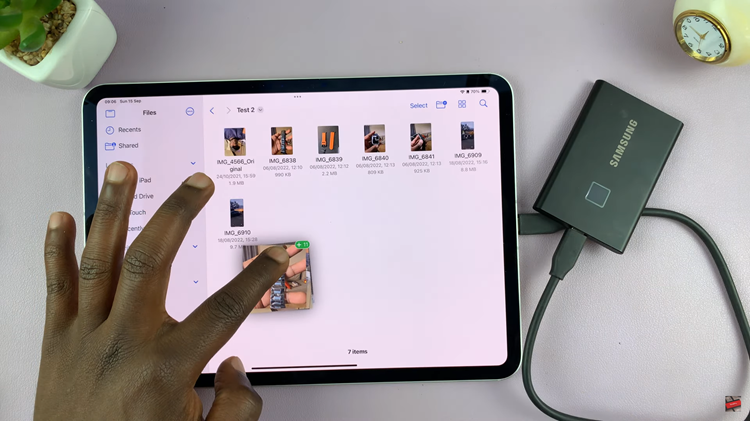
Additionally, you can drag and drop photos and videos directly from the photos app to your SSD. Begin by launching the Photos app, select all the photos you’d like to move, and then long press on them.
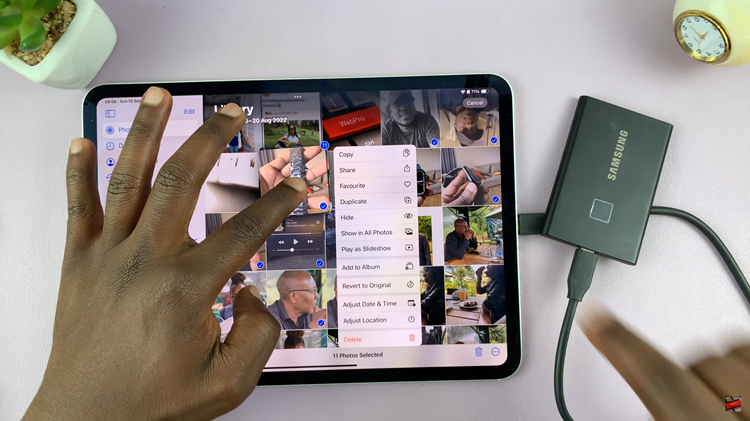
From here, open the Files app on your iPad, find the location on your external SSD, then release the photos and it will be imported to the designated location.
In conclusion, using an external SSD with an iPad is a powerful way to get increased storage and boost productivity. These above-mentioned steps will help you connect, manage, and transfer files smoothly to take full advantage of your iPad. When it is done correctly, you can surely enjoy flexibility in increased storage without hassle.
