Keeping your OnePlus 13 updated matters a lot to get the best performance, security, and new features. Software updates fix problems and make your phone work better. They also help your battery last longer and bring you the newest Android tech.
If you don’t know how to look for or put in updates on your OnePlus 13, don’t worry. This guide will show you how to do it step by step. We’ll tell you all you need to know how to update your OnePlus 13 in this article.
This guide will help you keep your phone running well, no matter if you’ve had a OnePlus for years or just got one. Let’s get started and make sure your OnePlus 13 stays up to date!
Watch: How To Show Accessibility Button On OnePlus 13
Update OnePlus 13
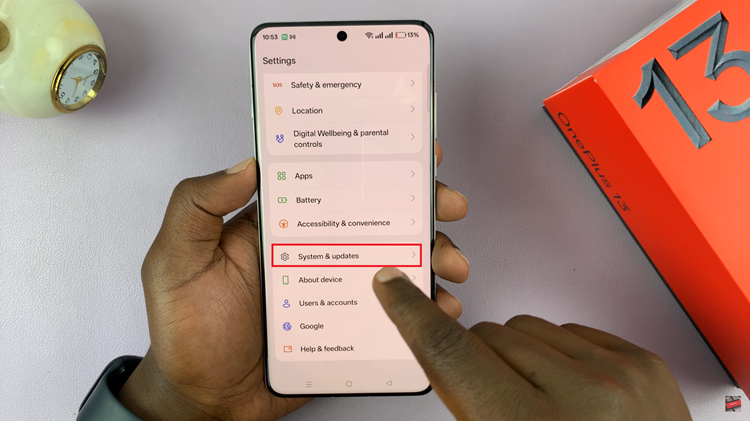
Start by unlocking your OnePlus 13 and navigating to the home screen. From there, locate and select the Settings app, either on the home screen or in the app drawer. Next, scroll down and tap on the ‘System & Updates‘ option to continue.

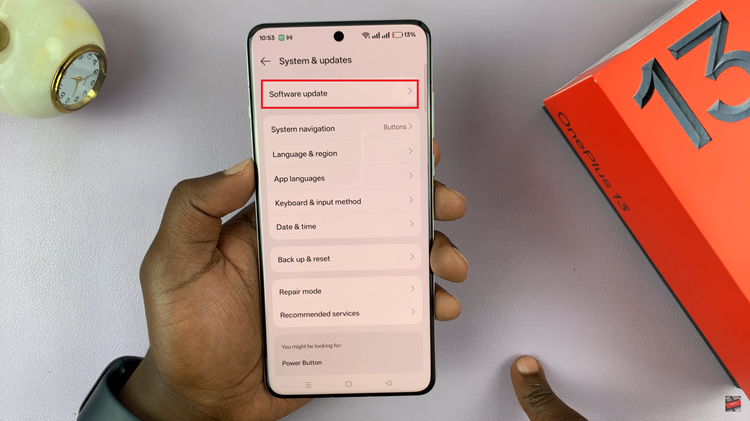
Following this, scroll down and find the ‘Software Update‘ option. Tap on it to continue to the next step.

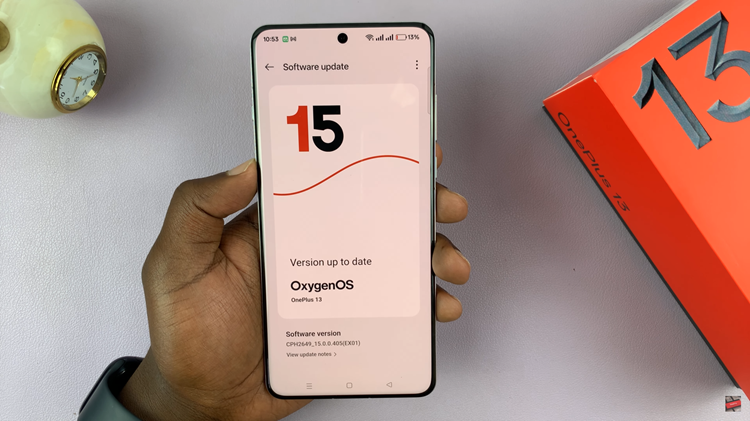
From here, your device will automatically check for availabe updates on your phone. If there’s not update available, you’ll see the ‘Version up to date‘ info. Alternatively, if you have an update available, tap on the ‘Update‘ or ‘Download‘ to begin the update process.

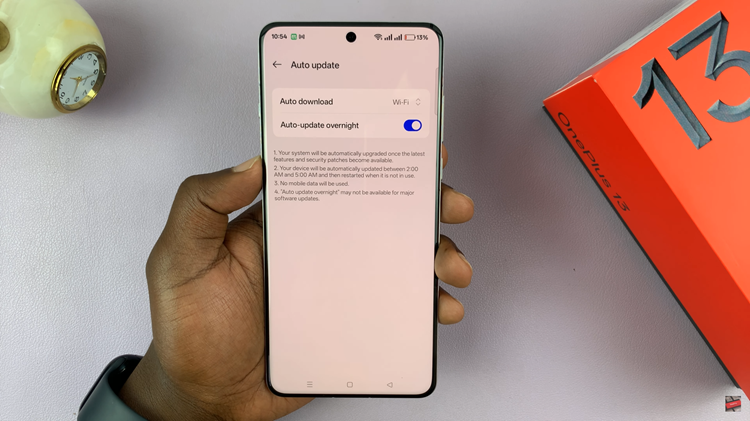
Additionally, you can enable the auto update option. Simply, tap on the three dots at the upper right corner and select ‘Auto Update‘ from the menu that appears. From here, you can customize the auto update options.

In conclusion, updating your OnePlus 13 is an essential part of ensuring your device continues to perform at its best. By following the simple steps outlined in this guide, you can easily keep your OnePlus 13 updated and avoid common issues that might arise during the process.

