
In this article, we will explore the steps to uninstall Valorant from your PC. Whether you’re making room for new games or simply no longer playing, removing the game is a straightforward process.
However, it’s important to ensure that all related data is completely wiped from your system to prevent any unnecessary files from taking up space on your hard drive and slowing down your computer.
Sometimes, simply closing the game or the client doesn’t fully shut down all background processes. This can make the uninstall process a bit more challenging, as lingering files and running programs may interfere with removal.
Preparing To Uninstall Valorant
Before you start the uninstallation process, it’s essential to take some preparatory steps:
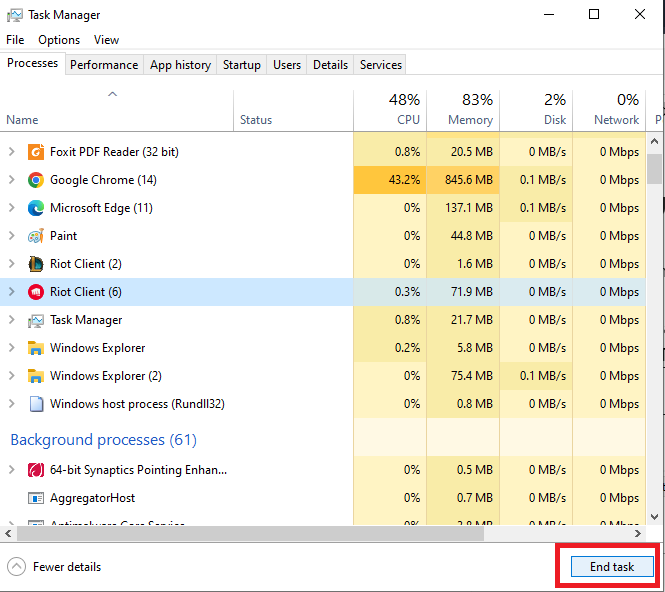
- Close the Game: Make sure that Valorant is not running in the background. Right-click on the taskbar and select Task Manager. In the Task Manager window, look for any processes related to Valorant and end them by selecting the process and clicking End Task.
How To Uninstall Valorant
Method 1: Uninstall Valorant Using Control Panel
The first step in the uninstallation process is to remove the game from your system. Follow these detailed steps:
- Access the Control Panel: Click on the Start menu located in the bottom left corner of your screen. Type Control Panel in the search bar and press Enter.
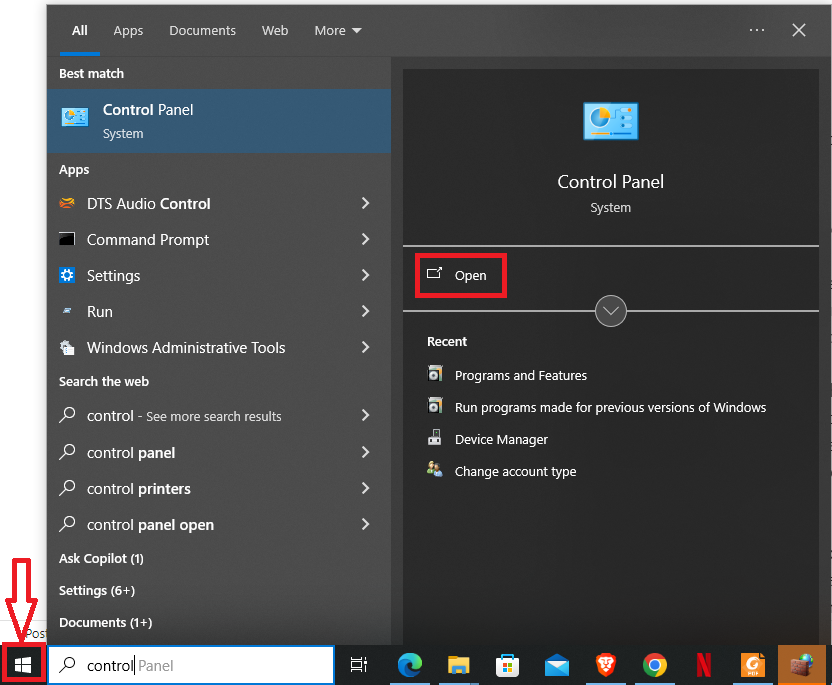
This will open the Control Panel, which allows you to manage various system settings.
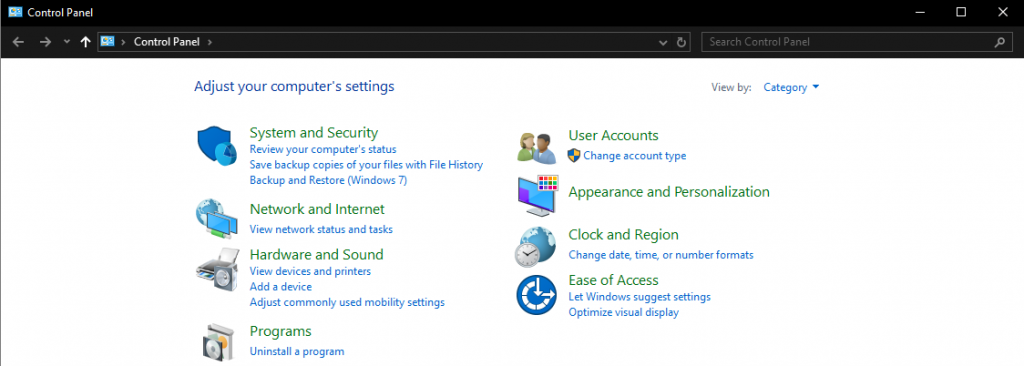
- Navigate to Programs: In the Control Panel, look for the option labeled Programs and click on it. You will then see an option called Programs and Features.
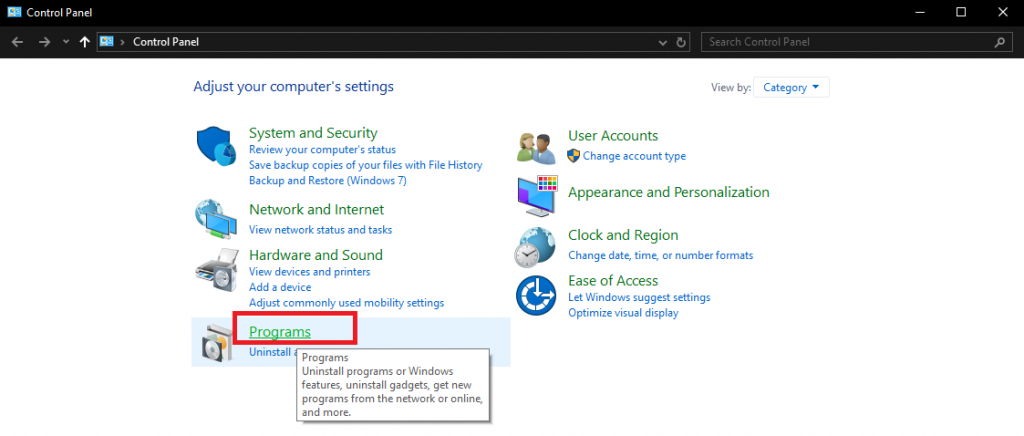
Click on this to view a list of all installed software on your computer.

- Locate Valorant: Scroll through the list of installed programs to find Valorant. The programs are usually listed alphabetically, so you should be able to find it relatively easily.
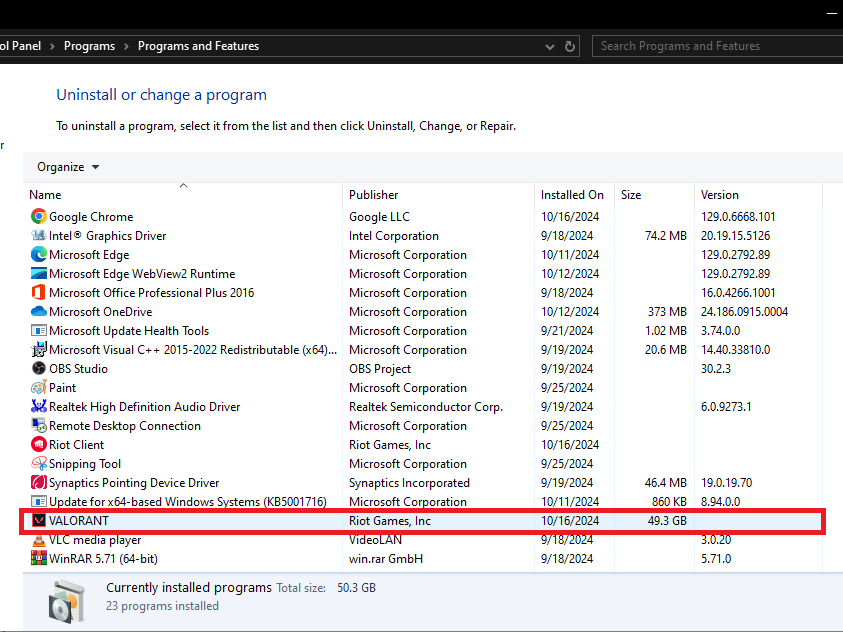
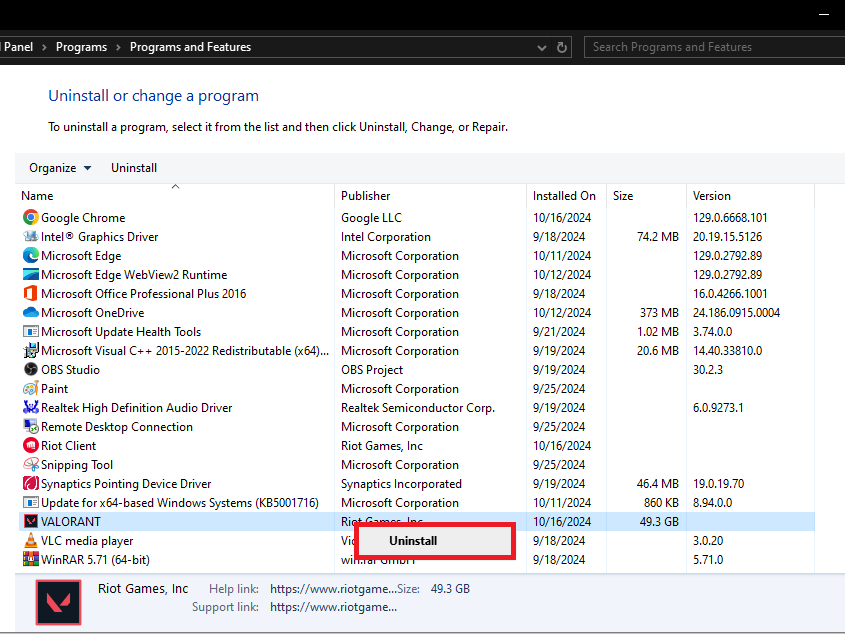
- Uninstall Valorant: Once you locate Valorant, right-click on it and select the Uninstall option. A prompt will appear asking you to confirm the uninstallation. Click Yes to proceed. Follow any additional on-screen instructions that may appear. This process will begin to remove the game files from your computer.
Method 2;Uninstall Valorant Using System Settings
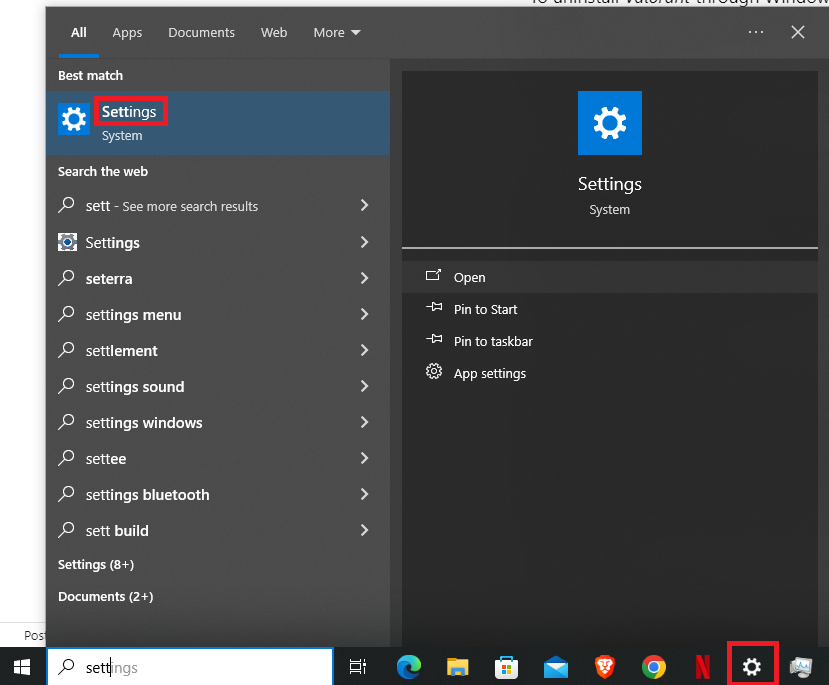
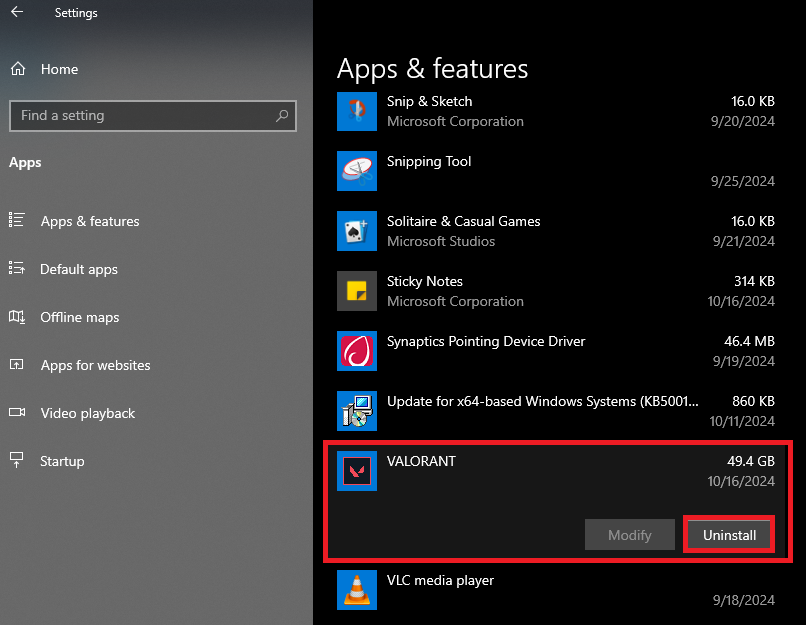
Click on the Start Menu, located at the bottom left corner of your screen, and choose the gear-shaped icon to open Settings. Alternatively, you can press Windows Key + I to directly open the Settings window.
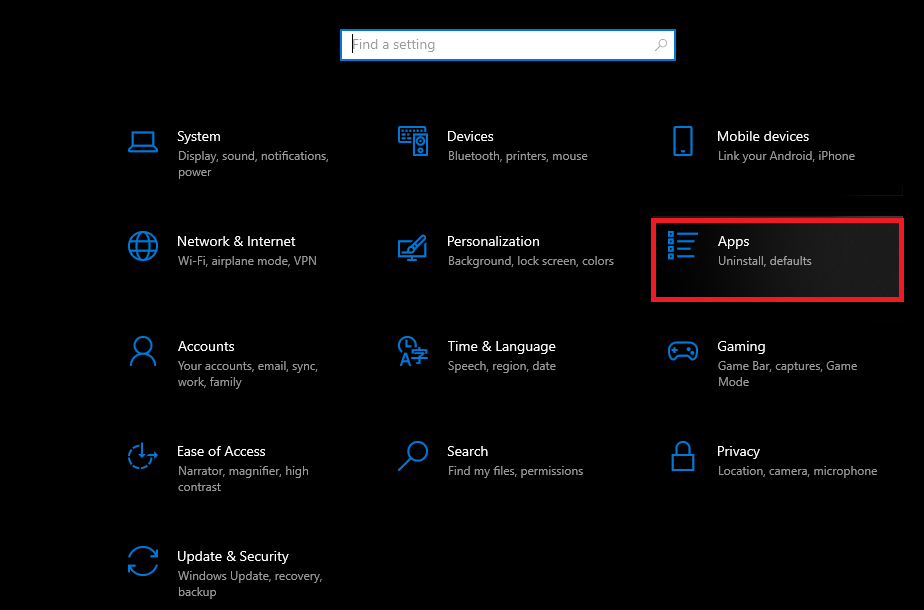
Once you’re in Settings, navigate to the Apps section. Here, you will find a list of all the programs installed on your system under Apps & features. This may take a moment to load if you have many applications installed. To locate Valorant quickly, use the search bar at the top of the page. Typing “Valorant” will immediately filter the list and display the game.
When you find Valorant, click on it, and a button labeled Uninstall will appear. Click on Uninstall to initiate the process. A prompt will pop up asking for confirmation, where you’ll need to click Uninstall again. Allow a few moments for the uninstallation to complete.
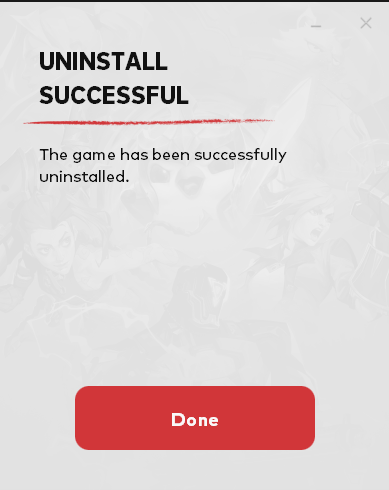
- Wait for the Uninstallation to Complete: The uninstallation process may take some time, depending on your system’s speed and the amount of data being removed. Once the process is complete, you will receive a notification indicating that Valorant has been successfully uninstalled.
How To Remove Residual Files and Folders
After uninstalling Valorant, it’s crucial to clean up any leftover files or folders that may remain on your system. Here’s how to do it:
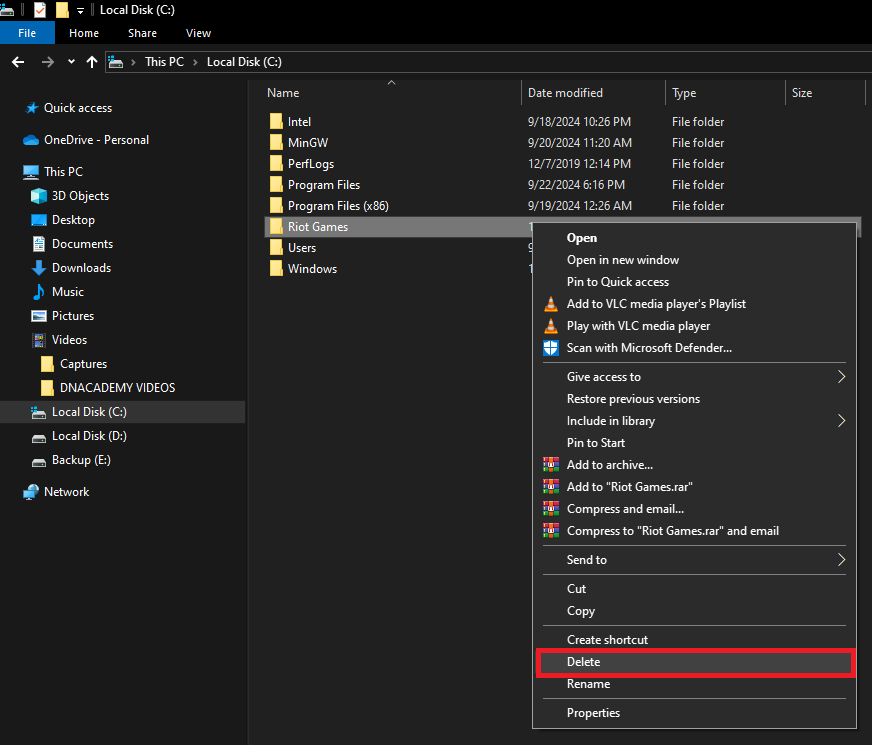
- Open File Explorer: Press Windows Key + E simultaneously to open File Explorer. This is the program that allows you to navigate your files and folders.
- Delete Remaining Folders: Head to local disk c or in the directory where you have saved the game and ensure you delete any folders or files related to Riot Games that you find.
How To Clean Up the Registry (Optional)
For users comfortable with more advanced procedures, cleaning up the Windows Registry can help remove any remaining entries related to Valorant. However, editing the registry can be risky, so proceed with caution:
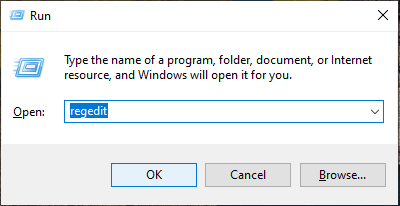
- Open the Registry Editor: Press Windows Key + R simultaneously to open the Run dialog box. Type
regeditand press Enter. This will launch the Registry Editor.
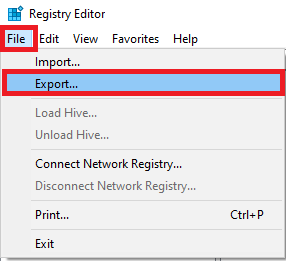
- Backup the Registry: Before making any changes, it’s crucial to create a backup. In the Registry Editor, click on File in the top-left corner and select Export. Choose a location to save the backup and give it a name, then click Save. This step ensures that you can restore the registry if anything goes wrong.
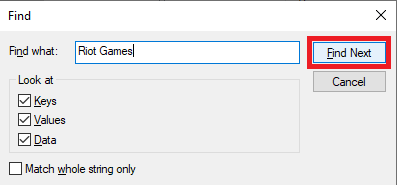
- Search for Riot Games Entries: Use the search function by pressing Ctrl + F. In the search box, type Riot Games and click Find Next. The editor will locate any entries related to Riot Games.
- Delete Entries: Carefully review each entry that the search brings up. If you are certain it is related to Valorant, right-click on the entry and select Delete. Be cautious—deleting the wrong entry can lead to system instability.

- Continue Searching: After deleting an entry, press F3 to continue searching for more entries related to Riot Games. Repeat the deletion process as necessary.
Note: Only proceed with registry editing if you are confident in doing so, as incorrect changes can cause system instability. If you are uncertain, it may be best to skip this step.

