Sharing your location with family and friends can be incredibly useful for staying connected, coordinating meetups, and ensuring safety. With your iPad, Apple offers a straightforward way to share your whereabouts securely through the “Share My Location” feature.
Whether you want to let loved ones know where you are or coordinate gatherings more efficiently, enabling “Share My Location” on your iPad is simple. This guide will walk you through the steps to activate and configure this feature, ensuring you can make the most out of your iPad’s capabilities while maintaining control over your privacy.
Read on to discover how to enable and manage “Share My Location” with family and friends directly from your iPad.
Watch: How To Find Downloaded Files On iPad
Turn ON ‘Share My Location With Family and Friends’ On iPad
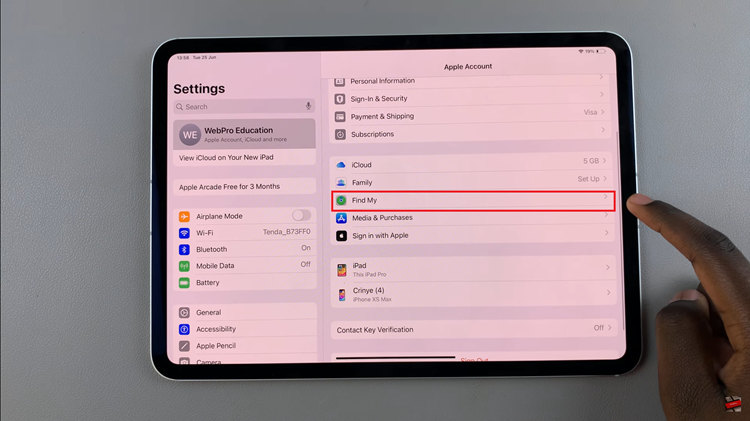
Begin by tapping on the “Settings” app icon located on your iPad’s home screen. Then, navigate to the top where your Apple ID banner is displayed and tap on it to access your settings. From here, select “Find My” from the options available under your Apple ID settings.

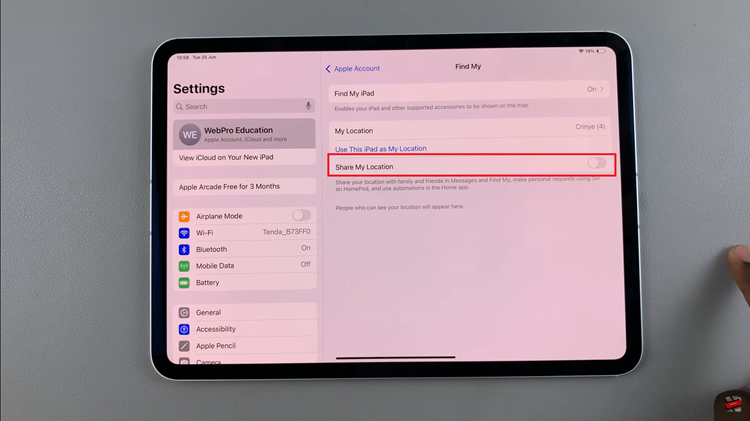
At this point, locate the “Share My Location” option. This feature allows you to share your real-time location with family and friends. Conversely, simply toggle the switch next to “Share My Location” to the ON position. This action enables your iPad to start sharing your location with the contacts you select.

Finally, exit the Settings menu by pressing the Home button or using the swipe gesture. The changes you’ve made will now be applied. This straightforward process ensures you can quickly enable and manage location sharing directly from your iPad’s settings, enhancing connectivity and convenience with your trusted contacts.

