Voice memos are incredibly useful for recording quick notes, ideas, meetings, or even entire interviews. The Voice Memos app on your iPad is a simple yet powerful tool that captures audio effortlessly. However, once you have your recordings, you might want to organize or share them in a more structured way. This is where the Files app comes in.
The Files app on iPad is a versatile storage solution that allows you to manage, organize, and access your documents and media files from various sources. By transferring your voice memos to the Files app, you can better manage your recordings, keep them organized in specific folders, and even share them more easily with others.
In this guide, we’ll walk you through the steps to transfer voice memos to the Files app on your iPad.
Watch: How To Stop Siri From Announcing Notifications On iPad
Transfer Voice Memos To Files App On iPad
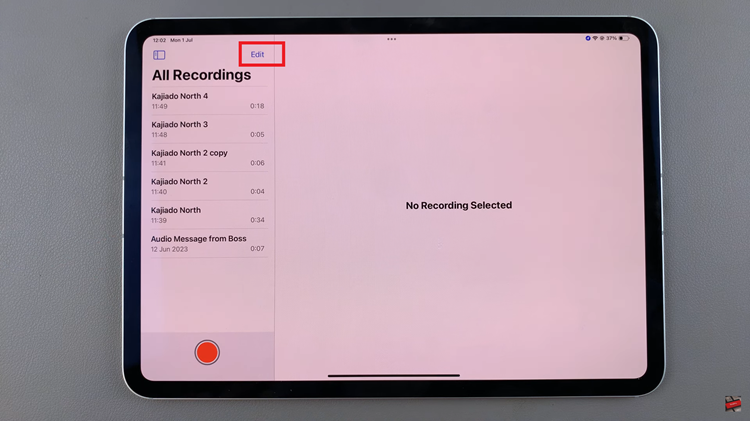
Firstly, launch the Voice Memos app on your iPad. The app will open and display a list of all your recorded voice memos, making it easy to view and manage your recordings. Once open, you’ll need to select the “Edit” option, and then choose the recordings you want to move to a different location.

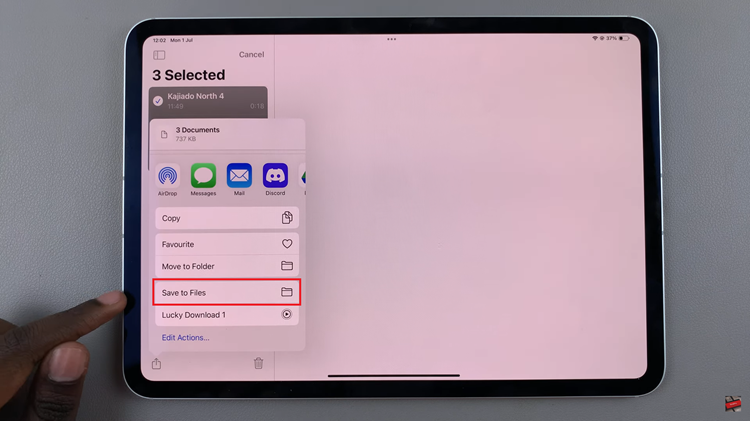
After you have selected the desired recordings, locate and tap on the “Share” button. This button is positioned at the bottom left of the screen and is represented by an icon that typically looks like a square with an upward arrow. A menu will appear with various sharing options. At this point, choose “Save to Files” to initiate the transfer process.

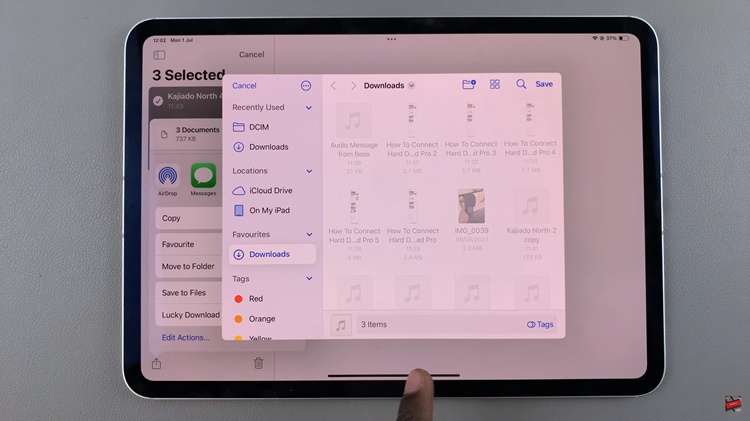
You will be prompted to select a destination for your recordings. This step allows you to decide where you want to store your memos within the Files app. Then, choose the preferred location and then tap on “Save” to complete and confirm the transfer.

In conclusion, transferring voice memos to the Files app on your iPad is a straightforward process. By following the steps above, you efficiently organize and manage your audio files. This method ensures that your memos are easily accessible and neatly arranged in the Files app for future use.
Read: How To Change Default Video Resolution & Frame Rate On iPad

