As eSIM technology slowly gains broad mainstream adoption, transferring a cellular plan from one iPhone to another has never been easier. A digital form of the traditional physical SIM card, an embedded SIM replaces the physical hardware and enables consumers to activate a cellular plan.
Overall, the process of eSIM transfer is fairly smooth, whether you’re upgrading from one iPhone on the same carrier to another or changing carriers. You can do this during your new iPhone setup, or you can later do it manually via the Settings app. There are still a few steps and precautions you should take to make sure the transition goes well.
Within this tutorial, we will walk you through the steps involved to transfer your eSIM from one iPhone to another.
Watch: How To Use Magic Eraser Tool On iPhone 16
Transfer eSIM From One iPhone To Another
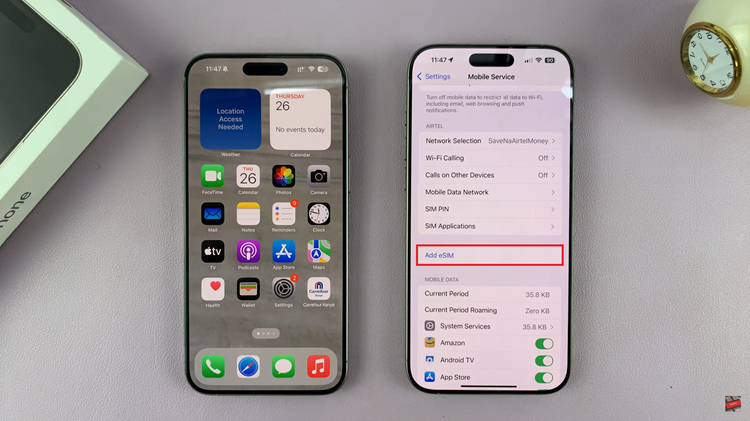
Begin by ensuring that both iPhones have Bluetooth enabled. Then, navigate to settings (on the newer iPhone) and find “Mobile Service.” Tap on it to proceed. From here, scroll down and select “Add eSIM” from the options that appear.
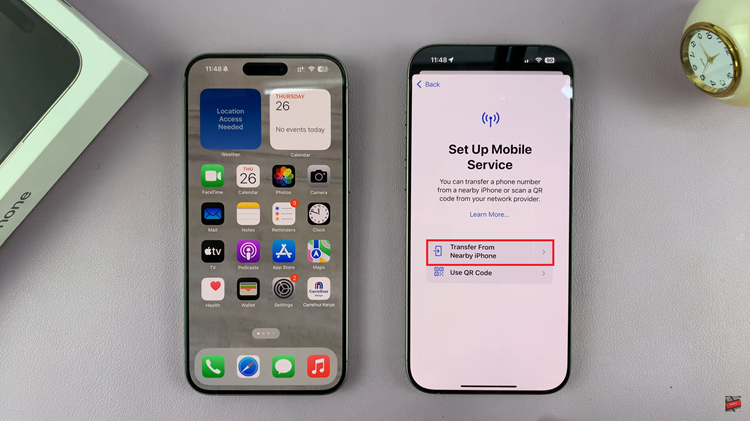
From here, tap on “Other Options” and from here, you’ll see two options; “Transfer From Nearby iPhone” & “Scan QR Code.” Now, tap on Transfer From Nearby iPhone.
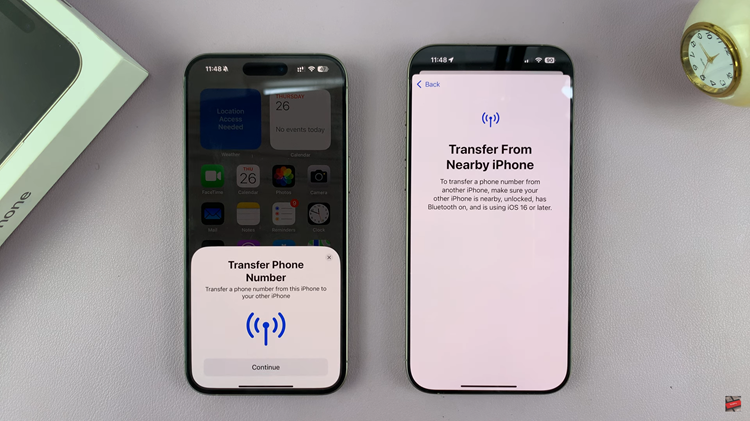
Following this, tap on “Continue” from the prompt that appears on the old iPhone.
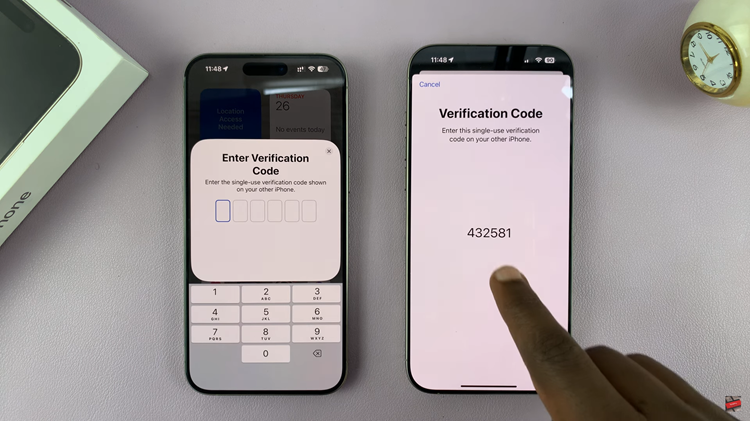
Then, you’ll be prompted to type in a verification code that appears on your newer iPhone. Type this verification code on the older iPhone and follow the on-screen instructions that appear. Once done, the eSIM will be transferred to the new iPhone.
In conclusion, the process of transferring an eSIM from one iPhone to another is pretty easy. Make sure both iPhones are on the latest software to make this smooth. You shouldn’t have any network connectivity issues afterward, but if you have problems, don’t hesitate to reach out to your carrier for support.
Read: How To Enable/Disable Lock Instantly With Side Key On Samsung Galaxy A06

