The iPad is a versatile device with powerful capabilities for casual and professional video recording. Whether you’re creating content for social media, filming a vlog, or capturing a special event, the ability to switch between the front and back cameras while recording can significantly enhance your videos. This feature allows you to seamlessly transition between different perspectives, providing a more dynamic and engaging viewing experience.
While the default Camera app on the iPad provides basic recording features, it may not offer the flexibility some users need. Fortunately, third-party applications provide advanced recording features, including easy switching between the front and back cameras during a recording session.
In this article, we’ll explore how to switch between front and back camera effortlessly while recording on your iPad.
Watch: How To Disable iCloud Backups For Specific Apps iPad
Switch Between Front And Back Camera While Recording On iPad
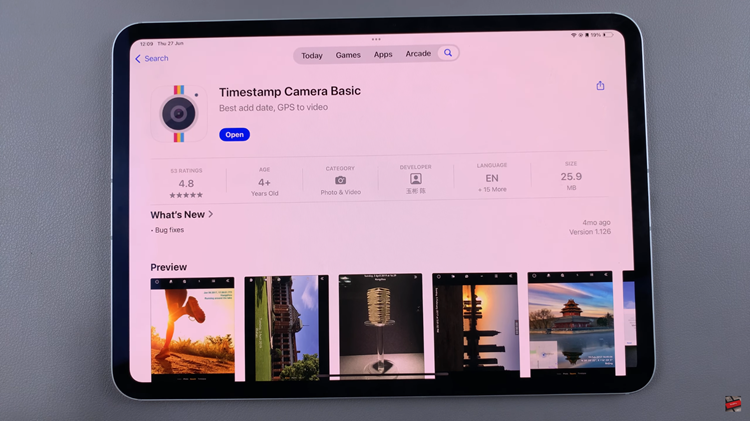
Start by opening the App Store on your iPad. Once open, search for “Timestamp Camera Basic” in the search bar. When you find the app, tap the “Get” button to download it. After the installation completes, locate the app on your home screen and launch it.

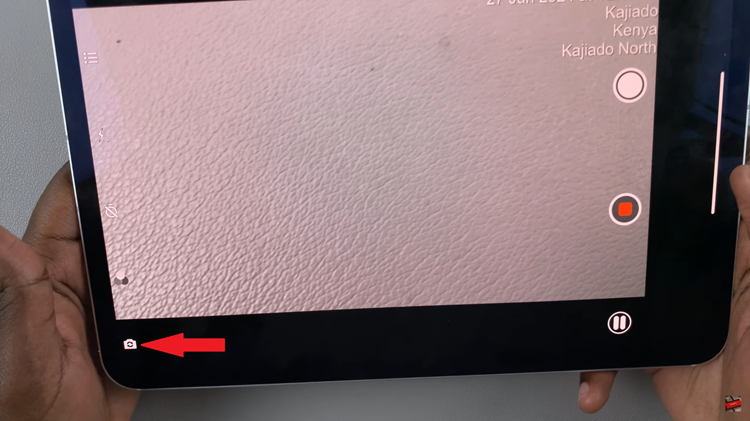
Upon launching the app, you will be prompted to allow necessary permissions. Grant the app access to your camera and microphone when requested. Additionally, allow any permissions needed to access your gallery. Next, identify the record button, usually red, and the camera switch button.
Now, initiate the recording process by tapping the red record button. As the recording begins, locate the camera switch button. Tap this button to seamlessly toggle between the front and back cameras during your recording session.

Continue capturing your video, switching between the front and back cameras as needed. Once you have finished recording, tap the stop button to end the session. Your recorded video will automatically be saved within the app, ready for you to view and share.

