Are you looking to add a creative twist to your video content? Reversing a video is a powerful technique that can create eye-catching effects and elevate your editing skills. Whether you’re working on a fun project or want to create dramatic video moments.
learning how to reverse video in CapCut is essential for any content creator. In this comprehensive guide, we’ll walk you through the step-by-step process of reversing video clips in CapCut Desktop, making it easier than ever to add creative effects to your videos.
From reversing a single clip to handling multiple clips at once, this tutorial will help you unlock the full potential of CapCut’s video editing tools.
Watch: How To Add AI Voice In CapCut
How To Reverse Video In CapCut
Start by opening your project in CapCut. Click on the video clip you want to reverse in the timeline to select it.
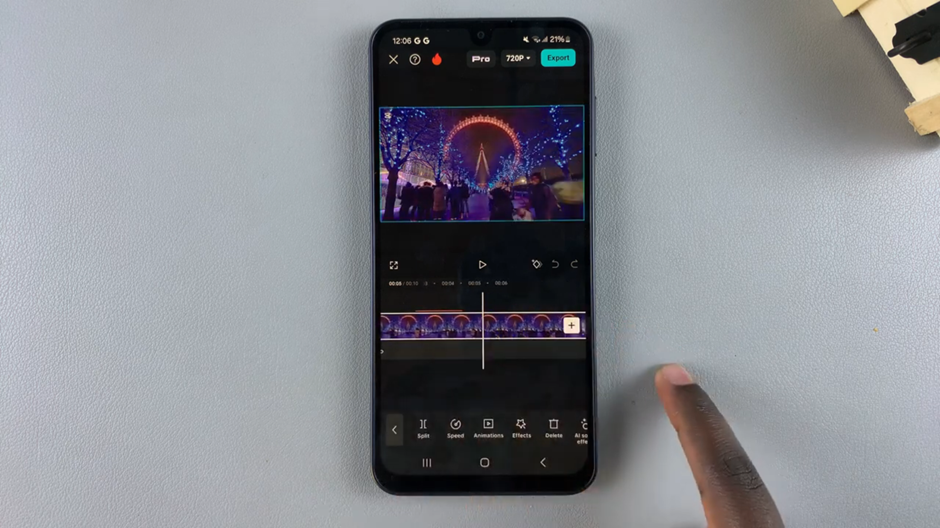
Once your video clip is selected, look for the menu located below the timeline or video preview.
In the menu, scroll through the available editing options until you find the “Reverse” option.
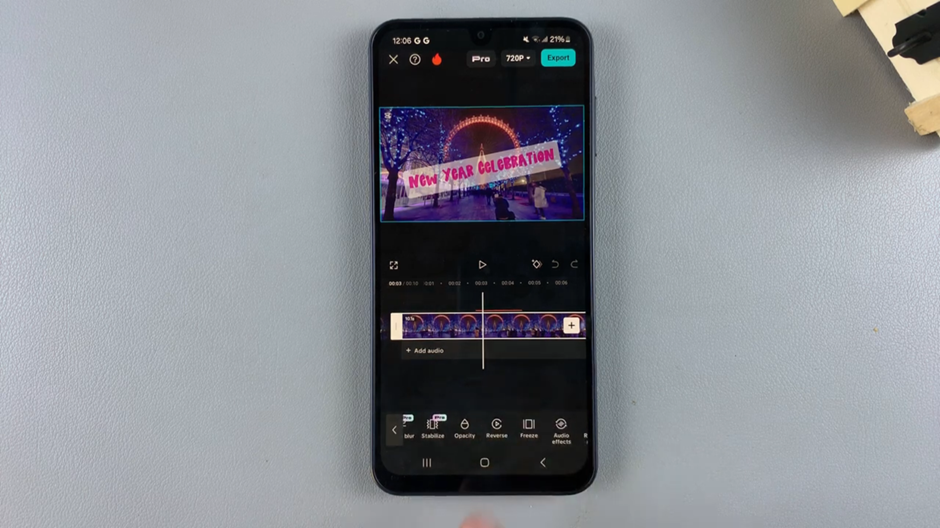
Click the “Reverse” button to apply the effect to your video. The video will automatically play in reverse, creating a cool and creative effect.
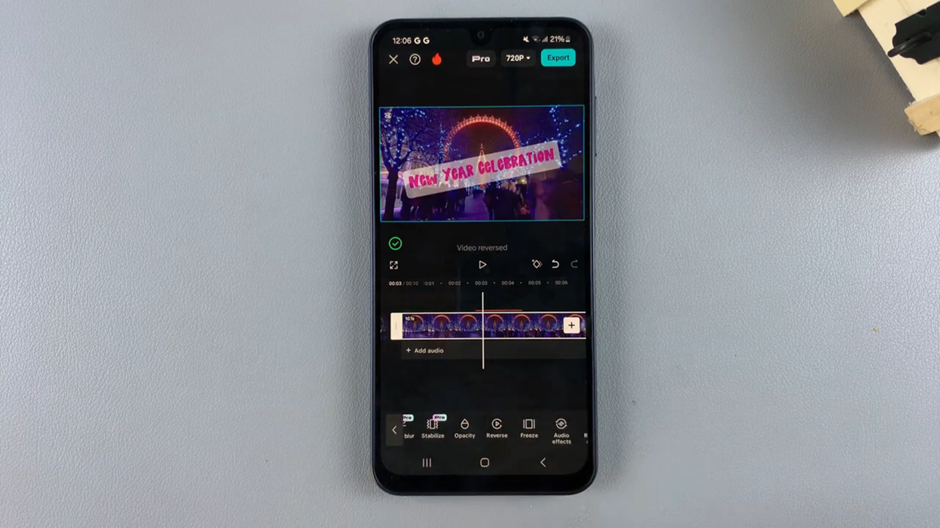
Now your video is reversed and ready to be further edited or exported. Whether you’re adding a dramatic twist or fun effect, CapCut makes reversing your videos quick and simple.
