The MX Master 3S is a powerful and versatile wireless mouse, famous for its ergonomic design combined with high-precision tracking and customizable buttons. Be it productivity, gaming, or creative tasks, this mouse comes packed with features to satisfy your needs.
Like with any tech device, though, the moment will come when you may want to restore your MX Master 3S to its default settings. This may be due to malfunctioning buttons, problematic connections, or simply in need of a fresh, new configuration.
Resetting your MX Master 3S is a pretty straightforward process, and we will guide you through each step to make sure your mouse is restored to its original settings. Let’s dive in and learn how to reset your MX Master 3S to its default settings!
Watch: How To Change Pointer Speed On MX Master 3S
Reset MX Master 3S To Default Settings
Beforehand, you’ll need to install the ‘Logi Options+ App‘ on your PC. Head to the Logitech software download site and install the software. Once installed, launch the app and select your mouse on the home page. Then, click on the ‘Settings‘ option from the menu that appears to proceed.
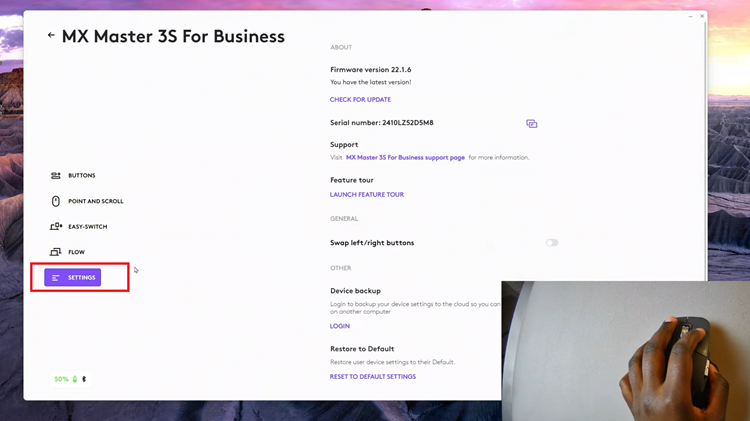
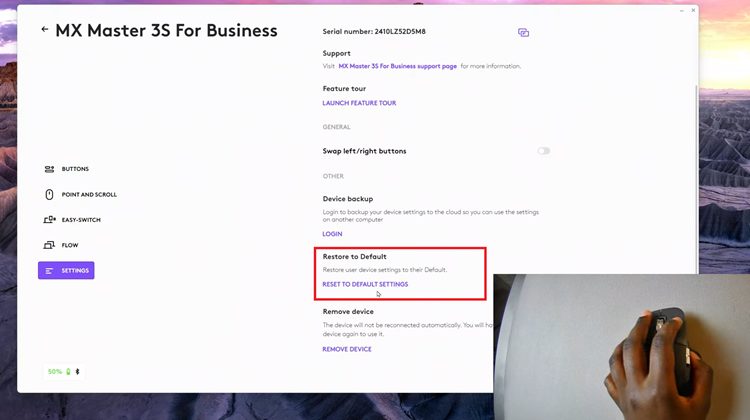
Following this, scroll down and find the ‘Restore To Default‘ section. From here, you’ll see the option ‘Reset To Default Settings.’
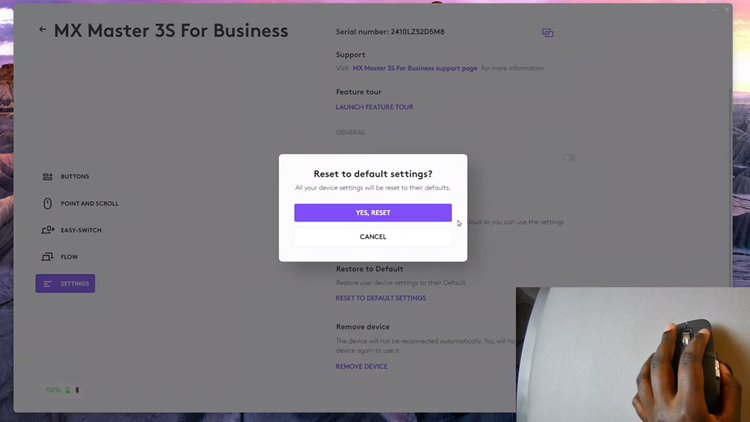
Now, click on this and you’ll be prompted to confirm the process. From the pop-up that appears, click on ‘Yes, Reset‘ and your mouse will reset to default settings. Once done, close the application and the changes will be applied.
In conclusion, resetting your MX Master 3S to its default settings is an easy process that can help resolve issues or give your mouse a fresh start. After the reset, you may set up your MX Master 3S again with your preferred settings and enhance its functionality, such as setting up customizable buttons for various applications and multi-device pairing.
Read: How To Enable Keyboard Haptics (Vibrations) On Samsung Galaxy A16
