Customizing your controller button layout in Marvel Rivals can make a huge difference in your gameplay. Whether you want a more comfortable setup, faster reaction times, or a layout that suits your playstyle, remapping your controller buttons is the way to go.
In this guide, we’ll walk you through the step-by-step process to remap your controller buttons in Marvel Rivals, ensuring you have the best control setup for an optimized gaming experience. Let’s dive in and fine-tune your controls for maximum performance.
Watch: How To Find / Customize Keyboard Controls In Marvel Rivals
How To Remap Controller Buttons On Marvel Rivals
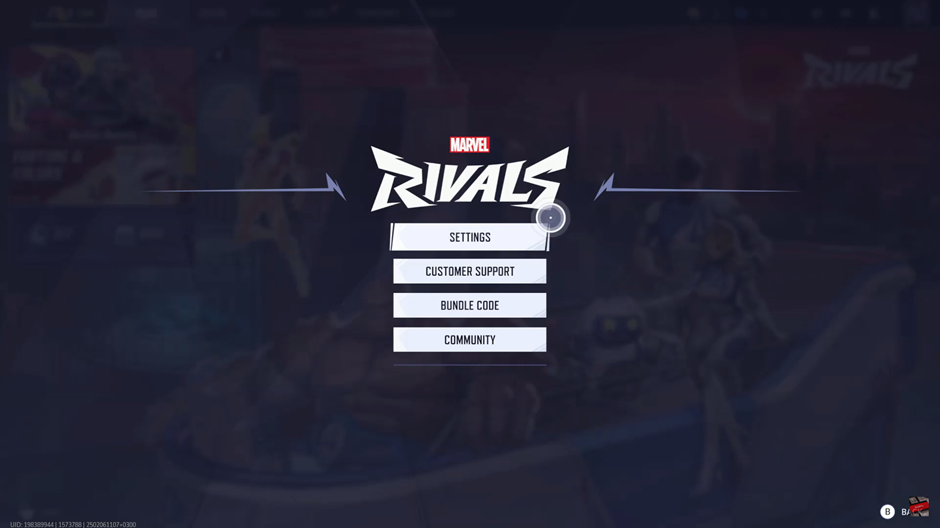
Open Marvel Rivals and navigate to the Settings menu from the main screen.
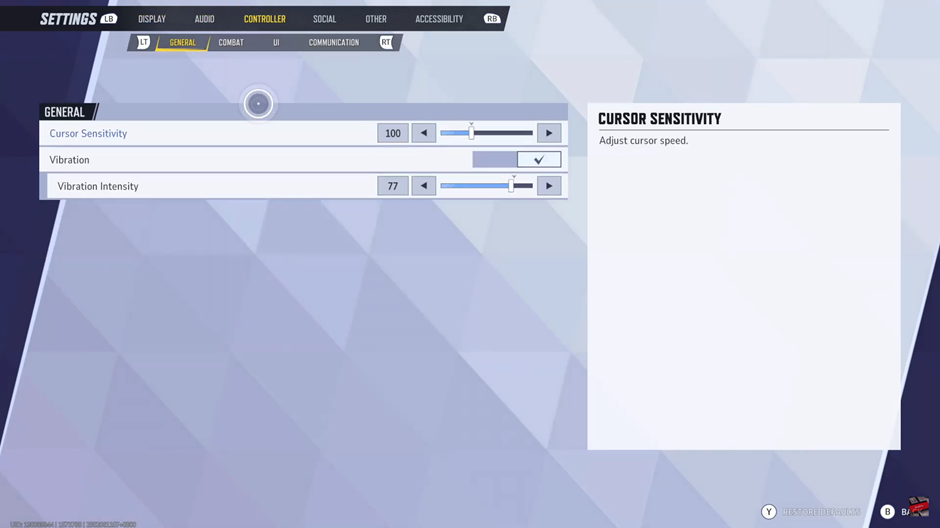
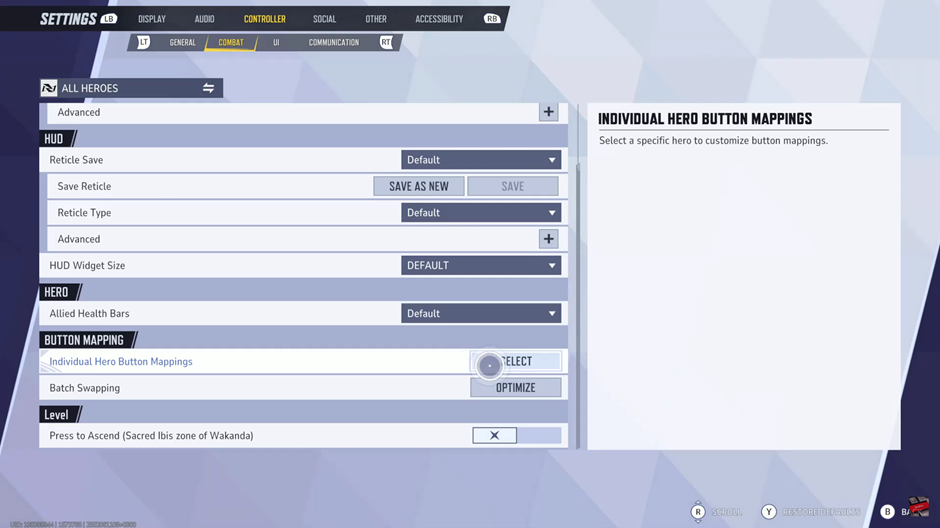
Once in settings, go to the Controllers section to access button mapping options.
Under the Controllers section, select the Combat tab to modify your button configurations.
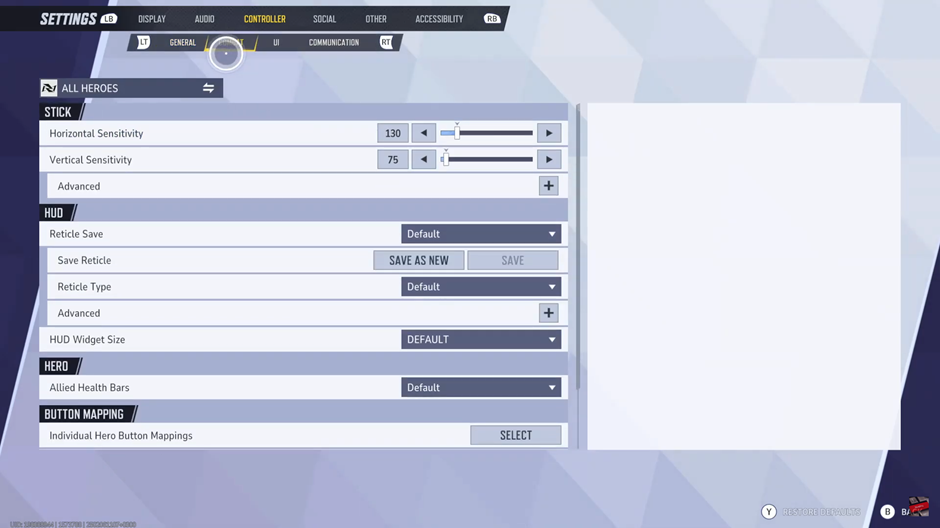
Scroll down until you find the Button Mapping section, where you can remap controls.
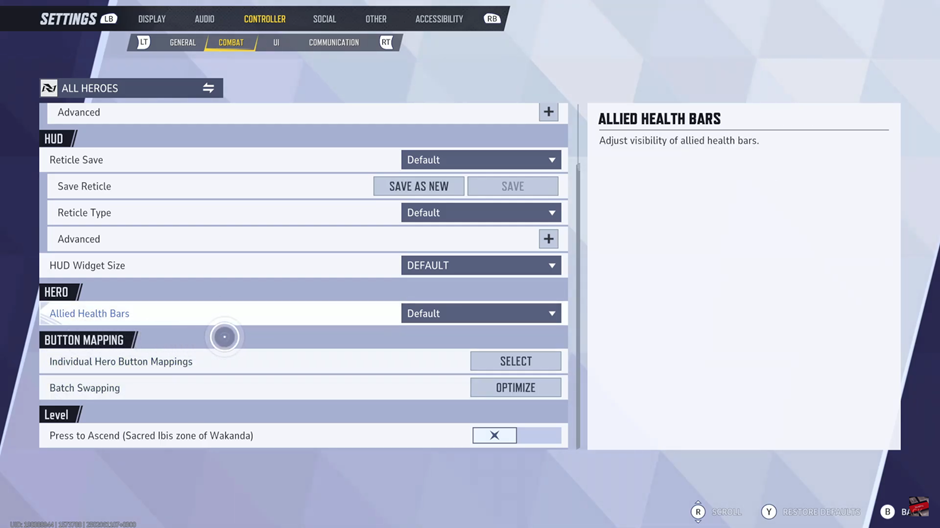
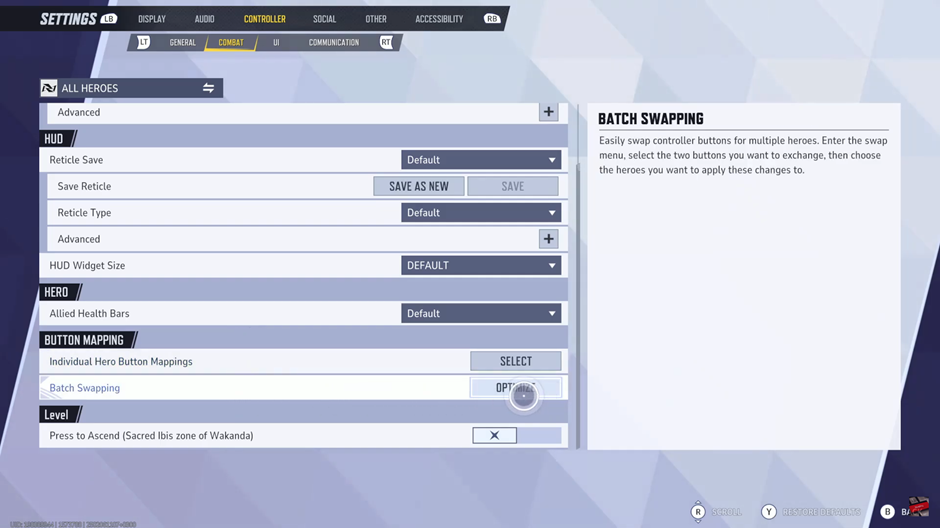
If you want to remap controls for all heroes at once, select the Batch Swapping option.
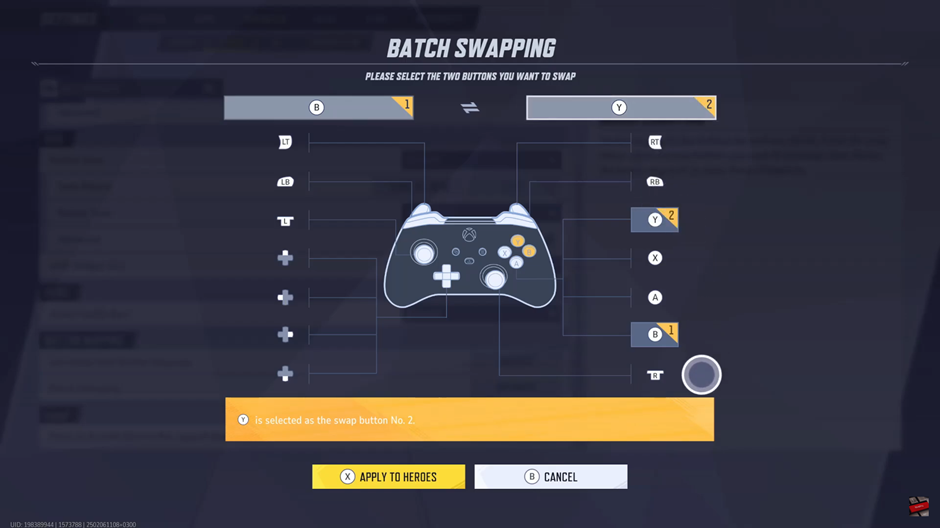
Swap buttons according to your preference and tap Apply to Heroes to save changes.
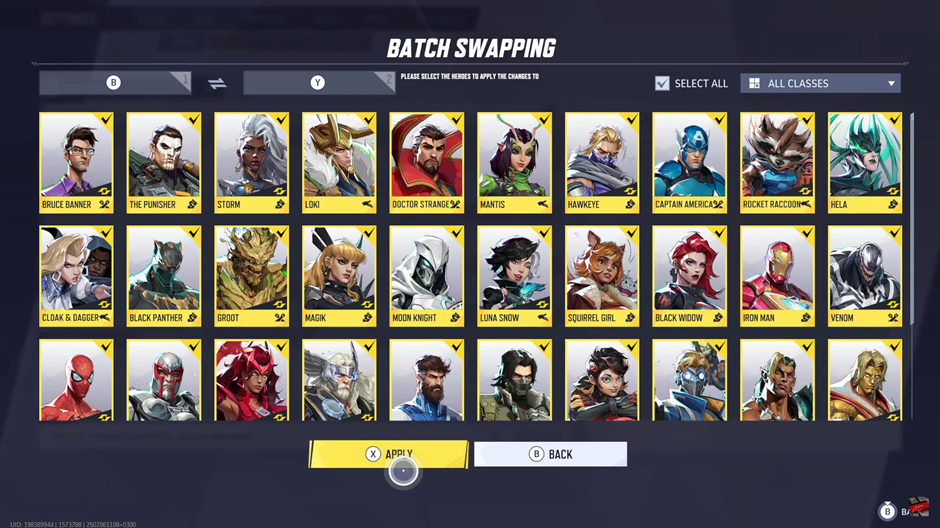
Confirm your selection by choosing Apply Changes to All Heroes, ensuring a consistent button layout for every character.
To Customize an Individual Hero, Select Individual Hero Button Mappings
If you prefer to modify controls for a specific hero, select Individual Hero Button Mappings instead.
Scroll through the hero list and choose the character you want to customize.
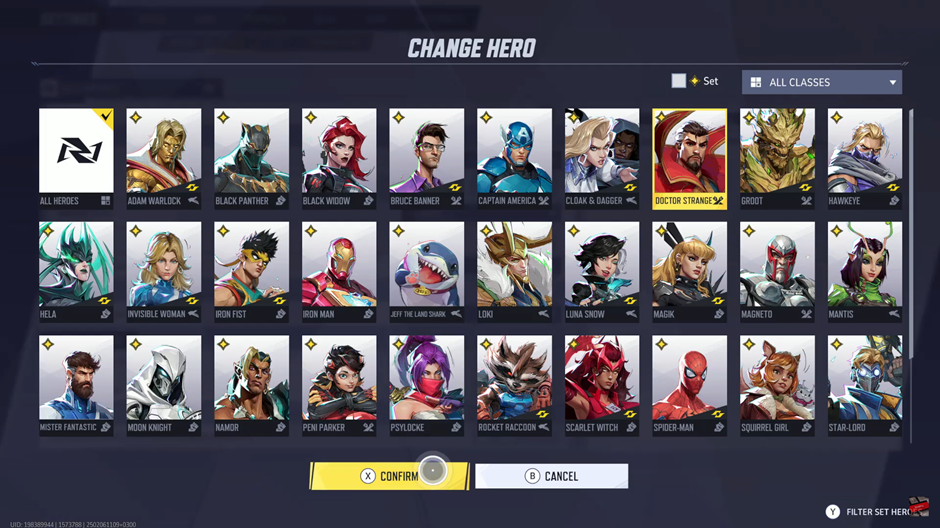
Tap Confirm to enter the customization menu, then adjust the button layout to your preference.
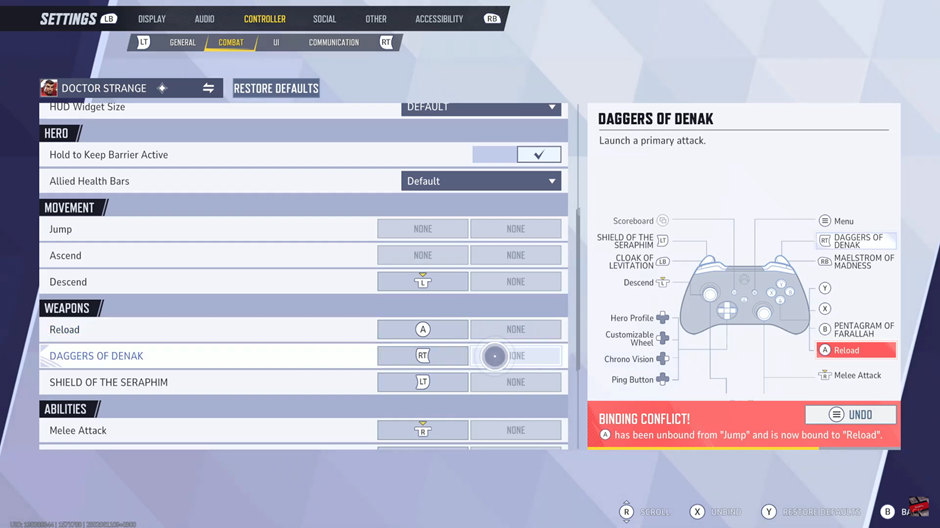
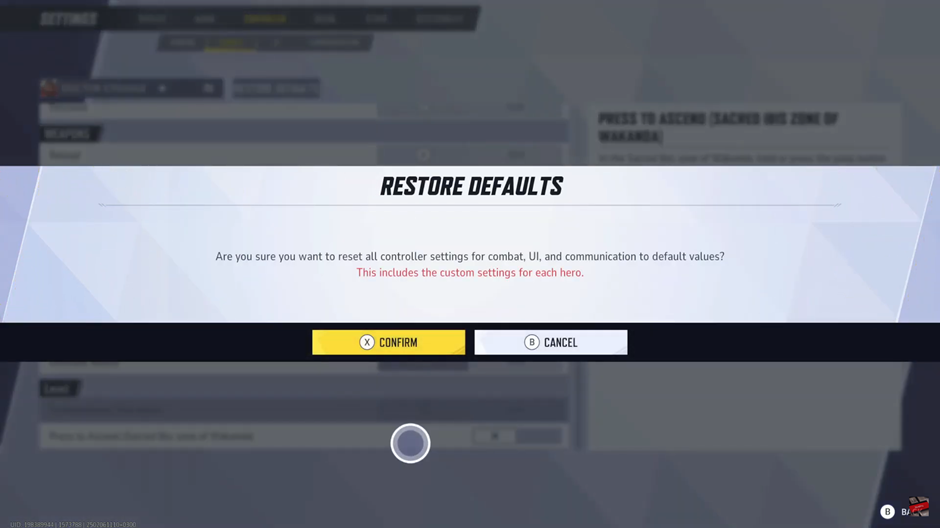
If you’re not satisfied with the new button layout, you can restore the settings to default by pressing the Y button.
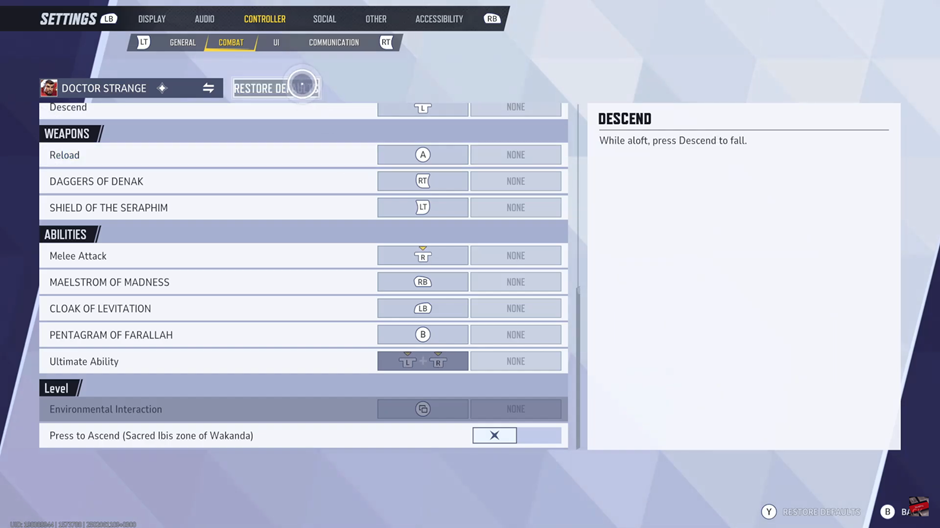
Now you’re all set! Your new custom button layout is applied, allowing you to play Marvel Rivals with optimized controls.

