The Google TV Streamer 4K remote is an incredibly user-friendly tool, but sometimes its default button functions might not align with your preferences.
Thankfully, remapping buttons on the remote is an option, allowing you to customize it for quick access to your favorite apps or functions. This guide will walk you through the process you can use to remap the buttons on your Google TV Streamer 4K remote.
Remapping your remote’s buttons can save time by assigning shortcuts to your most-used apps. It can also enhance convenience by customizing functions like volume control, input switching, or app launches.
A button reassignment will also improve accessibility for multi-user households with diverse streaming preferences.
Read: How To Turn HDMI CEC ON / OFF On Google TV Streamer
Remap Buttons On Google TV Streamer 4K Remote
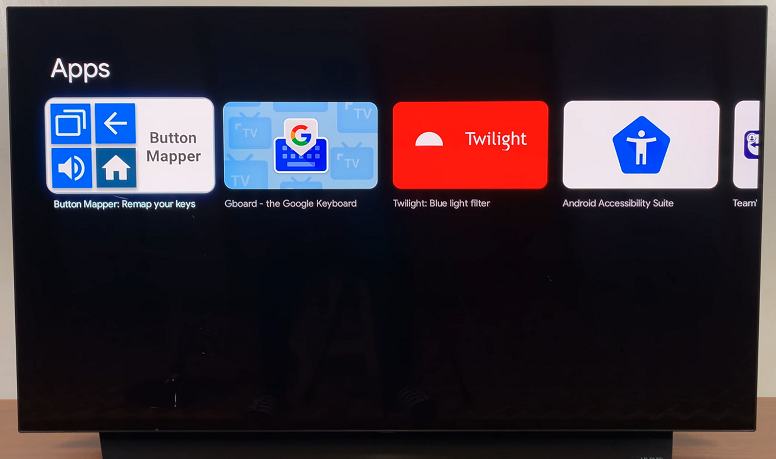
To start, ensure your Google TV Streamer is connected to the internet. Then, press the Home button on your remote. Navigate to the Apps section using your remote. Here, you will find suggestions for apps you can get. Scroll down until you find the Search function.
In the search bar, type the name Button Mapper using your remote. When the app appears in the search results, select it.
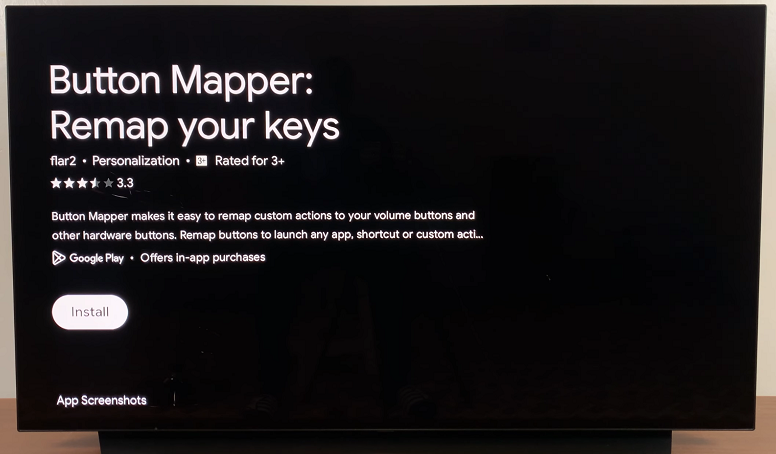
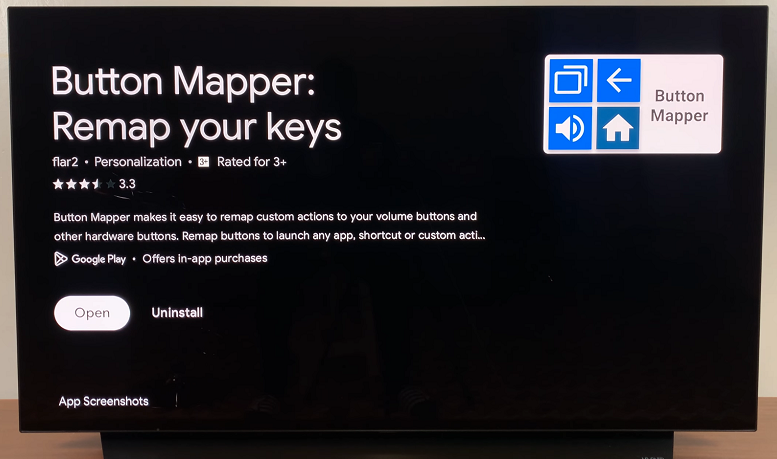
Click OK to select the Install button on the app’s information page and wait for the download and installation to complete.
Once installed, select Open to launch the app immediately. You can also access it from the Home screen, under the My Apps section. Simply highlight and click on the app icon to launch it.
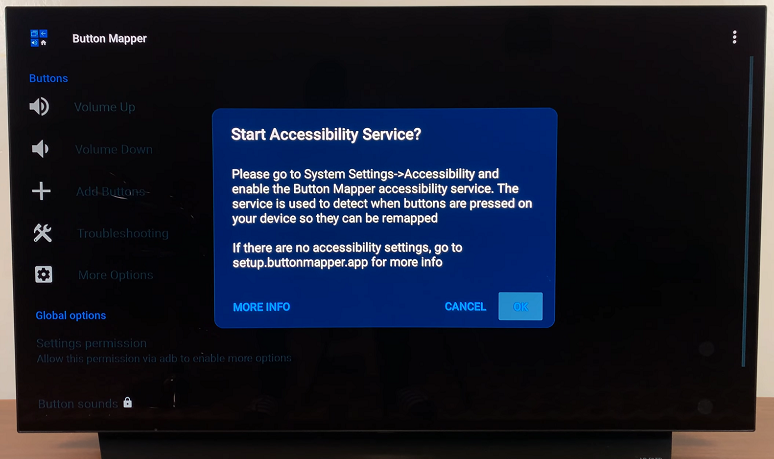
Upon launching the app, grant accessibility permissions by choosing the OK option. This will take you to the Settings menu. Here, select the Accessibility option.
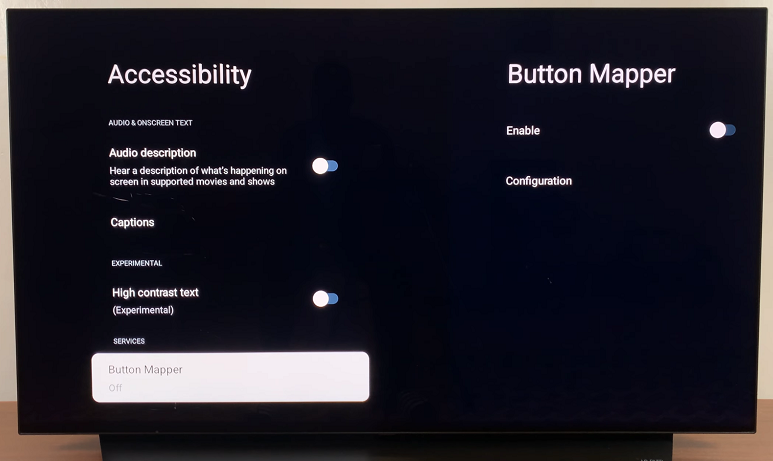
Under Accessibility, find the Button Mapper option. It should be turned off by default. Click OK to open it.
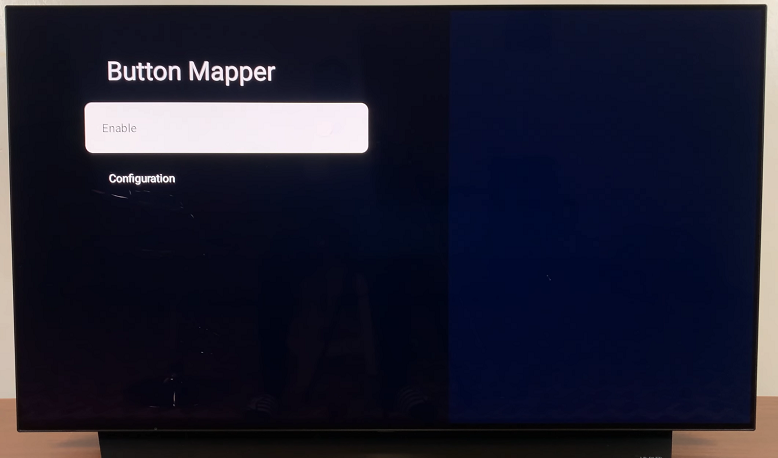
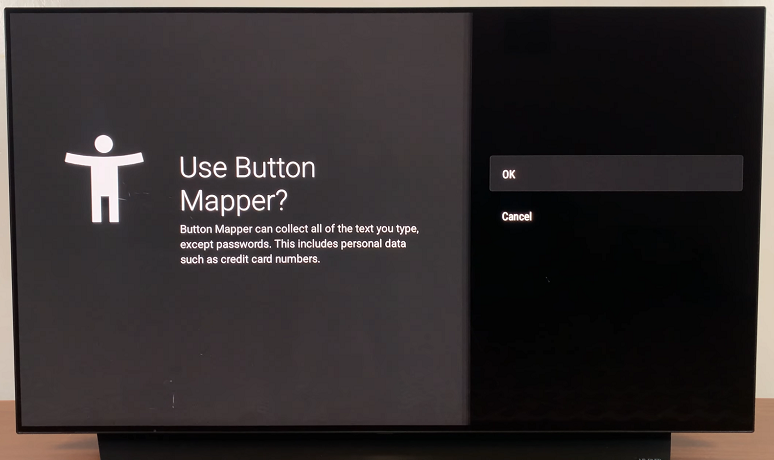
Highlight the Enable option and select it. In the confirmation page to use the button mapper, choose OK. This will send you back to the Button Mapper interface.
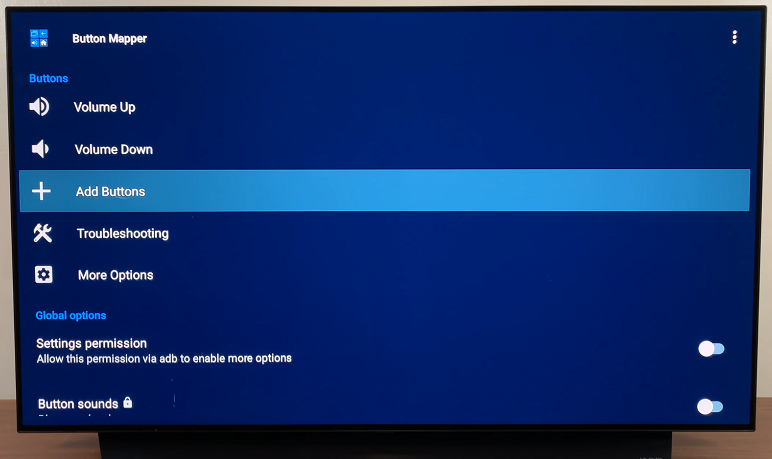
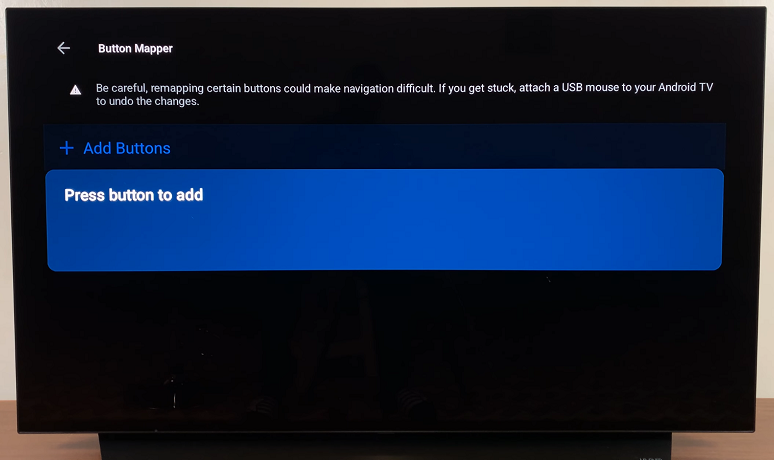
Scroll through the options and select the Add Buttons option. Read through the disclaimer and select the Add Buttons option if you want to continue. You will be prompted to press the button you want to remap.
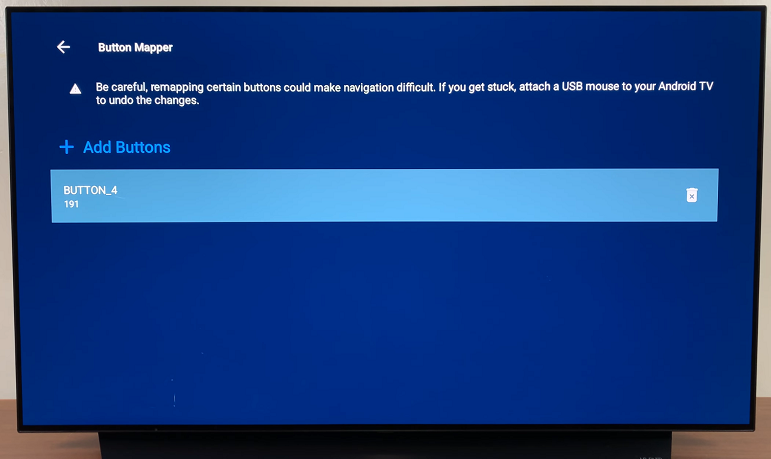
Press the button you want to remap (e.g., Netflix, YouTube, or Home). The button will be added to the list, so highlight and select it. This will take you to the customization page.
Highlight the Customize button and click OK to enable the toggle next to it. This will make the options Single Tap, Double Tap and Long Press, active.
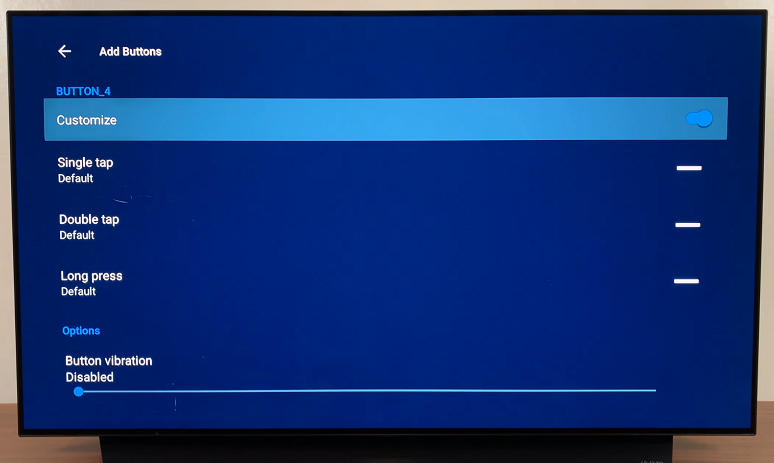
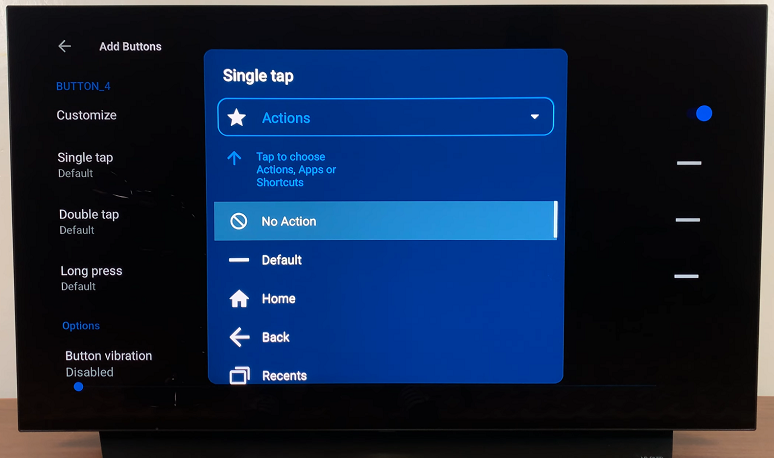
Select the Single Tap option, then in the drop-down menu at the top, choose whether you want to assign an Action, Application, Shortcut, System, Media or Advanced. Based on the function you select, you will be able to assign the appropriate input to it, from the list.
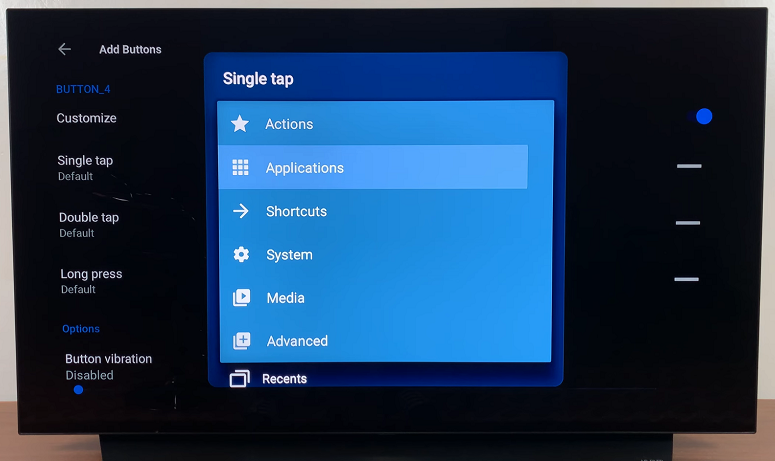
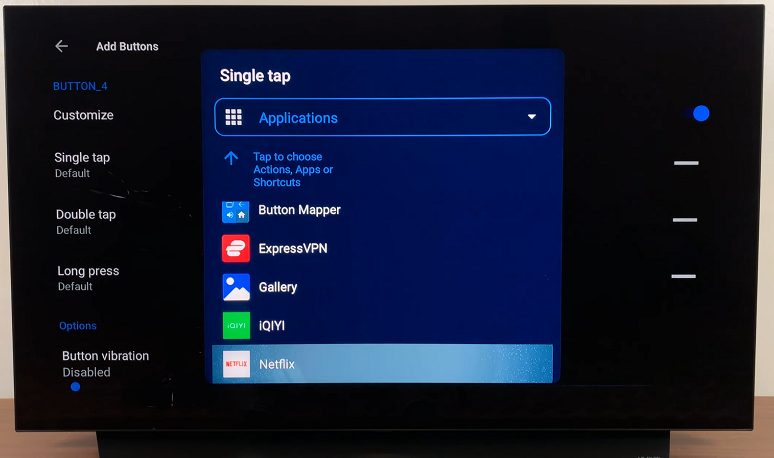
Once you select the function, for example Application, scroll through the list and select the application you want a single tap to launch.
Select the Double Tap and assign a function as well, then select the Long Press and do likewise. Assign your preferred action to the button:
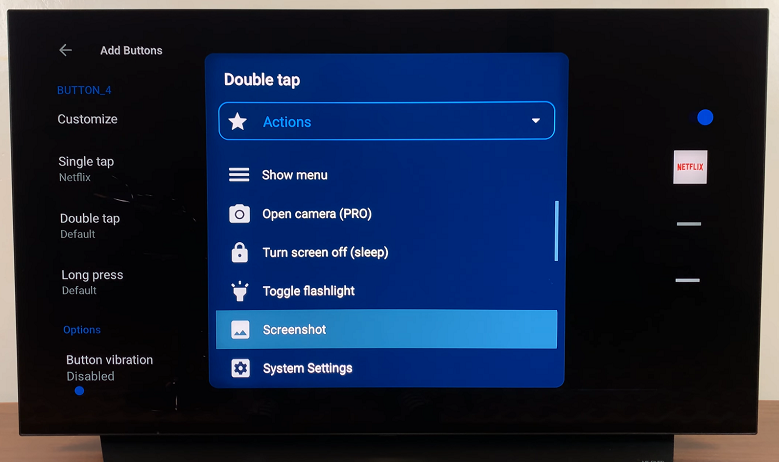
Open a specific app, trigger a system command like taking a screenshot or changing input & set advanced actions like launching routines or controlling smart home devices.
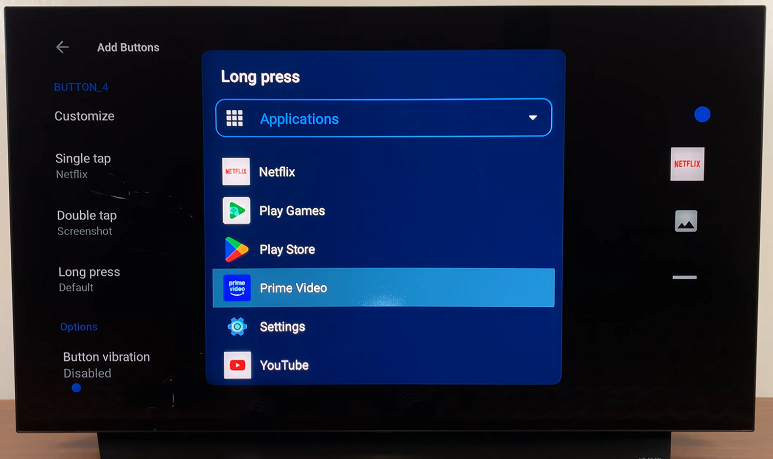
After you finish reassigning the actions to the button, you can also repeat the same steps for another button as well.
Once you’ve configured your buttons, test your remapped buttons to ensure they perform as desired. If anything doesn’t work correctly, revisit the app to adjust your configurations.
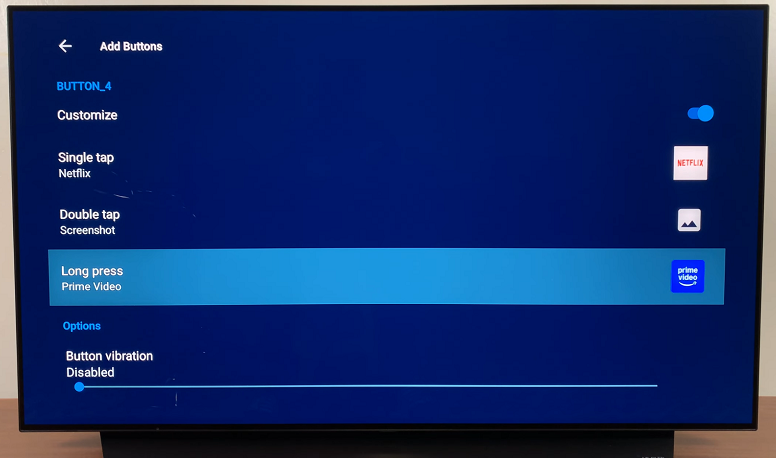
To avoid confusion, keep it simple. Assign only the most essential functions.
