Apple’s AirPods Max are renowned for their superior sound quality, sleek design, and advanced noise-canceling features. While they are tailored for seamless integration with Apple devices, they also work perfectly fine with Windows PCs and laptops.
Whether you’re a Windows user looking to experience the immersive audio quality of AirPods Max or need them for work calls and entertainment, connecting them to your computer is straightforward.
In this guide, we’ll walk you through the comprehensive step-by-step process on how to pair and connect AirPods Max To Windows PC or laptop.
Also Read: How To Pair & Connect AirPods Max To MacBook
How To Pair & Connect Airpods Max To Windows PC / Laptop
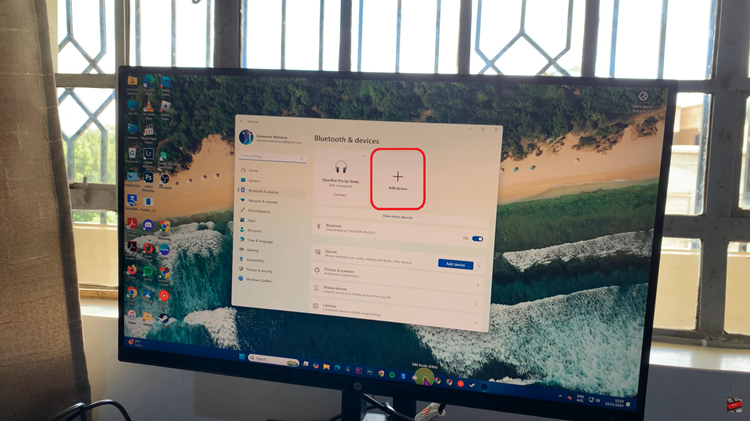
Begin by accessing the Bluetooth settings on your Windows PC or laptop. Once in Bluetooth settings, make sure that Bluetooth is enabled. Next, make sure your computer is ready to search for nearby Bluetooth devices. Select the Add Device option, then choose Bluetooth from the available options.

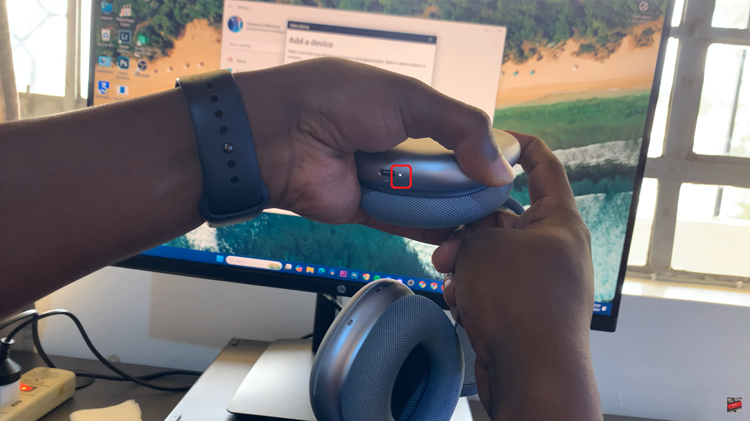
To pair your AirPods Max with your Windows computer, you’ll need to put them into pairing mode. Press and hold the Noise Control button (located on the right ear cup) until the status light flashes white. This indicates that your AirPods Max are in pairing mode and ready to be discovered by your computer.

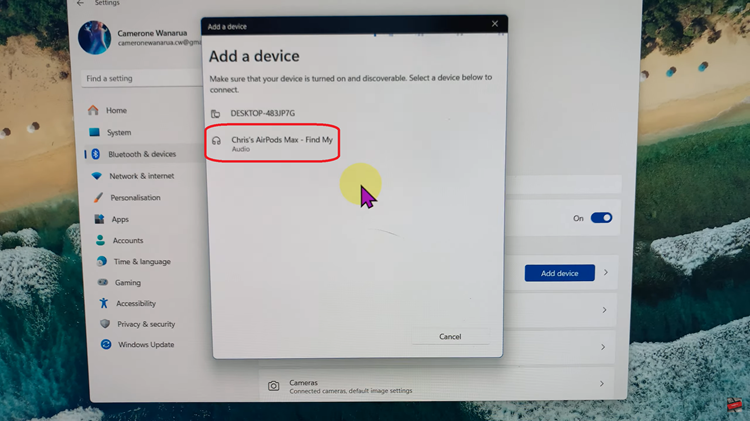
Once your AirPods Max are in pairing mode, go back to your Windows computer and continue the pairing process. In the Bluetooth settings window on your computer, you should now see your AirPods Max listed under Available devices. Select them to start the connection.

After a few moments, your AirPods Max should be successfully connected to your Windows PC or laptop. You will receive a confirmation on your screen, and you can now begin using them to listen to audio, participate in video calls, or enjoy your favorite music.

