In today’s world of constant connectivity, privacy management is what keeps things safe, and your smartphone is the first line of defense. If you are using the OnePlus 13, hiding and unhiding caller ID is such an easy step; it only requires three simple steps.
This feature enables you to show or hide your outgoing call number, making it a very useful tool for keeping calls private in business, personal interactions, or any situation where you want to remain anonymous. In this tutorial, learn how to hide or unhide your caller ID on the OnePlus 13.
If you want to keep your number private or show it again, this tutorial is quite easy to follow in order to get the most out of the settings on your device. By the end of this article, you’ll have complete control over your caller ID settings, all while enjoying the seamless experience that the OnePlus 13 offers. Let’s get started!
Watch: How To Enable Auto Answer Calls On OnePlus 13
Hide & Unhide Caller ID On OnePlus 13
Begin by unlocking your OnePlus 13 and accessing the home screen. Then, find & select the Settings app from home screen or app drawer. Now, scroll down and find the ‘Mobile Network‘ option. Tap on it to proceed.
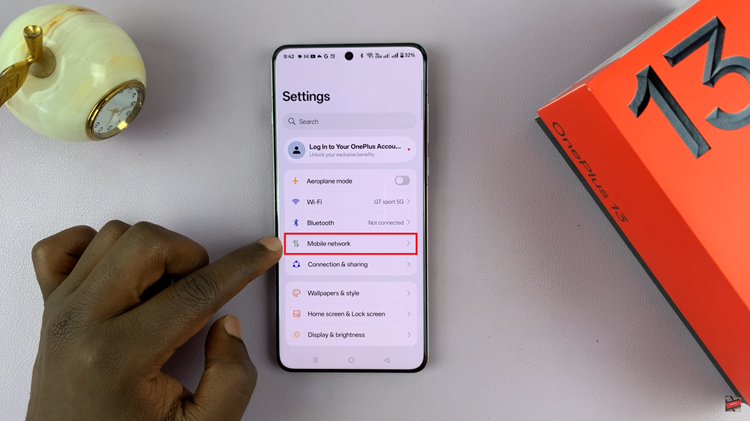
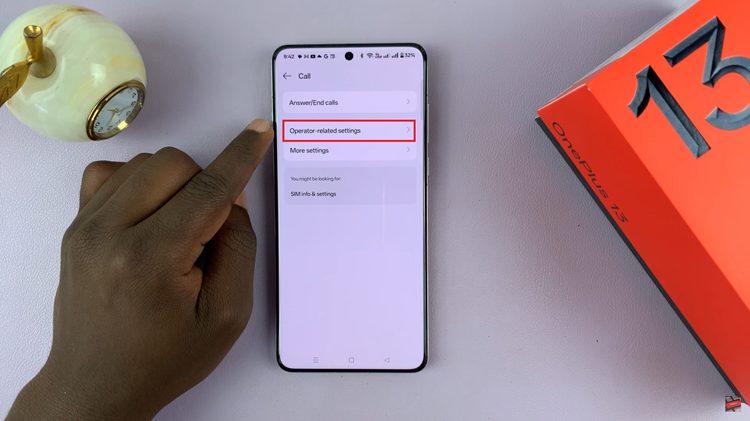
Following this, scroll down to the bottom and find ‘Call Settings.’ Tap on it and from here, select the ‘Operator-related settings‘ from the next page.
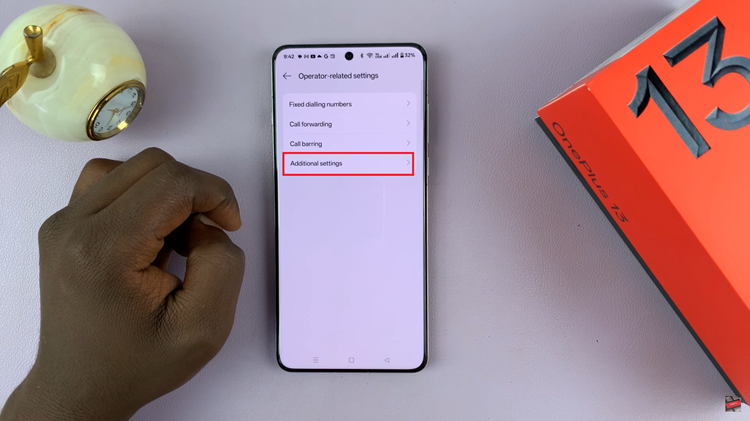
Conversely, find the ‘Additional Settings‘ option and tap on it to proceed. At this point, if you have a dual SIM inserted in your phone, simply choose the desired SIM.
Then, tap on ‘My Number‘ and from the options that appear, choose ‘Hide Number‘ or ‘Show Number‘ to either hide or unhide your number. Once done, exit the settings and the changes will be applied.
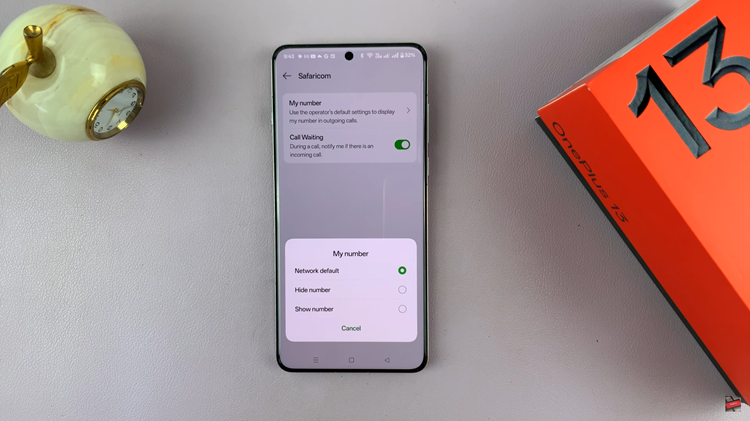
By following the steps outlined in this guide, you can easily switch between hiding and unhiding your caller ID whenever required. This is just one of the many ways the OnePlus 13 empowers you to customize your device for a more secure and personalized experience.
