Adding timestamps to your photos can help you keep track of when each picture was taken, making it easier to organize memories, document events, or maintain records. With the OnePlus 13, enabling photo timestamps in the Camera app ensures every captured image includes a visible date and time.
This can be especially useful for professional, personal, or legal purposes where accurate time-stamping is important.The OnePlus 13 offers a built-in option to display timestamps on photos without the need for third-party apps.
By enabling this setting, you can automatically mark each photo with the exact moment it was taken. Whether you’re capturing daily moments or important milestones, having timestamps can add an extra layer of convenience.
Watch:How To Connect An Xbox Controller To OnePlus 13
Enable Photo Timestamps In Camera App On OnePlus 13
Enable Photo Timestamps
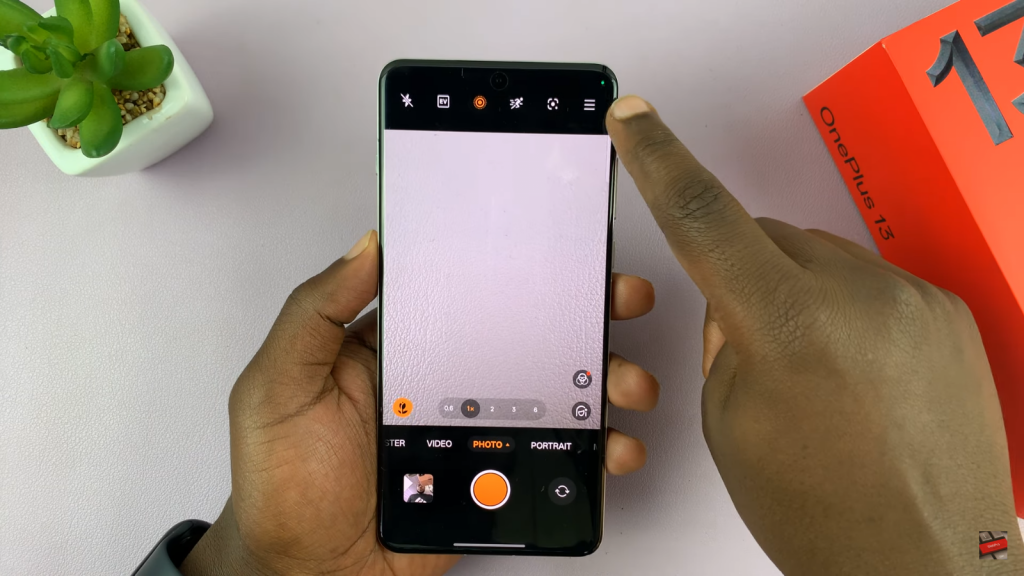
Open the Camera and tap the three-line menu in the upper-right corner.
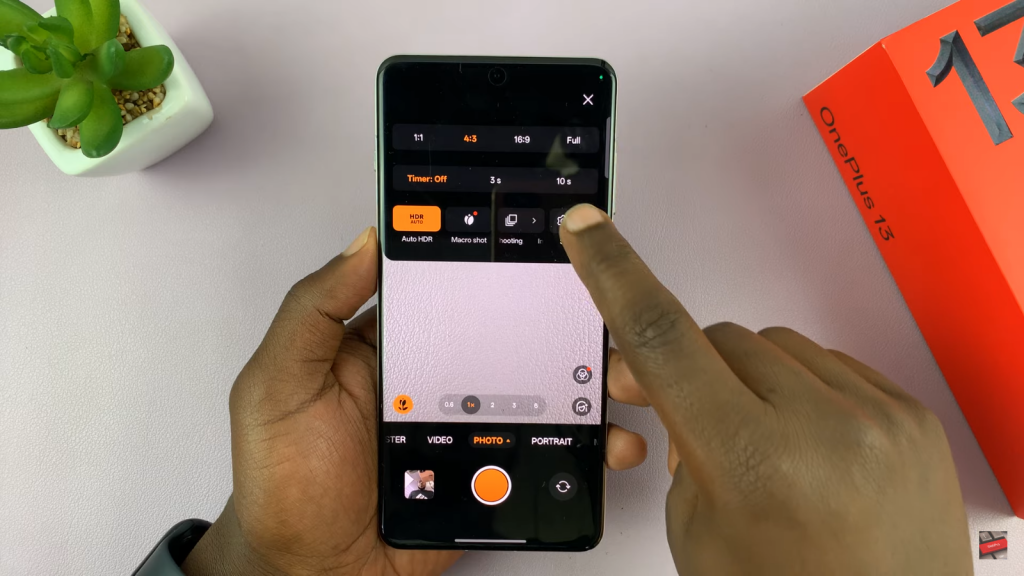
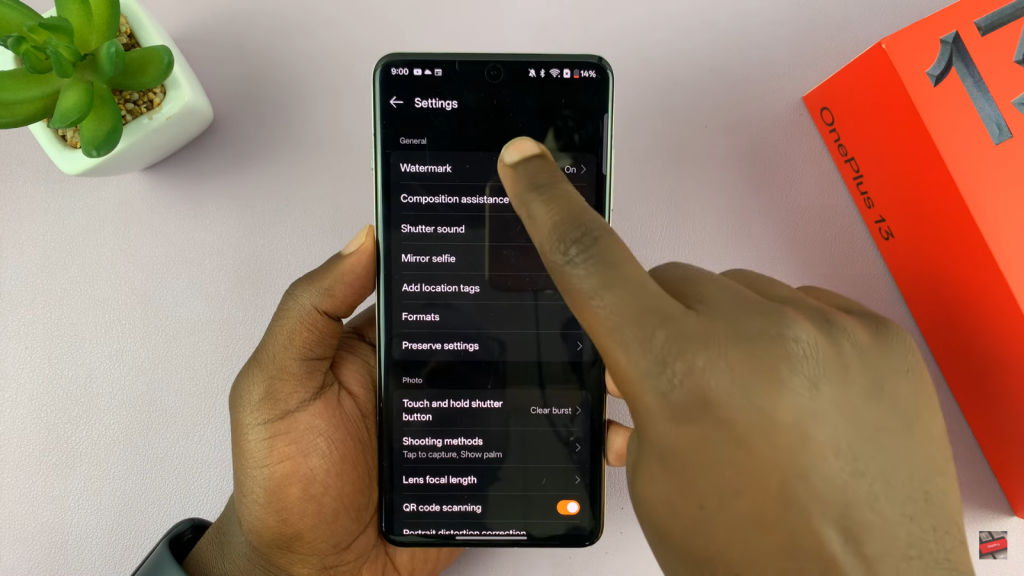
Select Settings from the menu go to Watermark and toggle it on.
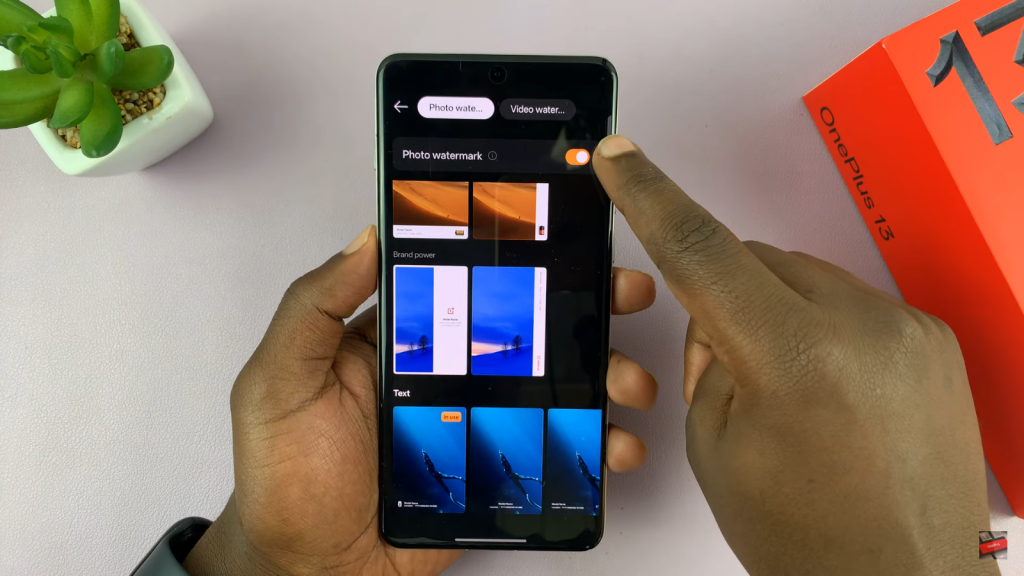
Choose a watermark frame that includes the date & time but minimal graphics.
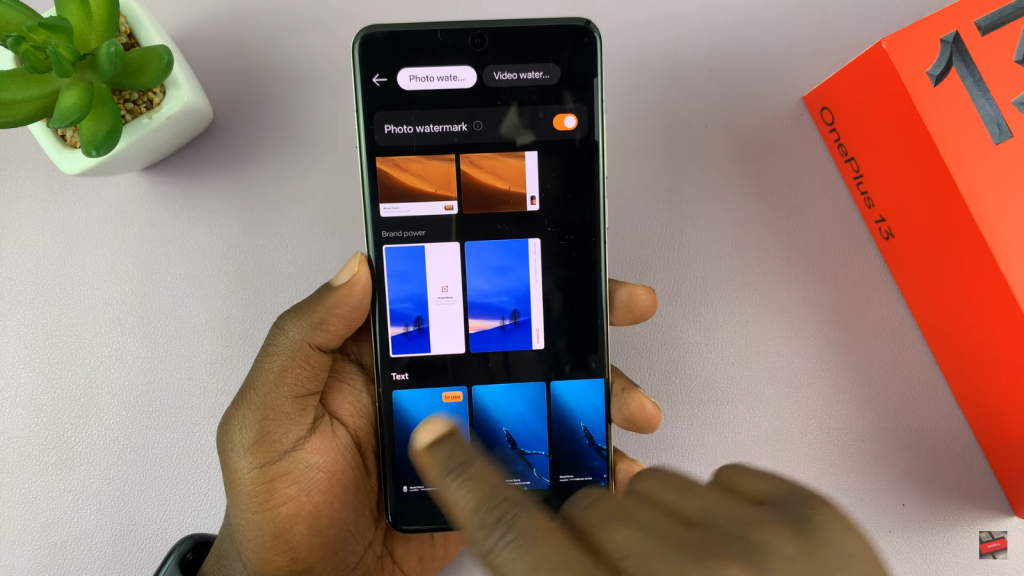
Under Graphic, select None to remove unnecessary elements.
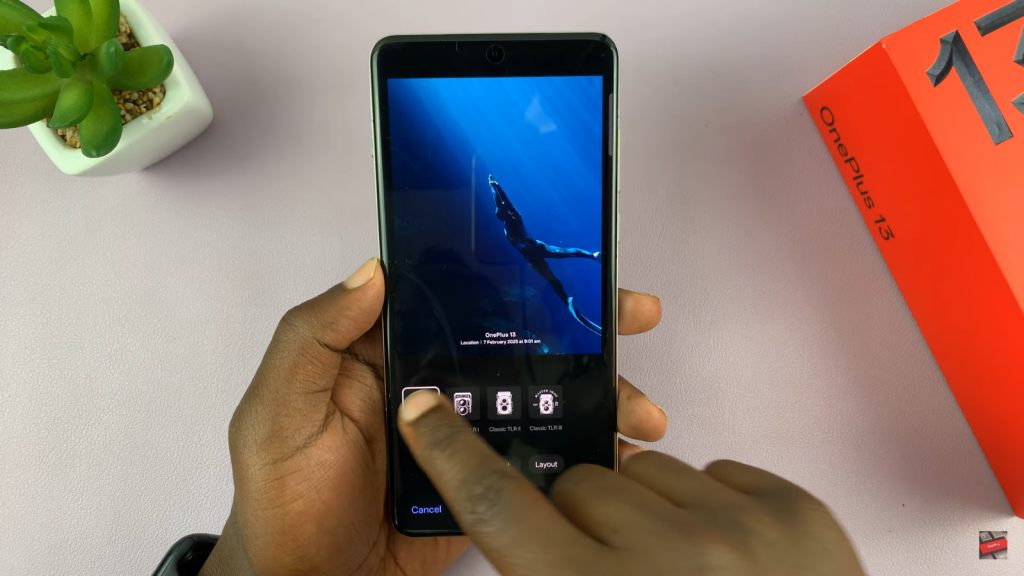
Under Text, enable Date & Time and Location (optional).
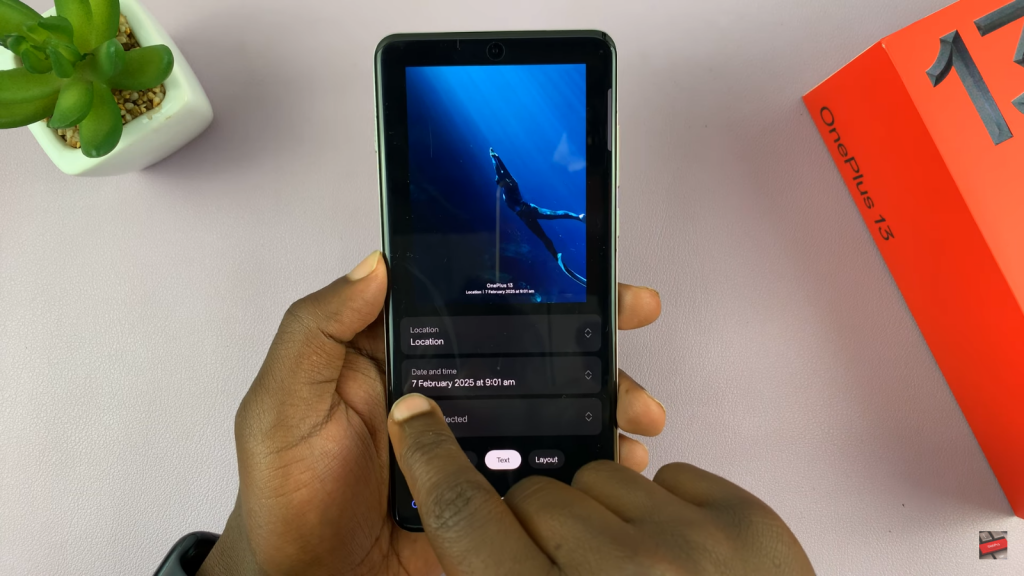
Adjust the layout size to Small for a cleaner look.
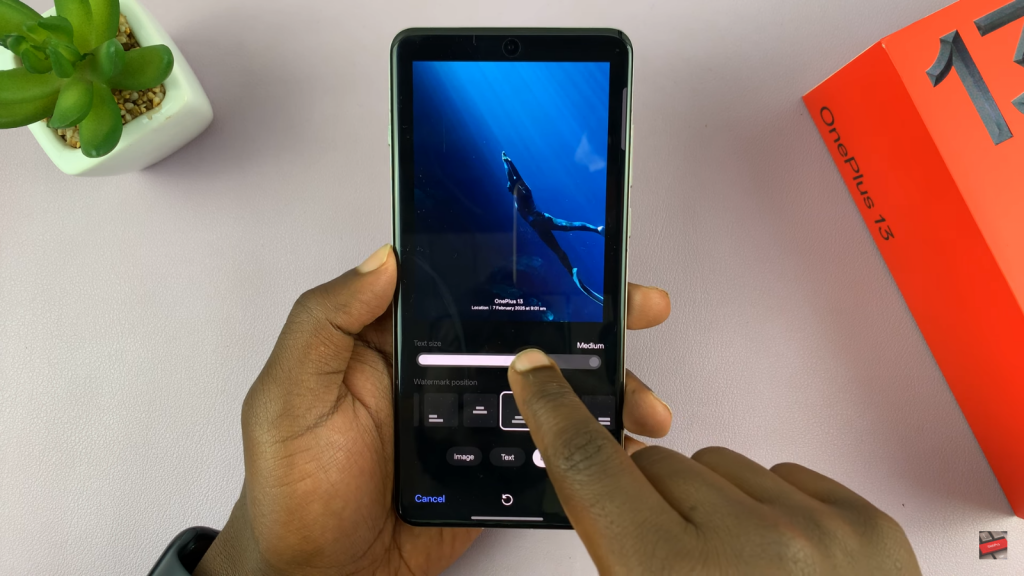
Set the position to Bottom Left for better visibility.
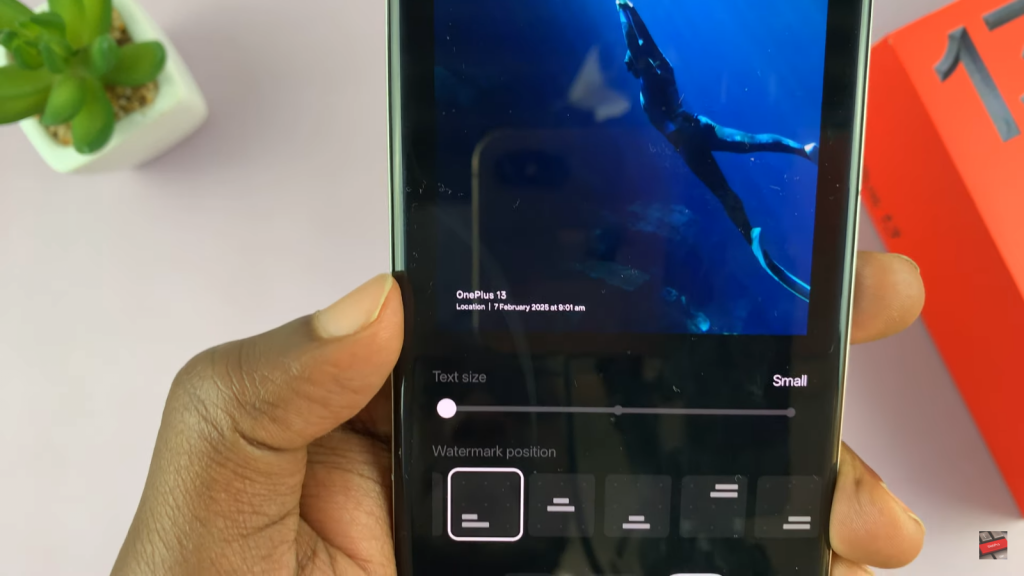
Tap Apply to save the changes.
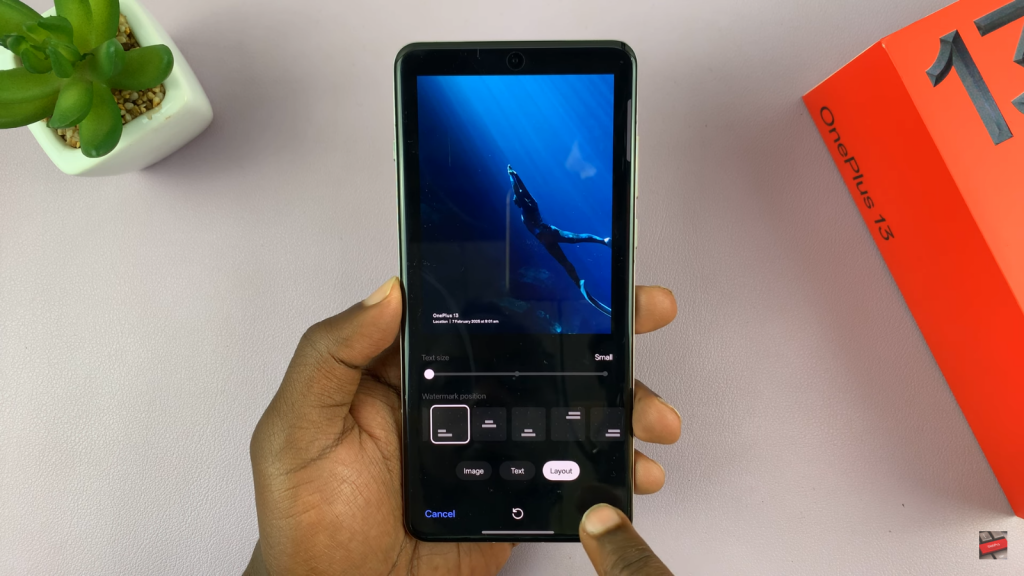
Now, every photo you take will include a timestamp in the bottom-left corner.

Enable Video Timestamps
Open the Camera go to Settings and tap Watermark and proceed to switch to the Video tab.
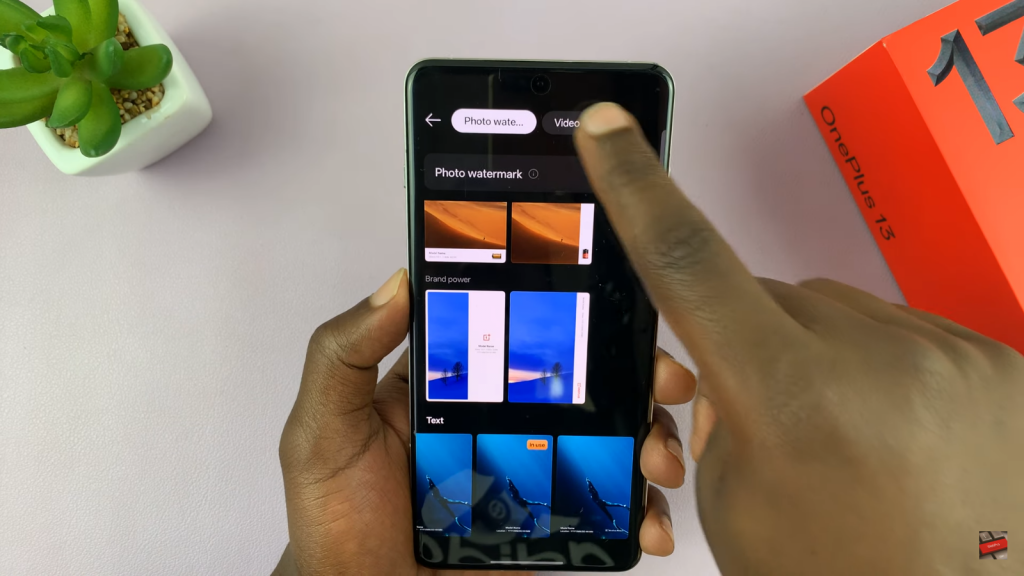
Select a minimal watermark frame to avoid extra branding.
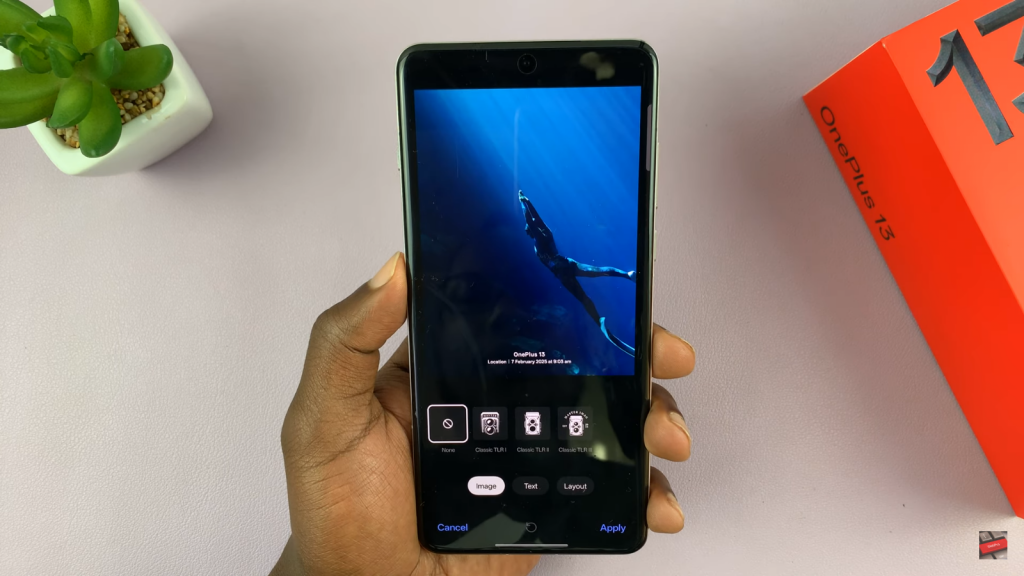
Disable Graphic by selecting None.
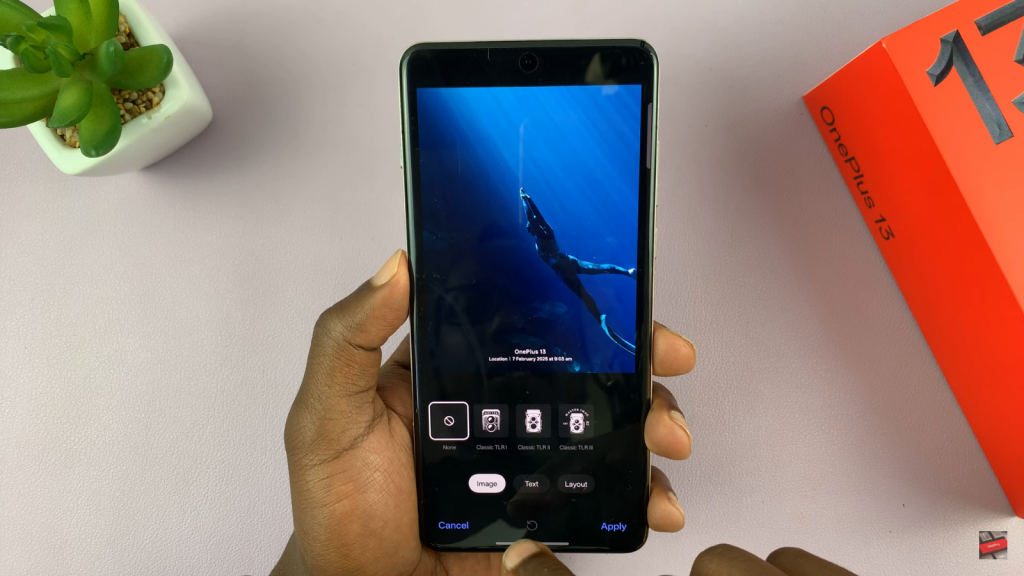
Enable Date & Time under the Text section.

Adjust the size to Small and place it in the Bottom Left corner.

Tap Apply to confirm the settings.
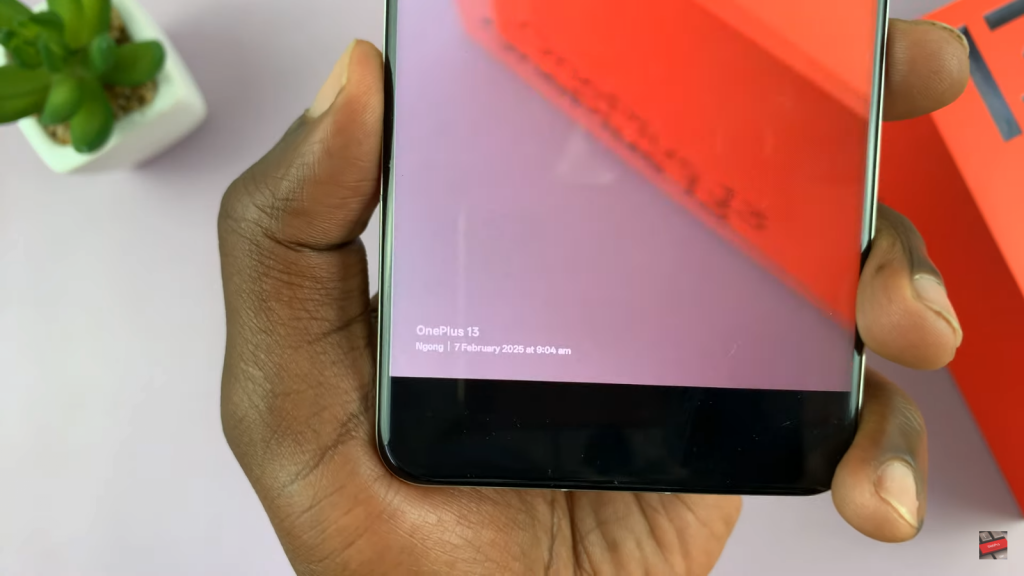
Now, all recorded videos will have a timestamp in the bottom-left corner.
Check Timestamps on Photos & Videos
- Open the Gallery and select a photo or video.
- Look at the bottom-left corner to see the date & time stamp.
Note: The OnePlus 13 branding will still appear and cannot be removed unless you use a third-party camera app.
