Enabling or disabling notification badges on your iPad can significantly impact how you manage incoming information and stay organized. Notification badges, represented by small red circles with numbers or dots on app icons, provide a quick glance at pending notifications without opening each app.
This feature is particularly useful for staying updated with emails, messages, and app alerts in real-time. However, managing these badges effectively is essential to avoid feeling overwhelmed by constant notifications.
Transitioning into the settings to manage notification badges, iPad users have the flexibility to customize their notification preferences based on personal or professional needs. Whether you prefer a minimalist approach with few distractions or a comprehensive view of all pending alerts, understanding how to enable or disable these badges ensures your iPad operates in a manner that complements your workflow.
By navigating through the iPad’s settings, users can tailor notification badges to prioritize important updates while minimizing distractions from less critical notifications. This level of customization empowers users to maintain productivity and focus, ensuring they remain informed without compromising efficiency.
Watch:How To Start Sharing Photos With Other Apple Devices Using Your Apple ID On iPad
Enable or Disable Notification Badges On iPad
Here’s how you do it;
Step 1: To begin configuring notification badges on your iPad, start by launching the Settings app. Once you’re in the Settings, navigate down the menu until you reach the ‘Notifications’ section. This initial step sets the foundation for customizing how notifications are displayed across your device.
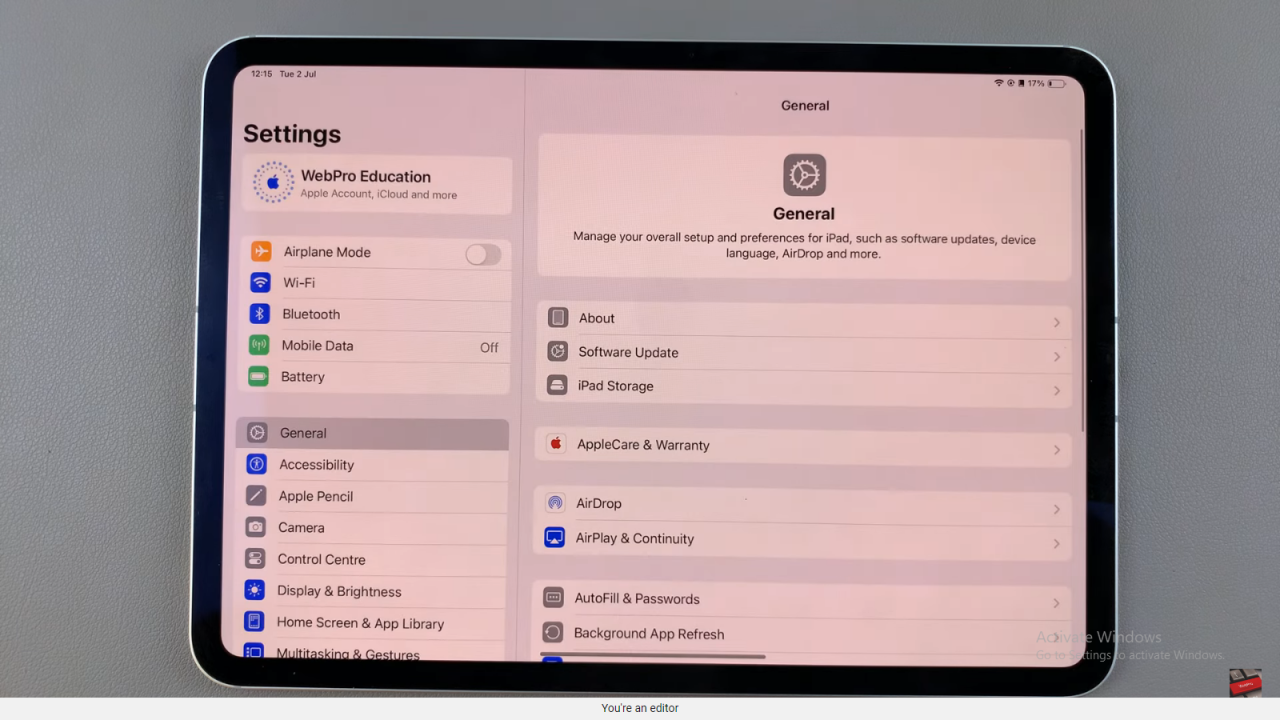
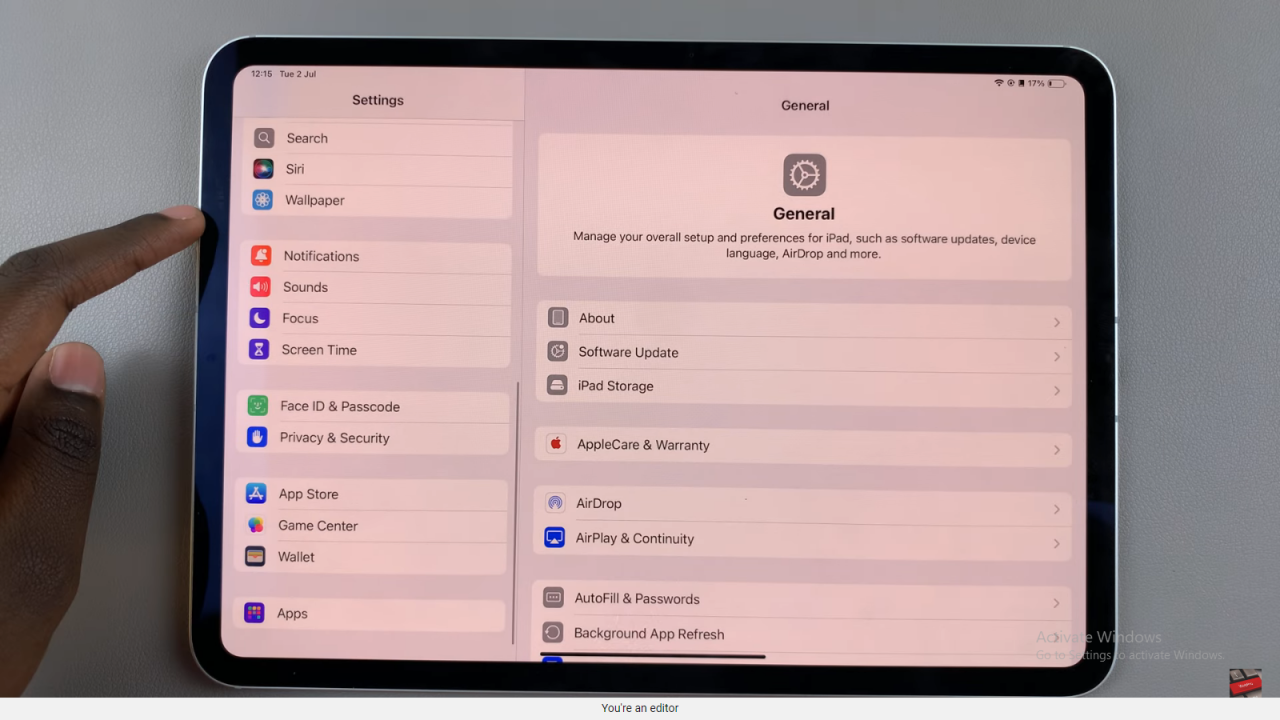
Step 2: Within the ‘Notifications’ menu, you’ll encounter a comprehensive list of apps installed on your iPad. This section allows you to individually adjust notification settings for each app according to your preferences. Scroll through this list to locate the specific app for which you wish to enable or disable notification badges.
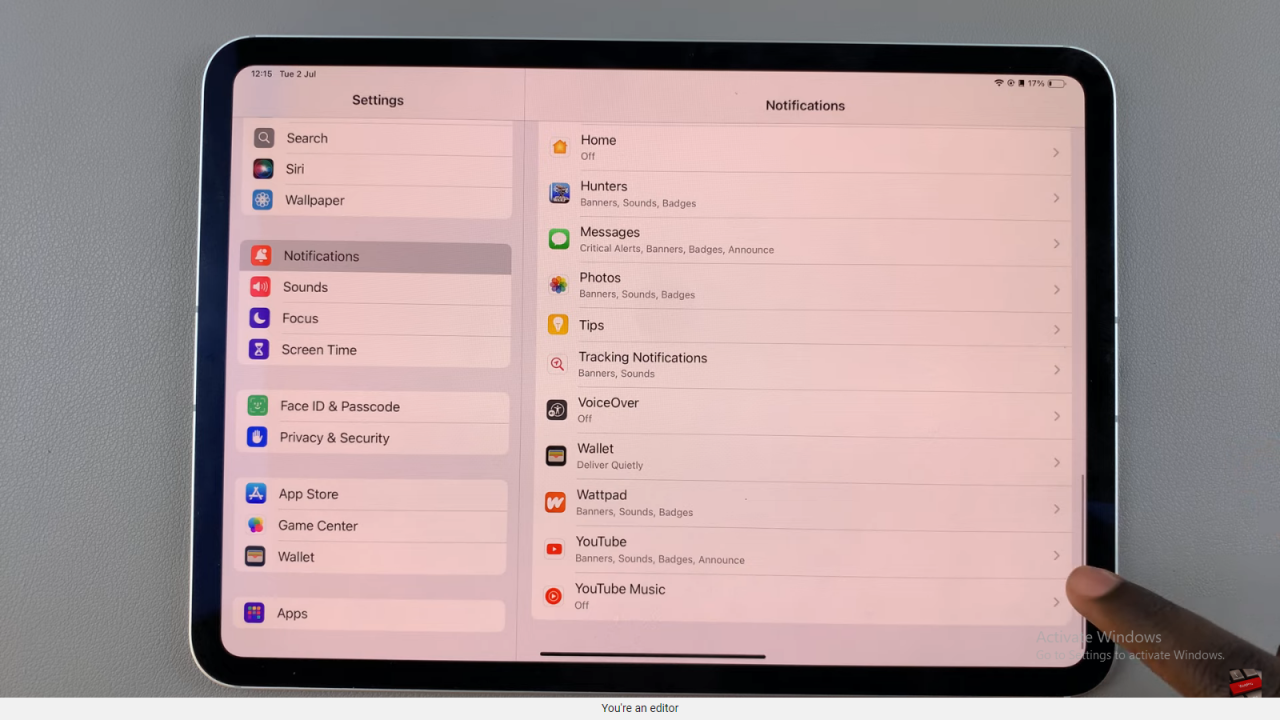
Step 3: Once you’ve selected the desired app, tap on its name to access detailed notification settings. Here, you’ll find various options tailored to how notifications are delivered and displayed. Look for the ‘Badge App Icon’ option—it’s typically represented by a toggle switch. Slide this switch to the ‘On’ position to enable notification badges for that particular app.
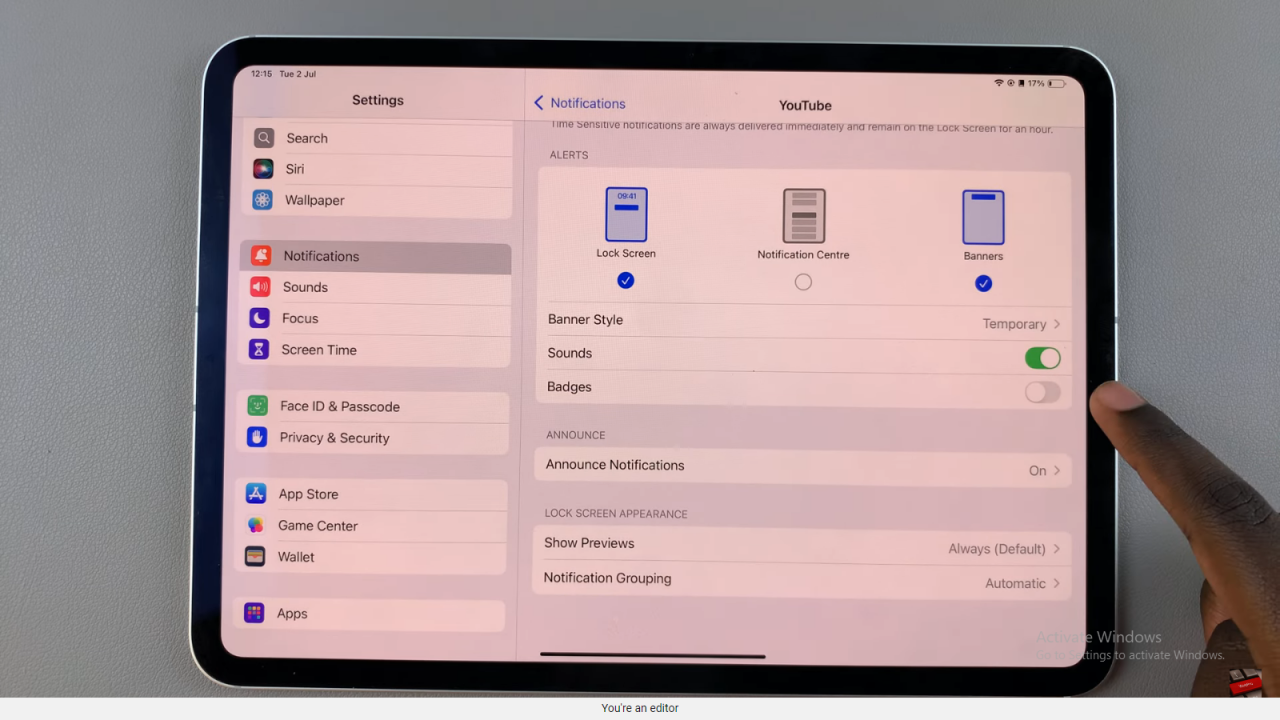
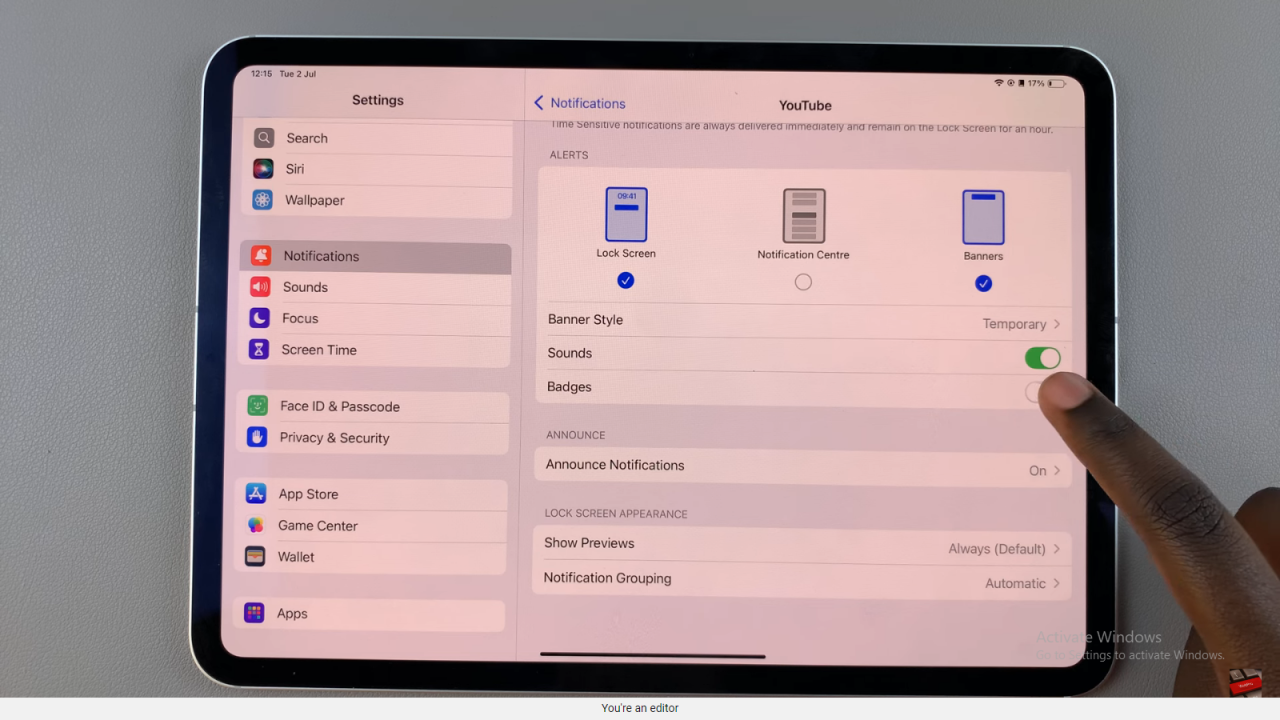
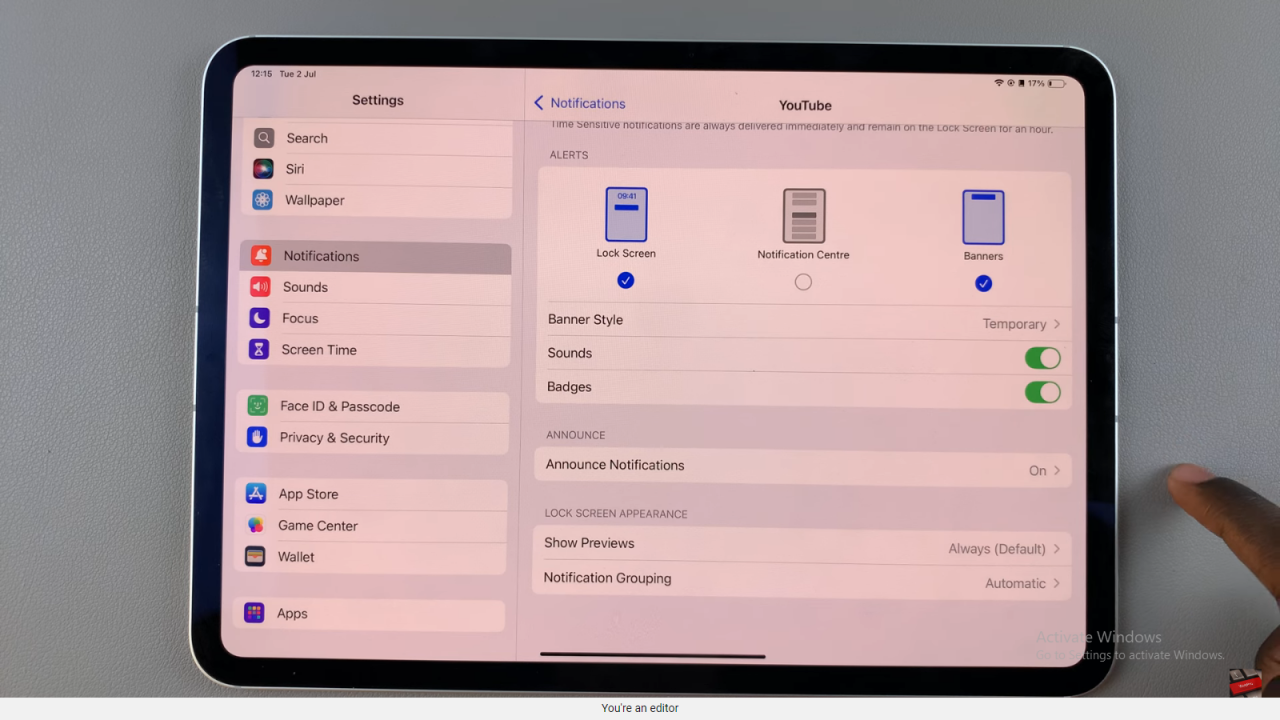
By following these steps, you gain precise control over how notifications are presented on your iPad, ensuring a more personalized and efficient user experience. This method not only helps in managing notifications effectively but also enhances your device’s usability by focusing on the notifications that matter most to you.
