Apple frequently releases updates that not only enhance the functionality of your device but also address bugs and security vulnerabilities. For many users, automatic updates are a convenient way to maintain their devices without needing to manually check for new software versions.
However, not everyone prefers automatic updates. Some users might want to maintain control over when updates are installed, especially if they rely on specific apps or configurations that may not be compatible with the latest software. Disabling automatic updates allows for this level of control, enabling you to choose the most convenient time to update your device.
In this guide, we will walk you through the steps to enable & disable automatic iOS updates on your iPhone 11.
Watch: How To Reset Face ID On iPhone 11
Enable/Disable Automatic iOS Updates On iPhone 11
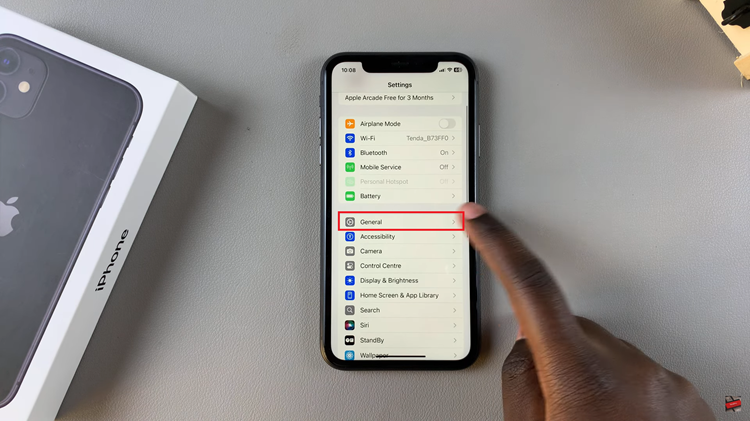
Firstly, locate and tap the “Settings” app, represented by a gear icon, typically found on your home screen. Then, scroll down the settings menu and look for the “General” option. Tap on it to proceed.

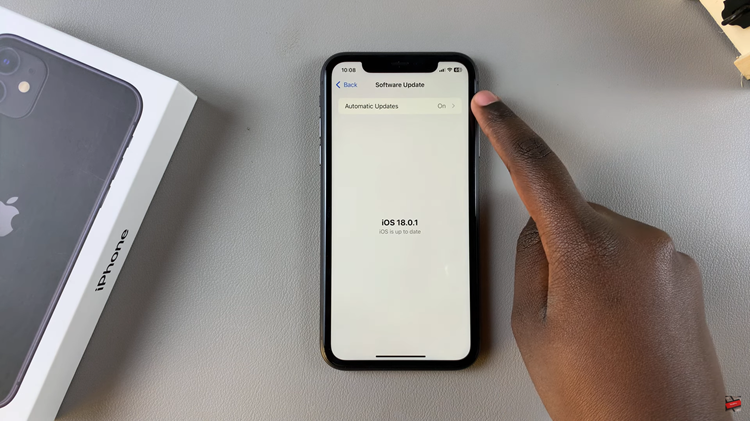
At this point, find the “Software Update” option within the general settings. Tap on it to proceed and then select “Automatic Updates.”

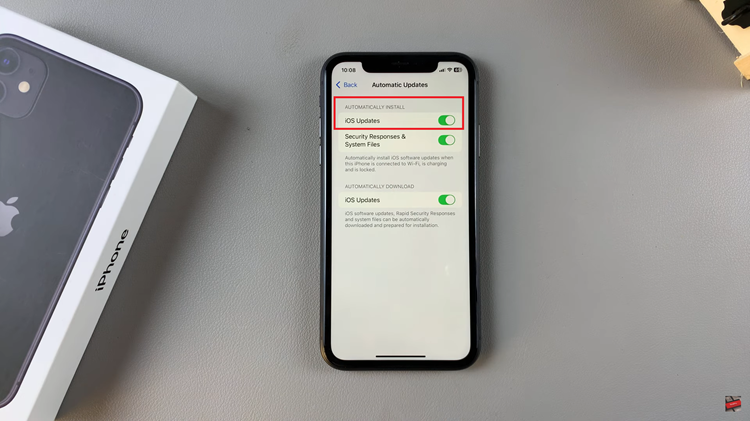
From here, find the “iOS Updates” option within the Updates settings. You’ll notice a toggle switch next to it. To turn automatic updates, toggle ON the switch. Conversely, toggle OFF the switch to disable this feature.

By following these steps, you can easily turn on & off automatic iOS updates on your iPhone 11. Keeping your device updated is essential for security and functionality, but managing updates manually gives you control over when and how they are installed.

