Automation on iPad is a powerful feature that allows you to streamline your daily tasks and enhance productivity by automating actions across various apps and settings. By leveraging the Shortcuts app, you can create personalized workflows that trigger automatically based on specific conditions or events.
Whether you want to automate routine tasks, manage settings based on your location, or integrate with other smart devices in your home, setting up automation on your iPad can significantly simplify your digital experience. In this guide, we’ll walk you through the step-by-step process of enabling automation on your iPad.
You’ll learn how to harness the full potential of automation to tailor your iPad to your unique workflow. Let’s dive in and unlock the power of automation on your iPad.
Watch: How To Disable iCloud Backup On iPad
Enable Automation On iPad
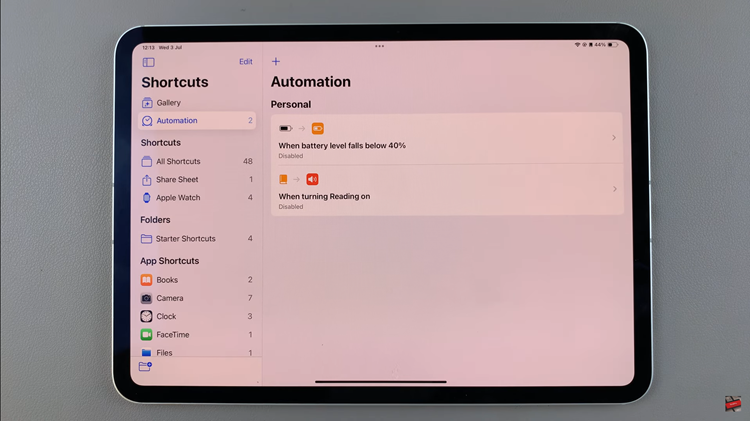
To begin automating tasks on your iPad, start by navigating to the Shortcuts app on your Home screen. Once you’ve located it, tap on the Automation option located at the top left side of the screen. Here, you’ll find a list of automations you’ve created previously.

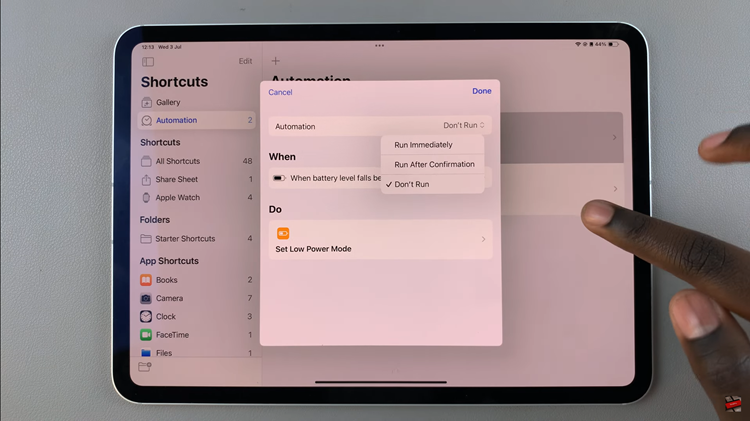
Following this, select the specific automation you wish to activate. After selecting your desired automation, proceed by tapping on the “Automation” option. Within this menu, you will encounter three distinct choices: ‘Run Immediately,’ ‘Run After Confirmation,’ and ‘Don’t Run.’

To enable the automation, carefully choose either ‘Run Immediately‘ or ‘Run After Confirmation‘ based on your specific preferences and needs. Once you’ve made your selection, ensure to save your changes by tapping on the “Done” option located in the upper right corner of the screen.
By following these steps, you can efficiently manage and enable automation on your iPad, streamlining your workflow and enhancing productivity seamlessly.

