This guide will show you how to turn off all noise controls on your AirPods 4 quickly and efficiently. AirPods 4 are equipped with advanced noise control features, but sometimes you might want to turn them all off. Whether you’re looking to experience natural ambient sounds or extend battery life, disabling all noise control settings, including Active Noise Cancellation and Transparency Mode, can be a practical choice.
Managing your AirPods’ noise settings gives you full control over your listening experience. While noise-canceling features are ideal for quiet environments, and Transparency Mode is great for staying aware of your surroundings, turning them off entirely can be beneficial in specific scenarios.
If you’re a new AirPods user or looking to customize your settings, this tutorial will help you make the most of your device. The process is simple and can be done directly from your iPhone or iPad.
Read: How To Set Up Personalized Spatial Audio On Airpods 4
Turn OFF All Noise Controls On Airpods 4
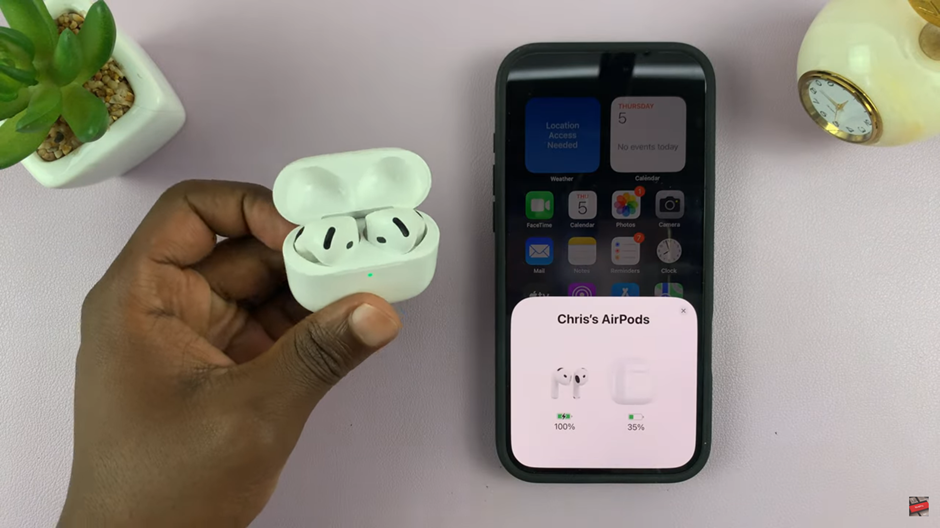
Open the AirPods case near your device, a popup notification will appear on your screen confirming automatic connection. If the connection doesn’t occur automatically, ensure that Bluetooth is enabled on your device and select your AirPods from the available Bluetooth devices list.

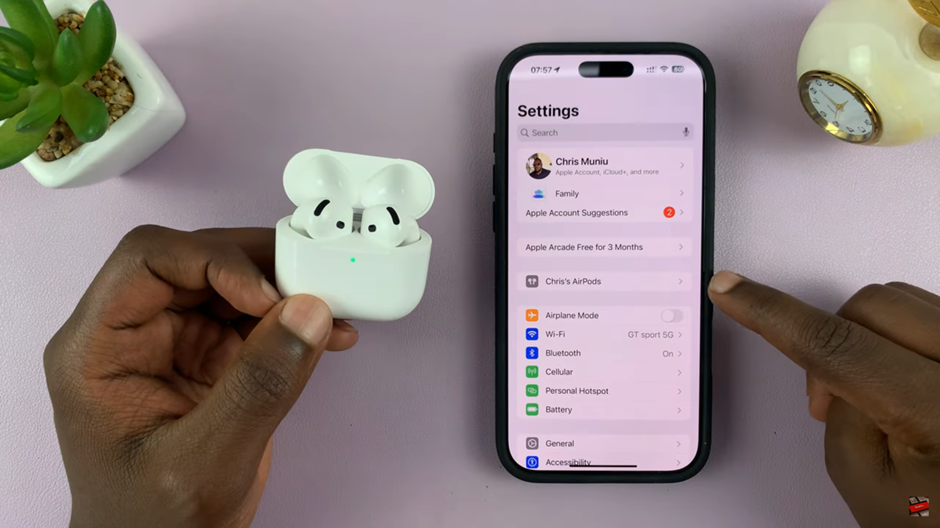
Select your AirPods from the list in the settings menu. This will take you to the AirPods control panel. This is where you can manage features like noise control, spatial audio, and microphone preferences. Ensure that your AirPods are active and connected to your device to access all options.

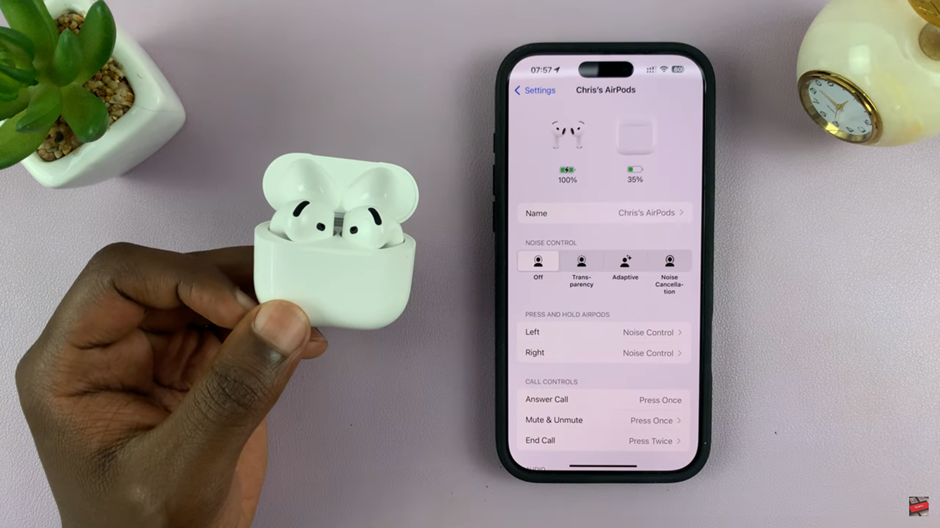
Select Off to turn off all noise control features. This setting restores your AirPods to their default mode, providing unaltered audio without noise filtering or ambient sound enhancement.

Once you’ve set Noise Control to “Off,” your AirPods 4 will no longer modify the surrounding sound. This is ideal for those who prefer a natural listening experience or want to save battery life.
Watch: How To Charge Your Airpods 4

