Connecting your AirPods 4 to a Mac or MacBook offers the perfect blend of convenience and high-quality audio, whether you’re listening to music, attending a virtual meeting, or watching a video. With Apple’s seamless ecosystem, connecting your AirPods to your Mac or MacBook is straightforward, and it enhances your overall audio experience.
In this detailed guide, we’ll take you through the step-by-step process of pairing your AirPods 4 with your Mac or MacBook. Once set up, your AirPods will easily switch between your devices, making them the perfect companion for your Apple devices.
Let’s dive into the process!
Watch: How To Change Font Size On Samsung Galaxy A16
Connect AirPods 4 To MacBook & Mac
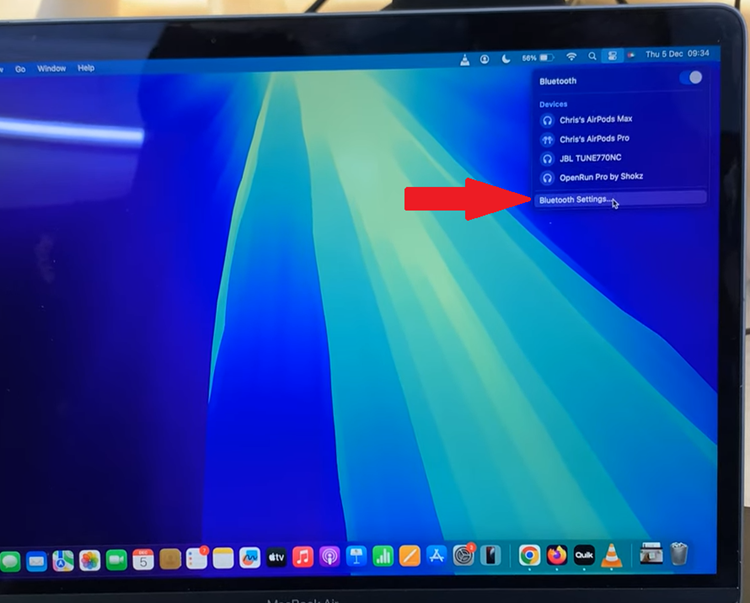
Begin by accessing the Bluetooth settings on your MacBook or Mac. To do this, click on the ‘Control Center’ icon located at the upper right corner of the screen. Then, click on the ‘Bluetooth‘ option and select ‘Bluetooth Settings.’

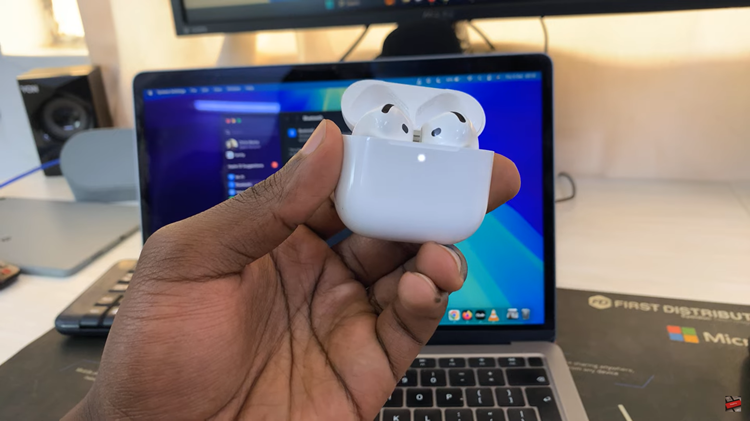
Following this, toggle ON the switch next to enable Bluetooth. Now, place the AirPods 4 into pairing mode. Open the charging case lid and locate the white light that appears. Then, double-tap just below the light to place them into pairing mode. You’ll notice a white flashing light on your AirPods 4 indicating that they’re in pairing mode.

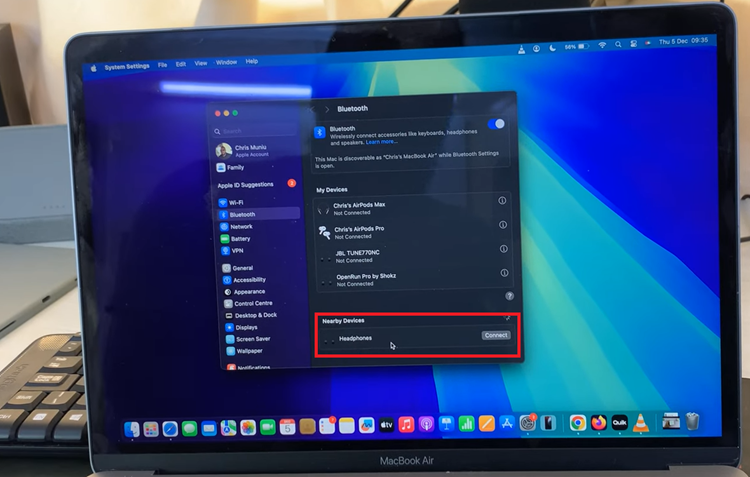
Conversely, head back to your MacBook or Mac and you should see the AirPods 4. From here, click on ‘Connect‘ and your AirPods 4 will be paired on your MacBook or Mac.

Now that you know how to connect your AirPods 4, you can enjoy the freedom of wireless audio for all your work and entertainment needs. If you encounter any issues, simply check your Bluetooth settings or ensure that your AirPods are properly charged. Happy listening!

