Changing video resolution can significantly impact the quality and file size of your footage. Whether you’re aiming for a professional look or adjusting settings to fit specific project requirements, knowing how to manage resolution in the Final Cut Camera App is essential for any video editor. Here’s a step-by-step guide to help you navigate and adjust video resolution settings effectively.
Before diving into the app, it’s crucial to understand what video resolution is. Resolution refers to the number of pixels that make up the video frame. Common resolutions include; HD (1280×720), Full HD (1920×1080) and 4K (3840×2160)
Higher resolutions offer better detail and clarity but result in larger file sizes and may require more processing power.
Read: How To Turn ON CMF By Nothing Watch Pro 2
Change Video Resolution (Size) In Final Cut Camera App
Start by launching the Final Cut Camera App on your device. This app is designed to help you capture and edit video with various customizable settings, including resolution.
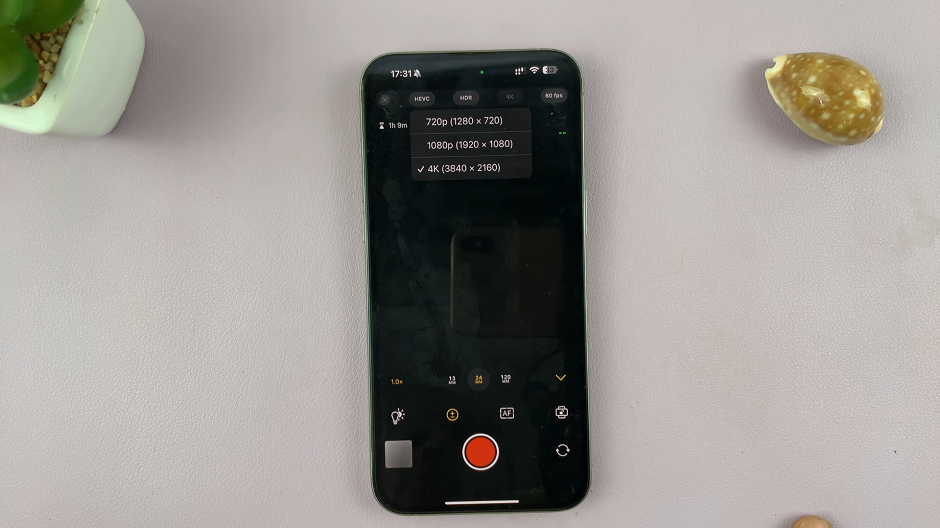
Once you’re in the app, there are two ways you can access the video resolution settings. You can locate the quick settings in the upper-middle section of the interface. Simply tap on the video resolution and choose between 4K (3840×2160), 1080p (1920×1080) and 720p (1280×720).
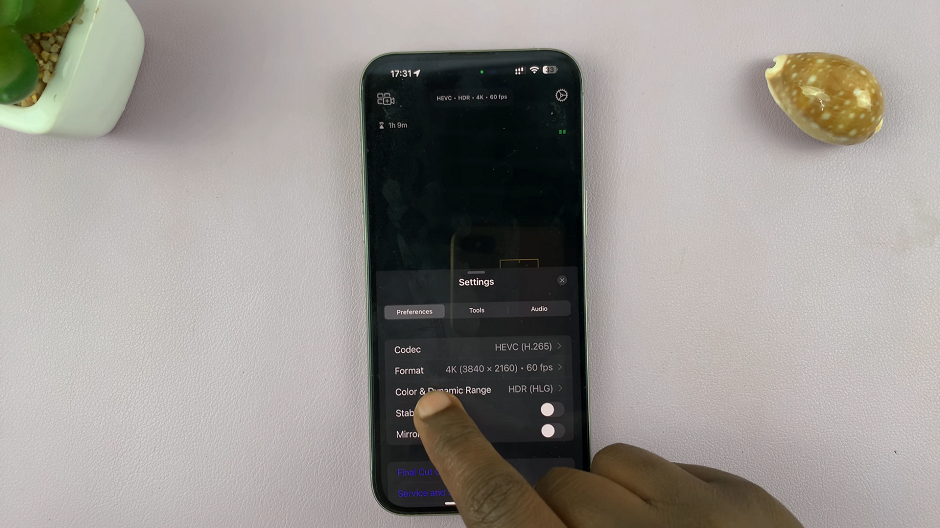
For more comprehensive video resolution settings, simply tap on the Settings icon in the top-right corner of the interface. It is typically represented by a gear or cogwheel symbol. This will open the camera settings menu where you can adjust various parameters.
In the Settings, make sure you’re on the Preferences tab. Look for the Format option. This area allows you to select different resolution options based on your needs. Select it to expand the menu.
Under the Frame Size section, you’ll see various choices:
720p HD for standard quality
1080p HD for high quality
4K for the highest quality
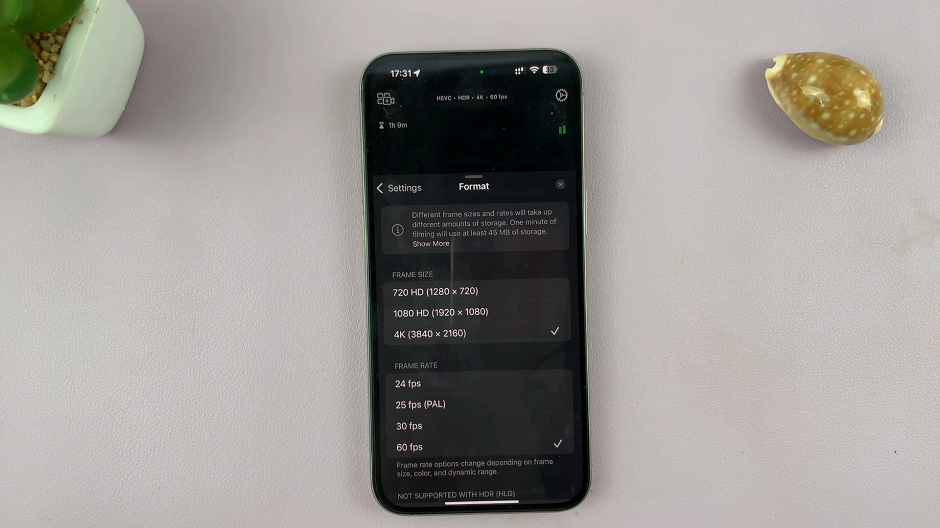
Choose the resolution that best fits your project. Keep in mind that higher resolutions provide better quality but also consume more storage space and require more processing power.
In the Frame Rate section, you’re allowed to adjust the frame rate in addition to resolution. Frame rates (e.g., 24fps, 25fps (PAL), 30fps, 60fps) affect the smoothness of motion in your video. Adjust these settings according to your project requirements.
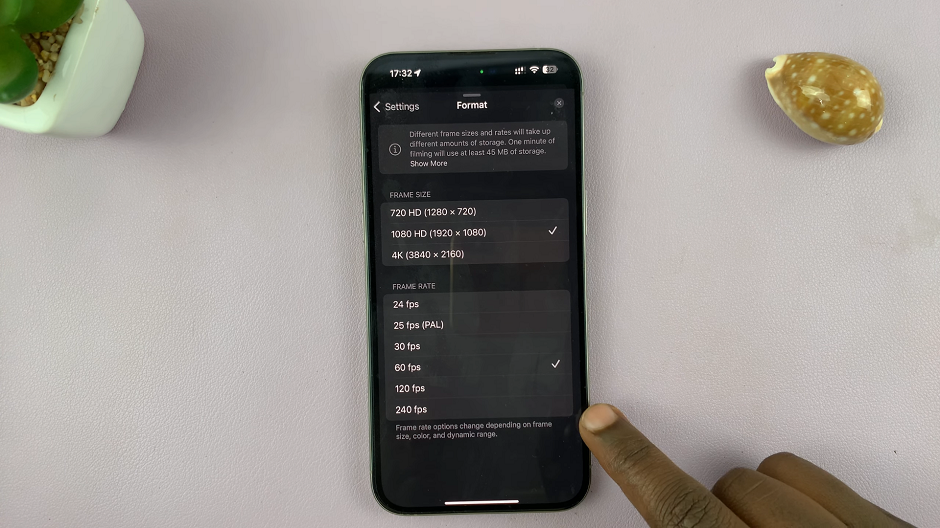
You can also have additional frame rates of 120fps and 240fps,when you turn off HDR. These frame rates , however, only apply to the 720p and 1080p resolutions.
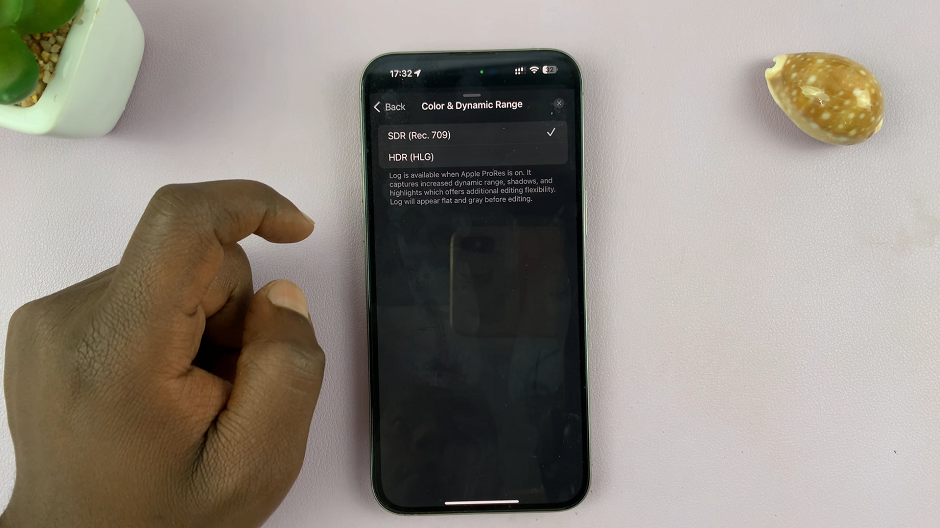
The app will now use the selected resolution for all future recordings or edits.
Check and Adjust During Editing
If you’re editing footage already captured, open the video in Final Cut Pro or another compatible editing tool. You may need to adjust the resolution settings within the editing software to match your project’s requirements.
When exporting your final project, ensure that you select the appropriate resolution and quality settings. This will maintain the desired video quality and compatibility with various platforms.
Tips for Optimal Video Resolution
Consider Your Platform: Different platforms (e.g., YouTube, Instagram, TV) may have preferred resolutions and aspect ratios. Research the best settings for your target platform.
Monitor File Size: Higher resolutions increase file sizes. Balance quality and file size according to your storage and bandwidth constraints.
Use Consistent Settings: For a professional look, maintain consistent resolution and aspect ratio throughout your project.
Mastering video resolution settings in the Final Cut Camera App allows you to produce high-quality content tailored to your specific needs. By understanding and adjusting resolution settings, you can enhance your video’s visual appeal and ensure it meets the requirements of various platforms and projects.

