As far as our smartphones are concerned, they have become a gateway to all manner of services, content, and applications specific to a particular region. Whether you travel out of the country, change locations, or want access to region-specific content, changing the region on your iPhone 11 opens a whole new world.
Another thing that changing your region can do to your iPhone is that this will affect the ways of payment available to you. Subscription services and the availability of some features may also change. While you’re making these changes, you need to be aware of how those changes can affect your existing accounts and purchases.
This step-by-step guide will show you how to switch your region on the iPhone 11. Let’s get started!
Watch: How To Lock Messages App On iPhone 11
Change Region On iPhone 11
Firstly, locate and tap the “Settings” app, represented by a gear icon, typically found on your home screen. Then, scroll down the settings menu and look for the “General” option. Tap on it to proceed.
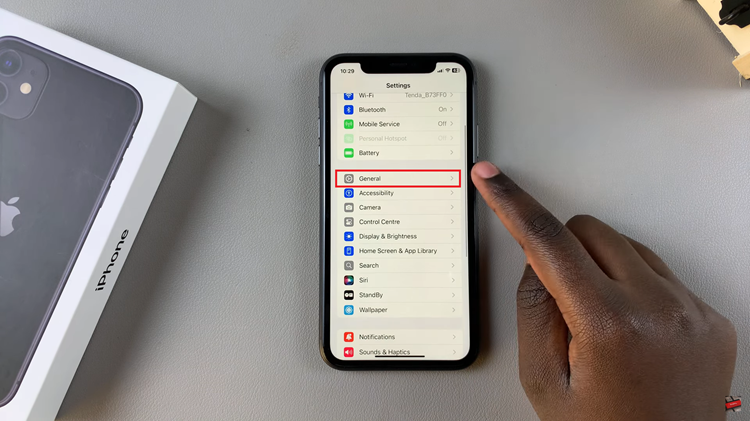
At this point, scroll down and find the “Language & Region” option within the general settings. Tap on it to proceed and then select “Region.”
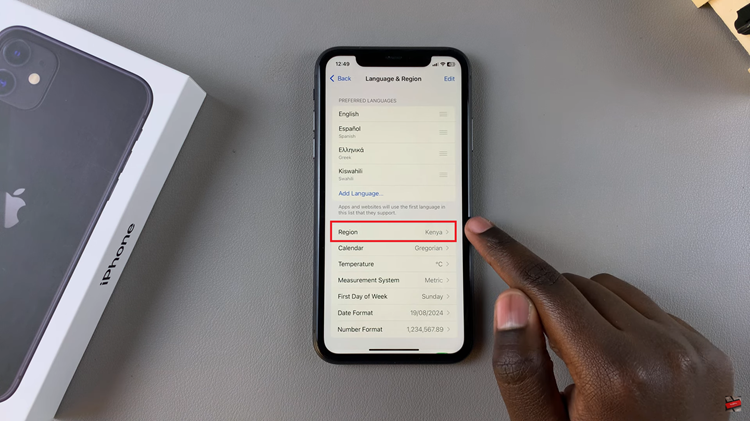
Following this, browse through the available options. Choose the desired country and confirm by tapping on “Change Region.” your iPhone 11 will apply the changes.
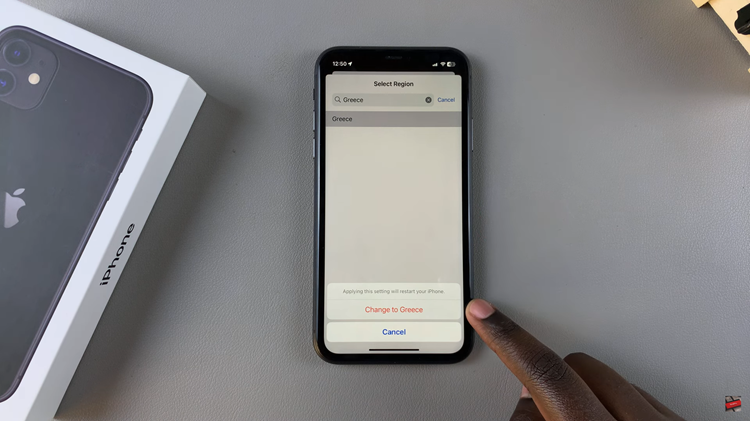
Follow these steps successively, and you will have your region changed on the iPhone 11 in no time. Remember to check compatibility for the apps and services you may want to use in the new region.
Read: How To Turn ON/OFF Headphone Notification On iPhone 11
