Backing up your iPhone to a Windows PC or laptop is an essential task to protect your valuable data—from photos and messages to app data and settings.
In this article, we’ll guide you through the process to back up your iPhone on a Windows PC / laptop step by step, using the Apple Devices app. Whether you’re upgrading to a new iPhone or simply want a secure backup, this guide will help ensure that your data is safe.
iTunes is the official tool provided by Apple for managing and backing up iOS devices. While it is the most common method for backing up an iPhone, Apple is phasing iTunes out and transitioning to the Apple Devices app.
Your iPhone stores a wealth of personal information, including:
Photos and Videos: Cherished memories that can’t be replaced.
Contacts and Messages: Essential communications and connections.
App Data and Settings: Personalized configurations and information for apps you rely on.
Backing up your device regularly minimizes the risk of data loss due to hardware failure, software glitches, or accidental deletion.
Watch: FIX iTunes Not Working
Back Up iPhone To Windows PC / Laptop
Before starting, ensure you have a Windows PC or Laptop, running a compatible version of Windows and the Apple Devices app installed. You also need a genuine or certified USB cable to connect your iPhone to your computer.
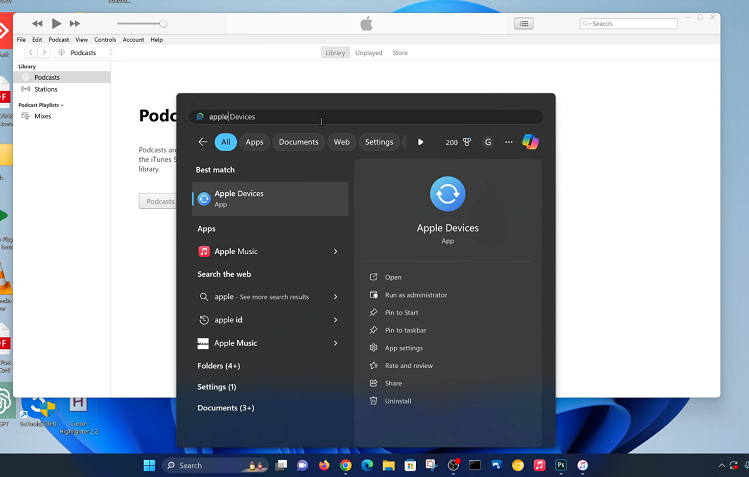
First, open the Microsoft Store app from the pinned icon on the taskbar. You can also search for it using the start menu search bar.
Search for Apple Devices using the Microsoft Store search bar. Locate the official app from Apple Inc. in the search results and click on the Get button to download and install it on your Windows device.

Once the installation is complete, launch the Apple Devices app by clicking on the Open option. You can also use the start menu search bar to locate it and open.
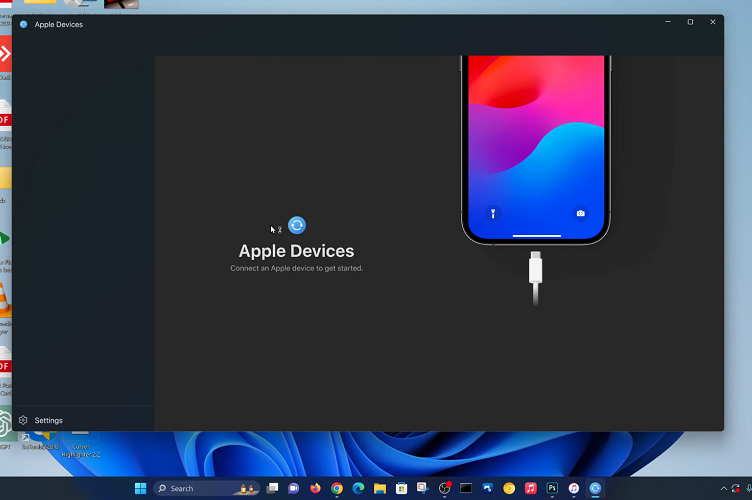
Plug your iPhone into your Windows PC / laptop using a USB cable. Unlock your iPhone and, if prompted, tap Trust to allow the connection with your computer.
If the iPhone summary doesn’t come up automatically, look for the iPhone icon near the top-left corner of Apple Devices and click on it. This will open the device summary screen, where you can view your iPhone’s information and settings.
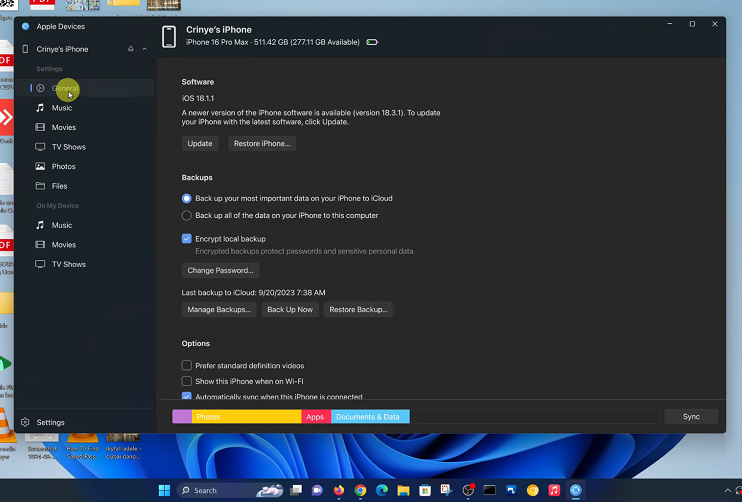
Check the capacity of the backup at the top of the summary page. Simply minus the difference of the total capacity from the available space.
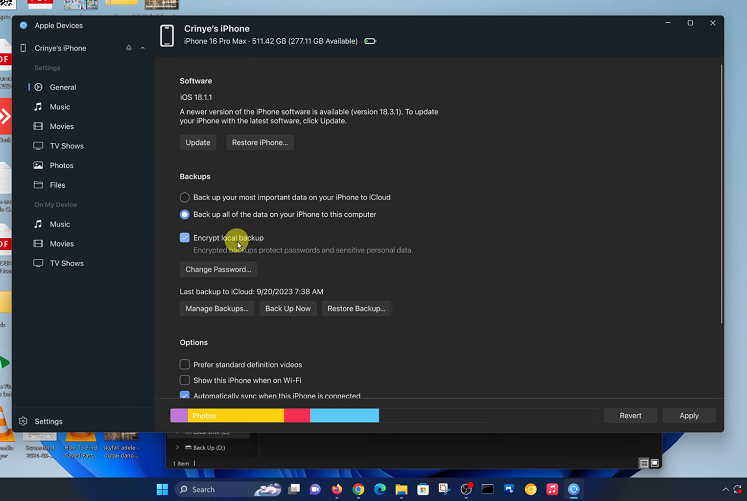
In the Summary section, click on the General tab and go to the Backups area. Here, select Back Up All Of The Data On Your iPhone to This Computer.
Optionally, check the box to Encrypt Local Backup if you wish to secure your backup with a password. Encryption ensures sensitive data like passwords and sensitive personal data.
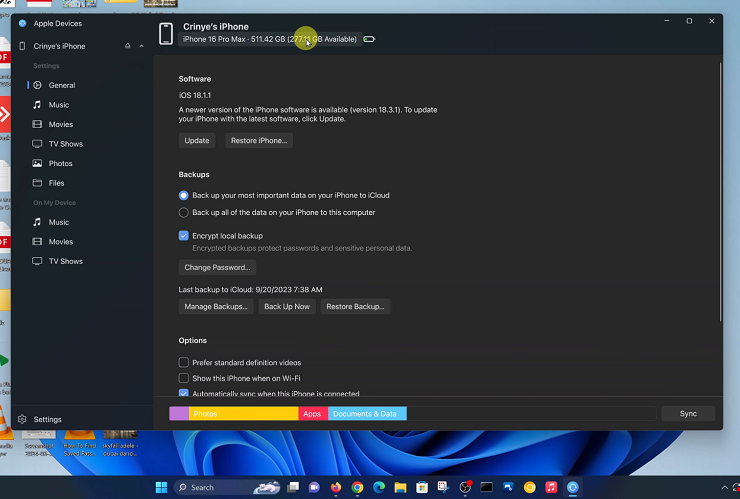
Click the Back Up Now button if the backup doesn’t start automatically. Apple Devices will begin copying the data from your iPhone to your computer. The time this takes depends on the amount of data stored on your device.

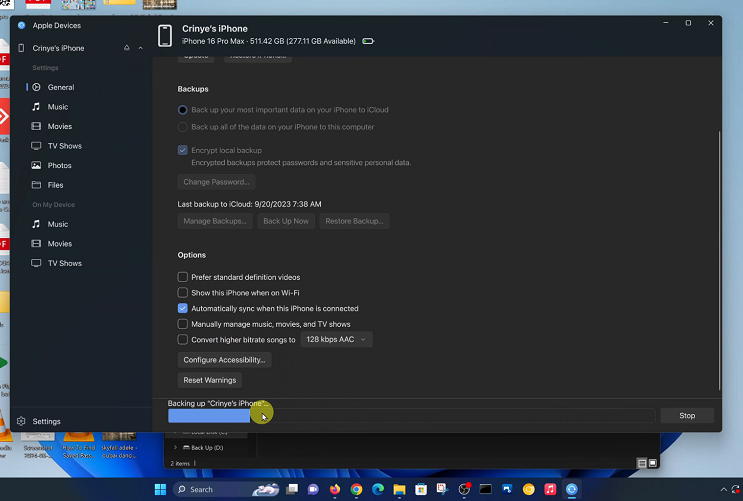
Once the process is complete, look for the Last Backup to iCloud timestamp under the Backups section. This timestamp confirms that your iPhone has been successfully backed up to your Windows PC.
If you forget the password for an encrypted backup, you may not be able to access the data later. Consider writing it down or using a password manager.

