Capturing stunning footage involves more than just pointing your camera and hitting record. To achieve the best possible results, understanding and adjusting key settings like shutter speed and ISO are essential.
In this guide, we’ll walk you through how to adjust these settings in the Final Cut Camera App, empowering you to take full control over your video quality.
Before diving into the app-specific instructions, let’s briefly review what shutter speed and ISO are:
Shutter Speed: This refers to the length of time the camera’s sensor is exposed to light. Faster shutter speeds (e.g., 1/1000s) freeze motion, while slower speeds (e.g., 1/30s) allow more light in and can create motion blur. The ideal shutter speed often follows the 180-degree rule, which suggests a speed that’s twice the frame rate (e.g., 1/50s for 24fps footage).
ISO: This measures the sensitivity of your camera’s sensor to light. Lower ISO values (e.g., 100-400) produce cleaner images with less noise, while higher values (e.g., 1600-6400) increase sensitivity but also introduce more noise. Adjusting ISO helps in achieving the correct exposure in various lighting conditions.
Watch: How To Charge OnePlus Watch 2
Adjust Shutter Speed & ISO In Final Cut Camera App
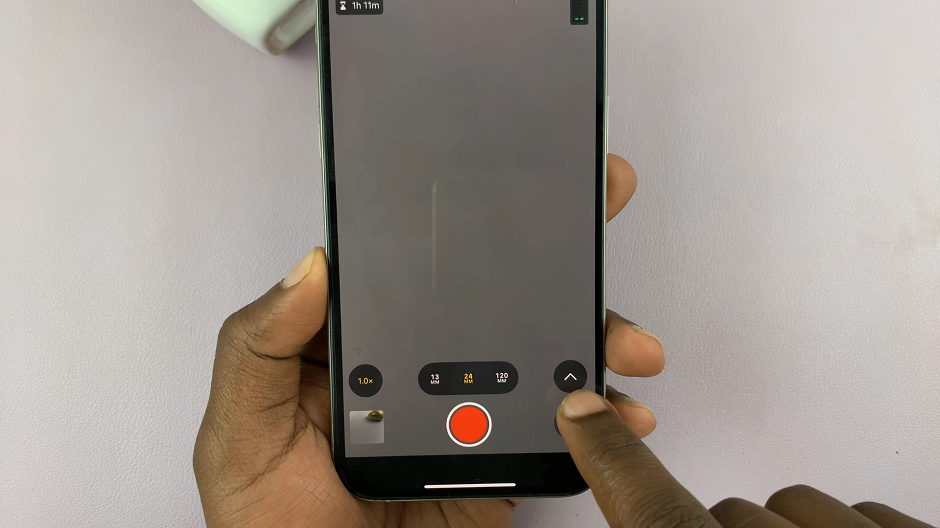
First, launch the Final Cut Camera App on your device. Locate the arrow in the bottom right of the Final cut Camera interface. Tap on it to reveal additional options.
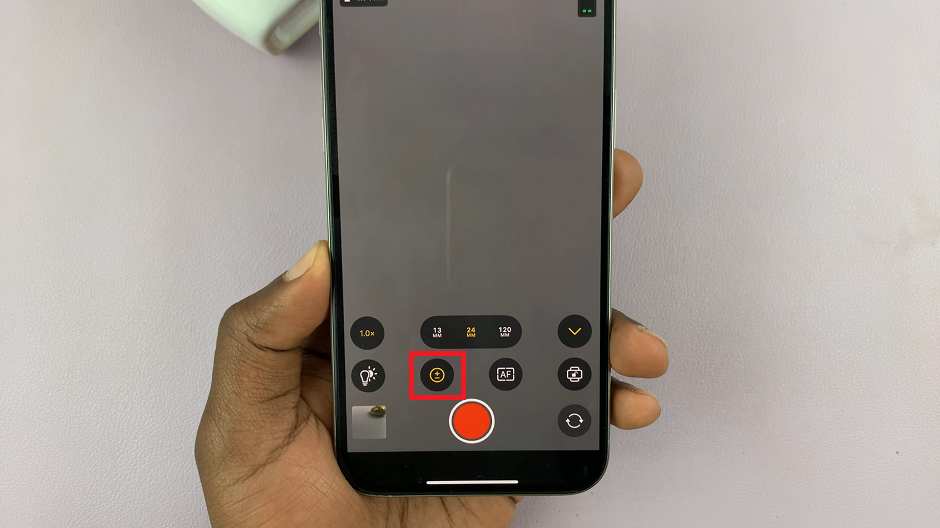
In the additional settings menu, find the Exposure icon. It is represented by a + and – icon, enclosed inside a circle. Tap on it to reveal the Exposure settings.
Exposure should be set to Auto by default, therefore you get to adjust Automatic Exposure to the level you want.
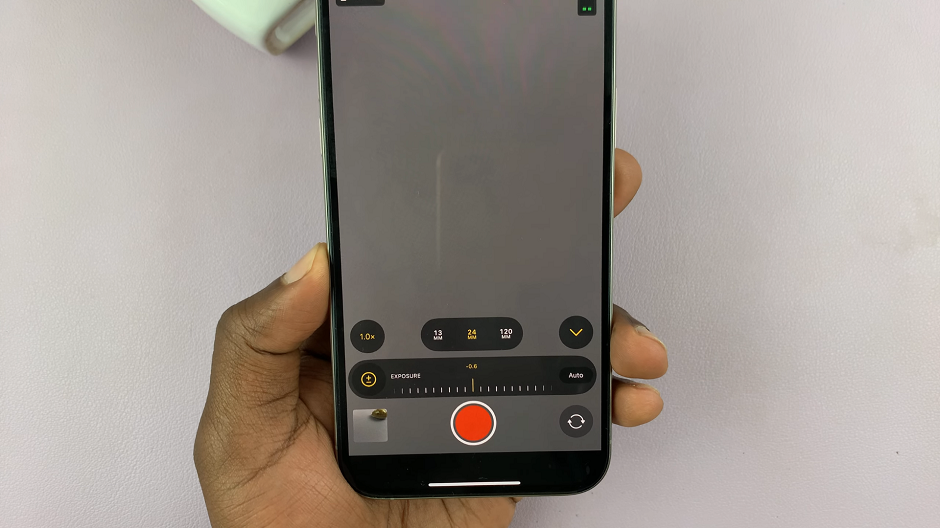
Ensure that your camera is set to manual mode, which will allow you to make specific adjustments to shutter speed. Do this by tapping on the Auto while on Exposure. This will change to Manual, and separate the Shutter and ISO.
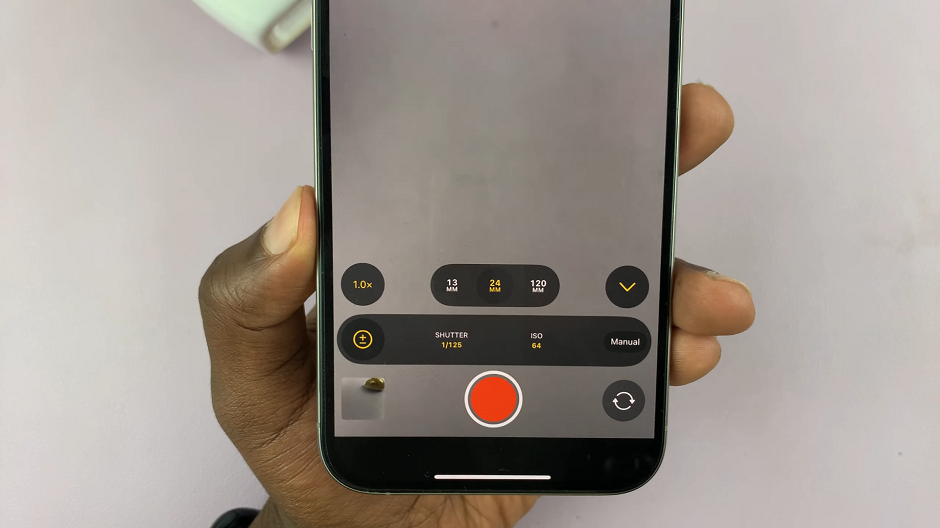
Tap on Shutter, then use the slider to set your desired shutter speed. Remember to follow the 180-degree rule for natural-looking motion. For example, if you’re filming at 30 frames per second (fps), set your shutter speed to approximately 1/60s.
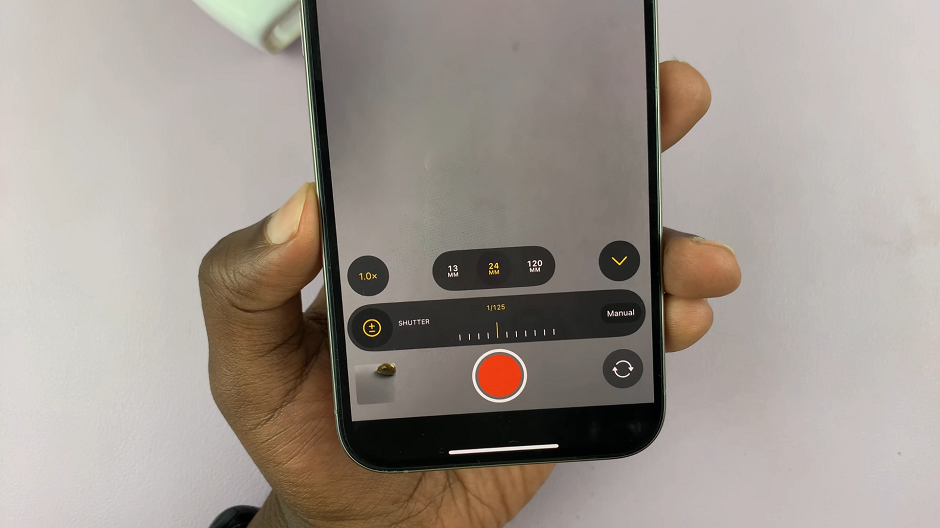
After adjusting the shutter speed, preview your shot to see how it affects the motion and exposure. Make any necessary tweaks to get the desired result.
Similar to adjusting shutter speed, you can tap on ISO under the Exposure option. Choose an ISO value, using the ISO slider, based on the lighting conditions. For well-lit environments, keep ISO low (e.g., 100-400) to maintain image clarity. For dim conditions, increase ISO as needed, but be mindful of potential noise.
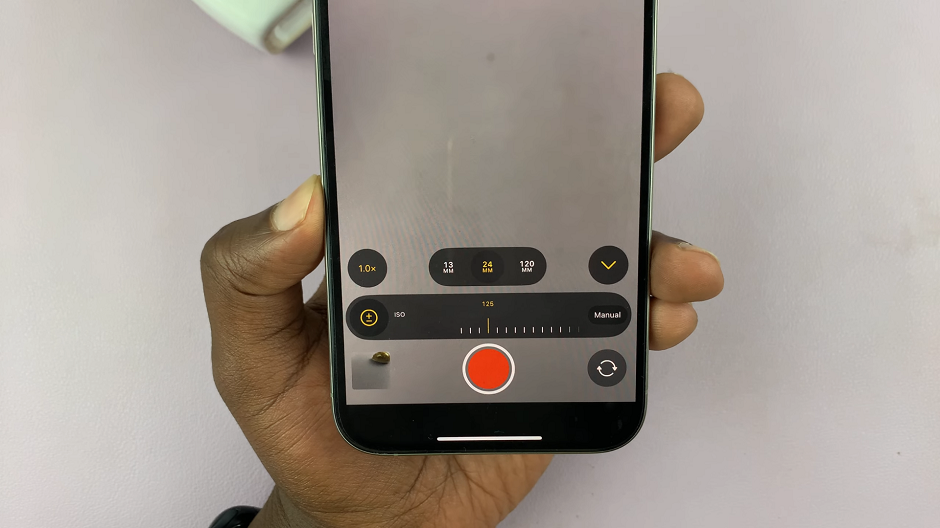
Check the image preview to ensure that the exposure is balanced and adjust the ISO value if necessary. Higher ISO settings will brighten the image but may introduce graininess.
Tips for Optimal Results
Lighting Conditions: Adjust shutter speed and ISO based on the environment. In bright conditions, lower ISO and faster shutter speeds work well. In low light, you might need higher ISO and slower shutter speeds.
Use a Tripod: For slower shutter speeds, a tripod can help avoid camera shake and ensure sharp images.
Balance Settings: Achieving a perfect balance between shutter speed and ISO is key. Avoid pushing ISO too high to prevent excessive noise and try to keep shutter speed in the recommended range for natural motion blur.
Mastering shutter speed and ISO adjustments in the Final Cut Camera App can greatly enhance your video quality. By understanding these settings and how to modify them in your app, you can ensure that your footage is both well-exposed and visually appealing. Experiment with different settings to see how they impact your shots, and don’t be afraid to make adjustments based on the specific needs of your project.
Read: How To Record To External Storage In Final Cut Camera App

