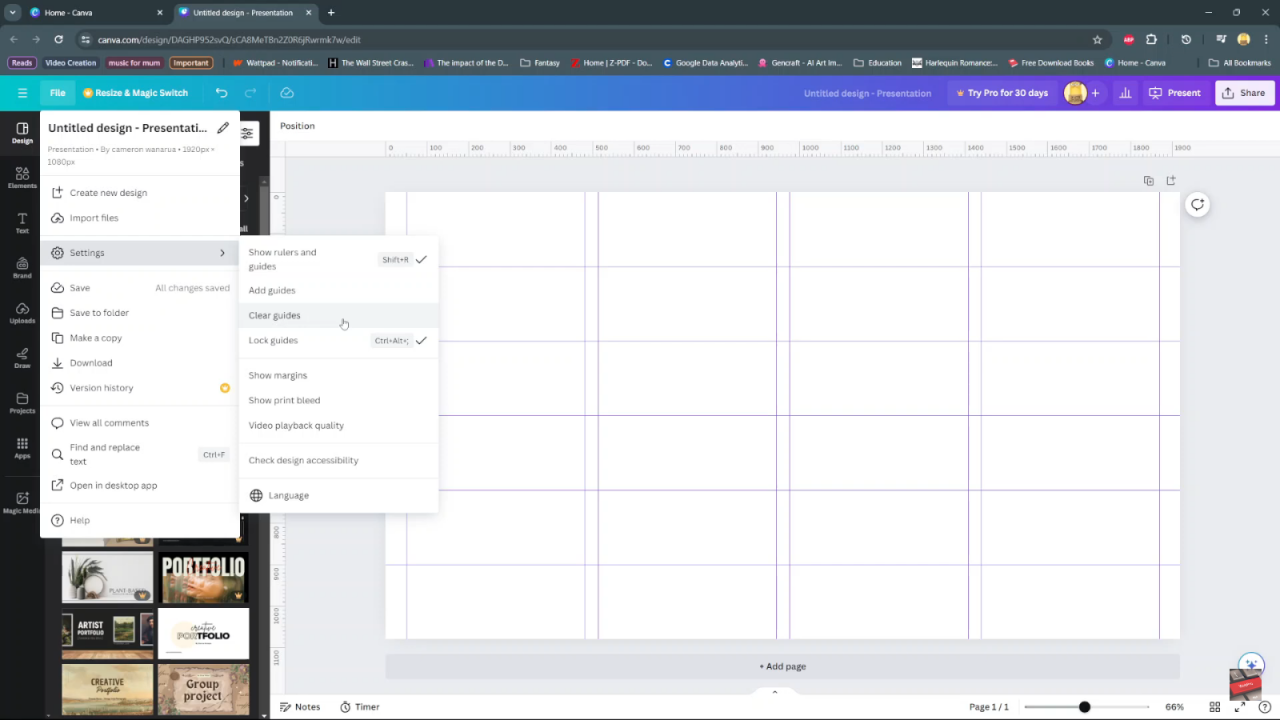
Integrating grid lines, columns, and rows into your designs using Canva enhances both the structure and visual appeal of your projects. Initially, these tools provide a foundation for organizing content with precision. Moreover, Canva’s user-friendly interface ensures that even beginners can utilize these features effectively.
Additionally, incorporating grid lines helps maintain alignment across elements, promoting a cohesive and professional layout. Furthermore, columns and rows allow for seamless division of space, optimizing the presentation of information in various design formats.
To get started, accessing grid lines, columns, and rows in Canva is simple and intuitive. Firstly, navigate to the layout options where you can toggle grid lines on or off, depending on your design needs. Once enabled, you can adjust the spacing and alignment of elements with ease.
Moreover, integrating columns and rows provides additional flexibility in structuring your content. Whether you’re designing presentations, social media posts, or marketing materials, mastering these tools enables you to create visually engaging compositions that effectively convey your message.
Watch:How to Create a Floral Text Effect in Canva
Add Grid Lines, Columns, and Rows in Canva
Here’s how you do it;
Step 1: Begin by opening your project in Canva. Navigate to the top of your screen and click on ‘File,’ then select ‘Settings’ from the dropdown menu.
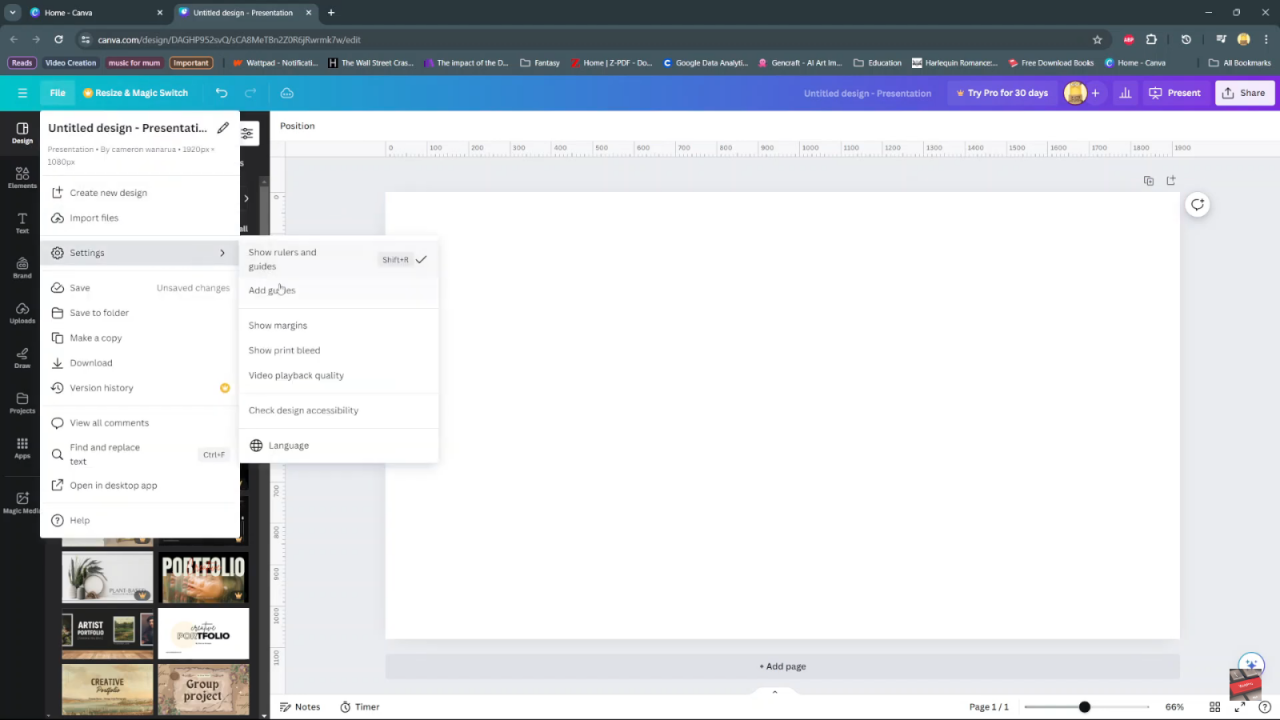
Step 2: Within the Settings menu, locate and enable ‘Show rulers and guides.’ Once activated, these guides will become visible on your screen, assisting you in aligning your design elements. Adjust the size of the guides as needed to fit your layout.
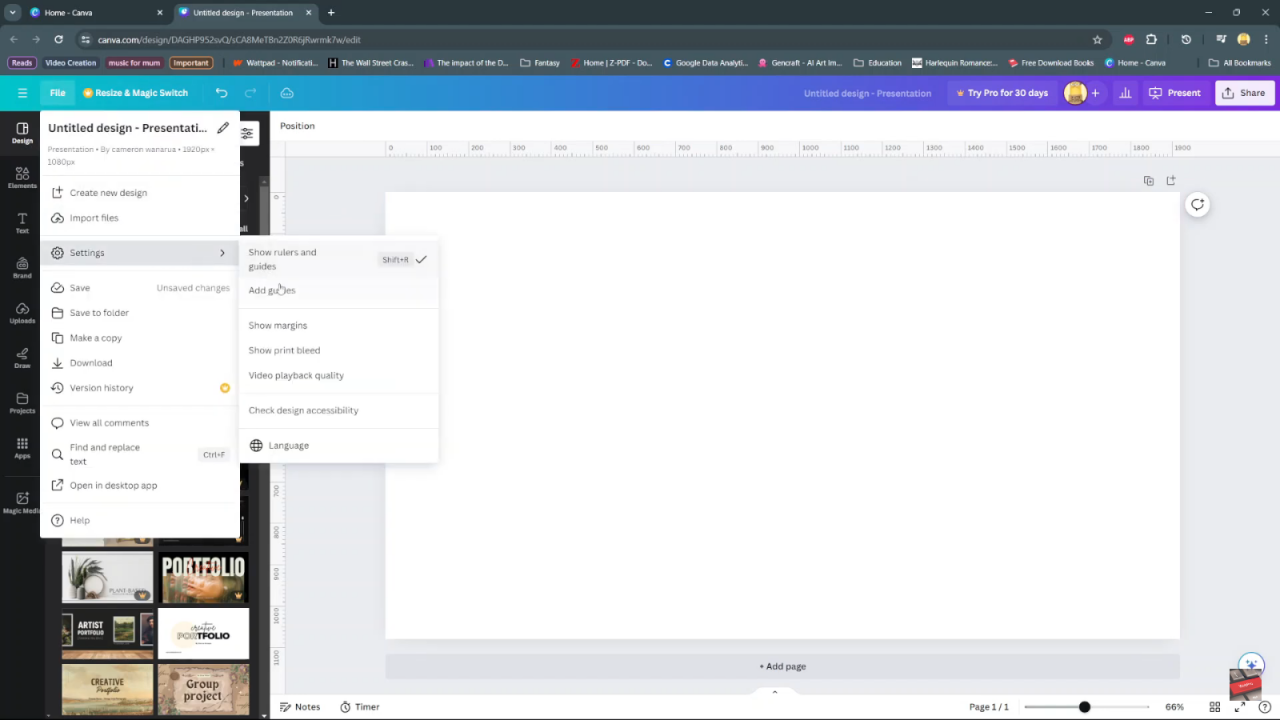
Step 3: To further refine your layout, return to the ‘File’ menu and select ‘Settings’ again. This time, choose ‘Add guides’ to begin incorporating columns and rows into your design.
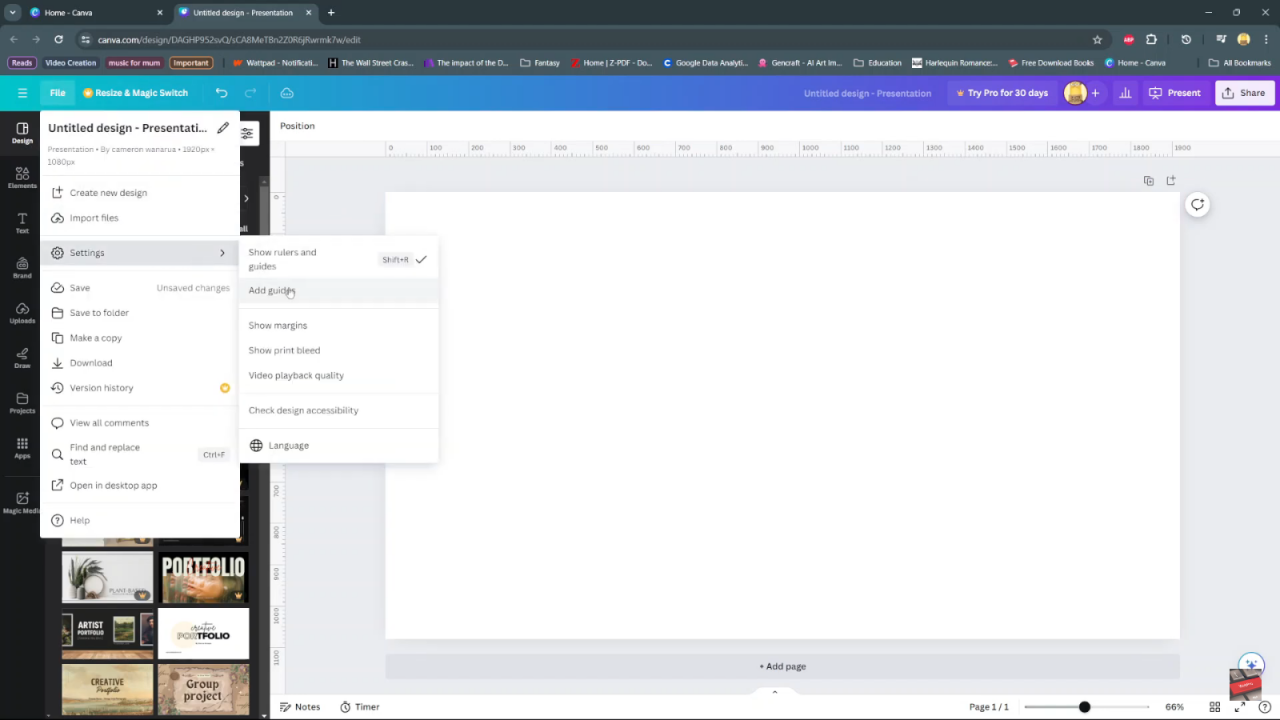
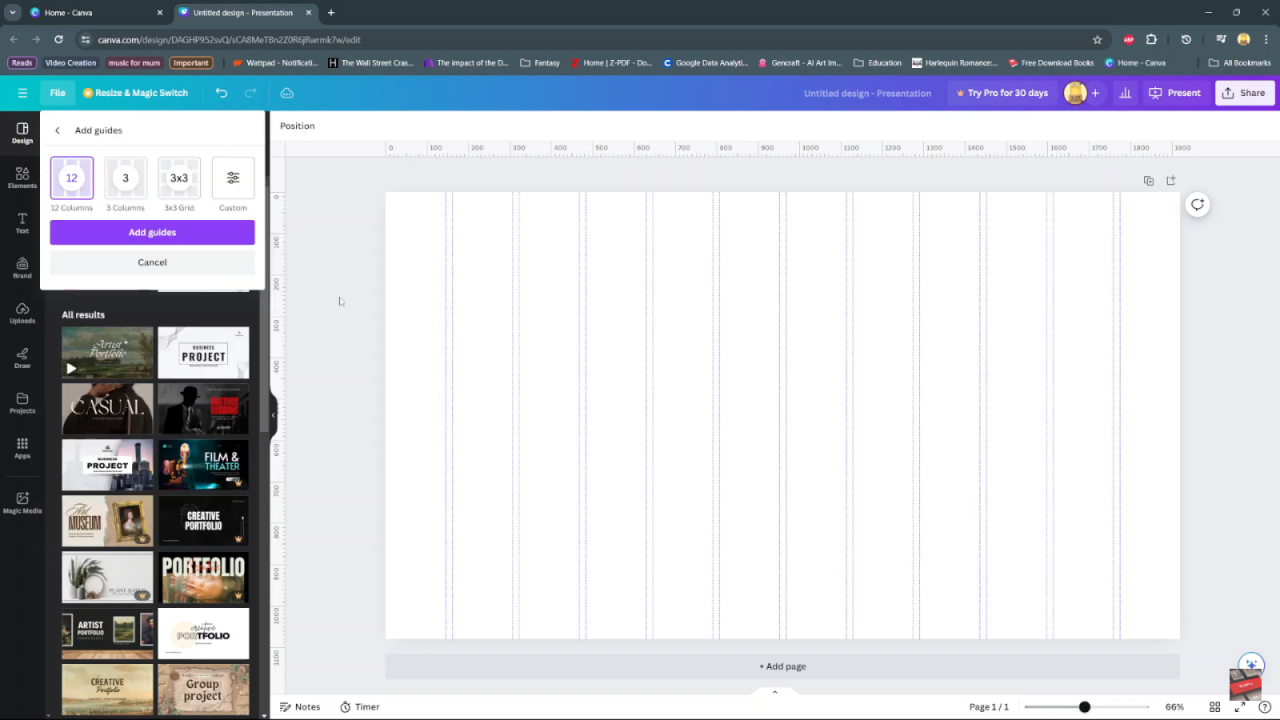
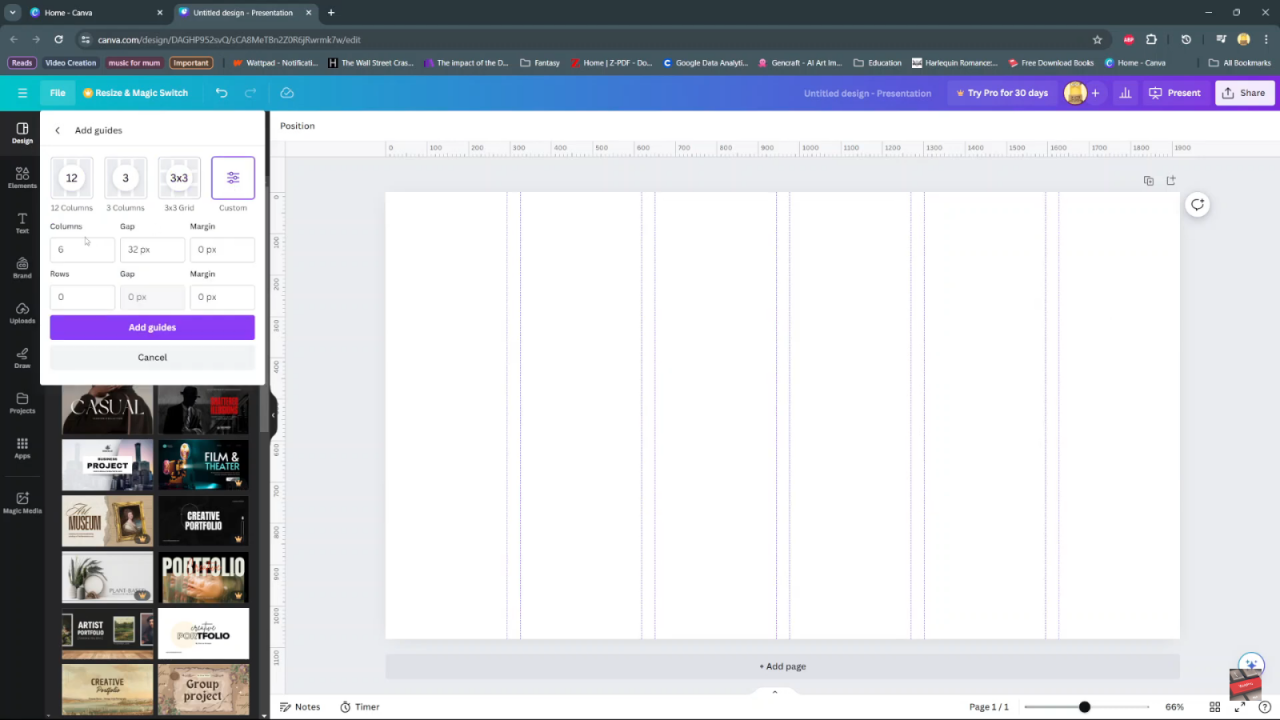
Step 4: Customize your columns and rows by specifying the number, spacing, and margins that best suit your design requirements. Canva allows you the flexibility to create custom layouts tailored precisely to your needs.
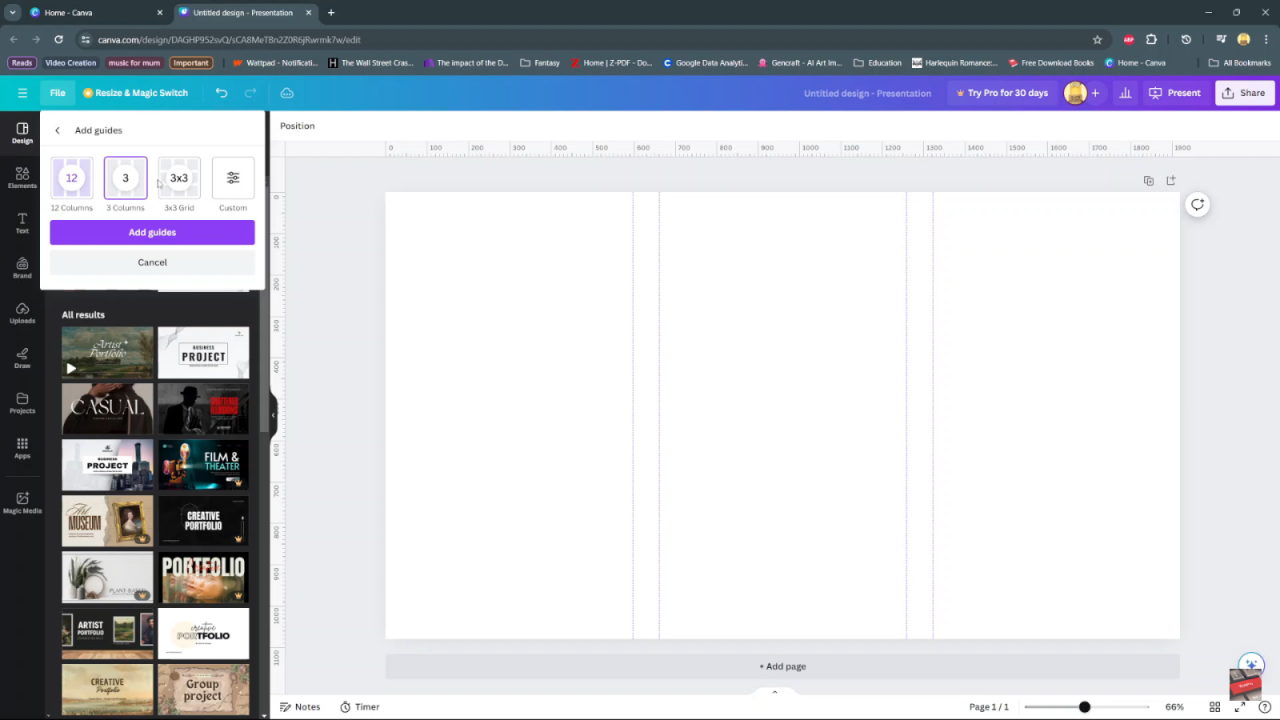
Step 5: Apply your customized columns and rows to your project by clicking on ‘Add guides,’ ensuring each element is placed precisely where intended.
Step 6: Maintain the integrity of your layout by preventing accidental movement of guides. Go back to ‘File’ ‘Settings’ and select ‘Lock guides’ to secure them in place during the editing process.
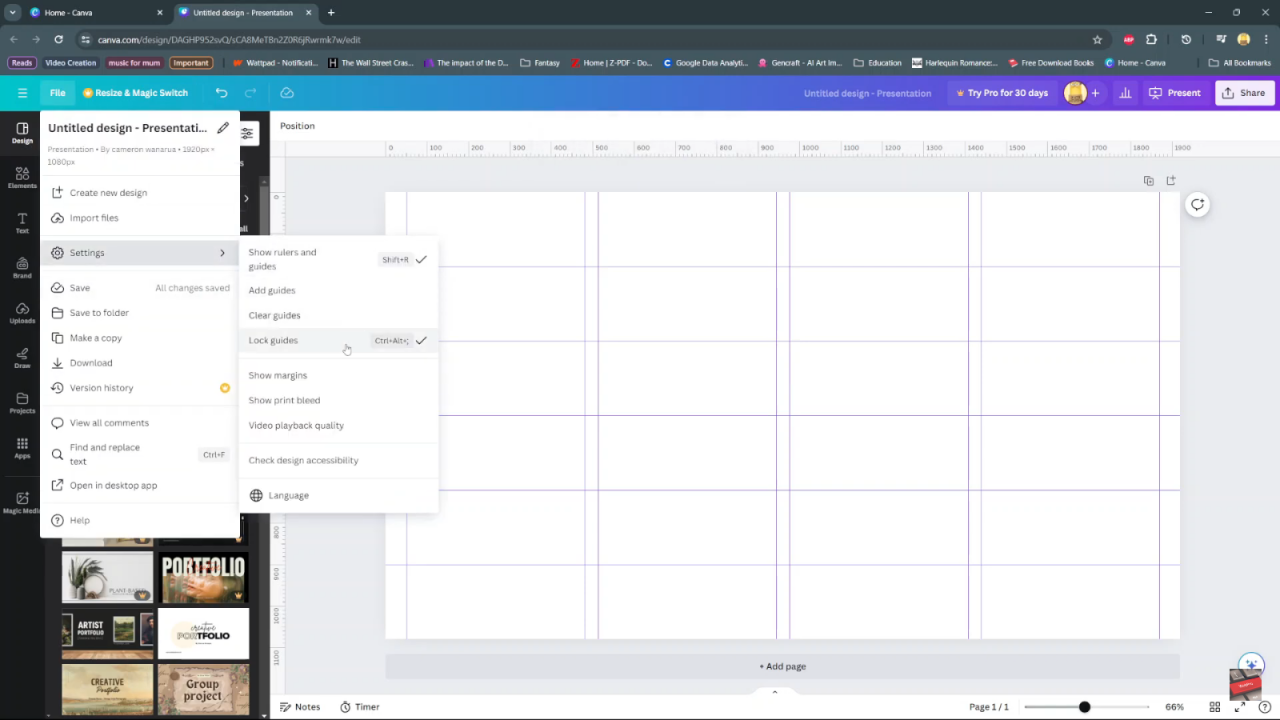
Step 7: If adjustments are needed or you wish to remove the guides entirely, simply navigate to ‘File’ ‘Settings’ again and choose ‘Clear guides’ to delete them from your project, providing a clean slate for further design modifications.
