The screen timeout or, better explained, the Auto-Lock period is the time your iPhone 11 takes to go into sleep mode, an essential feature on any device to save battery life and maintain privacy in case someone else uses your iPhone. But this setting might always not be suited to your needs.
Maybe you have read a very long article, or maybe you have set your phone up for something hands-free and it just ends up locking the screen too soon. You certainly do not want to keep your screen on all the time, as that unnecessarily kills the battery.
In the following tutorial, we are going to show you how to change the screen timeout period with ease on your iPhone 11, so that you will have full control over how your device operates.
Watch: How To Turn OFF Keyboard Sounds On iPhone 11
Change Screen Timeout Period On iPhone 11
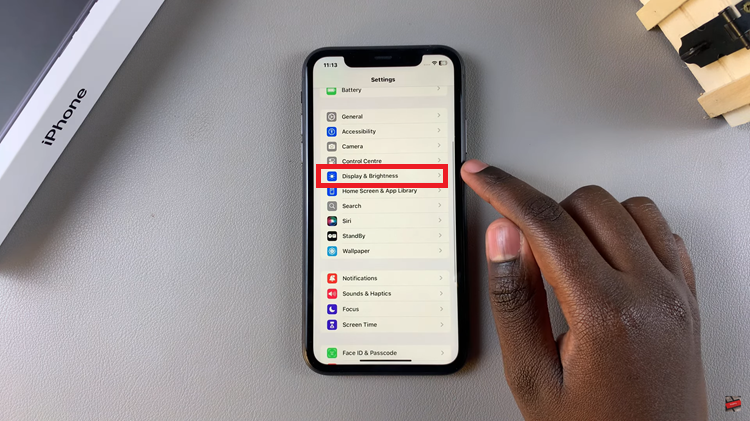
Firstly, locate and tap the “Settings” app, represented by a gear icon, typically found on your home screen. Now, scroll down the settings menu and look for the “Display & Brightness” option. Tap on it to proceed.

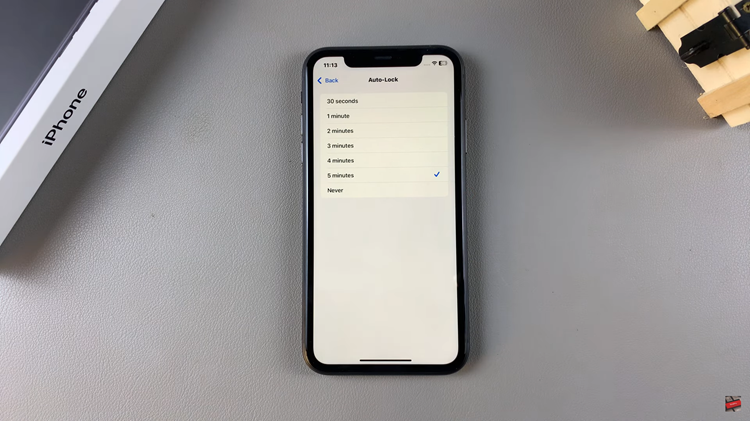
At this point, scroll down, find the “Auto Lock” option, and tap on it to proceed. Now, you’ll see a list of options ranging from 30 seconds to Never. Now, tap on the desired option and exit the settings page to apply the changes.

In conclusion, you can change how long it takes for the screen to time out, whether that’s longer to stay on or quicker to lock in an attempt to save power. Follow the steps above to learn how to customize this feature to suit your preferences.
Read: How To FIX ‘Attention Aware Features’ Greyed Out On iPhone 16/16 Pro

