Guided Access is a powerful feature on the iPad designed to help users focus by temporarily locking the device to a single app and controlling which features are accessible.
It’s especially helpful for anyone who needs to restrict the use of the iPad for specific purposes, such as limiting screen time or preventing accidental taps.
In this guide, we’ll walk you through the comprehensive step-by-step process on how to use Guided Access on the iPad.
Also Read: How To Find Serial Number Of Redmi Buds 6
How To Use Guided Access On iPad
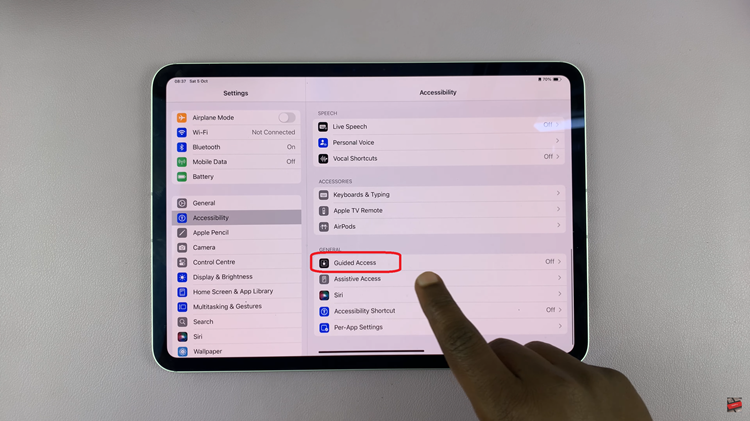
Start by opening the Settings app on your iPad. Once you’re in, scroll down and find the Accessibility option. Tap on it. In the Accessibility settings, continue scrolling until you see the Guided Access option. Tap on it to enter the Guided Access settings.
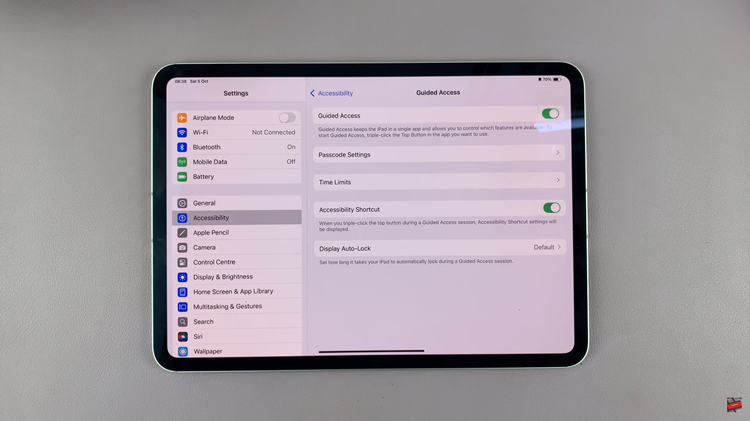
Here, toggle the switch next to Guided Access to turn the feature on. Once enabled, you can customize your experience further by adjusting time limits. You may also want to set up a Passcode Settings option within this menu, which allows you to specify a passcode or use Face ID/Touch ID to exit Guided Access.
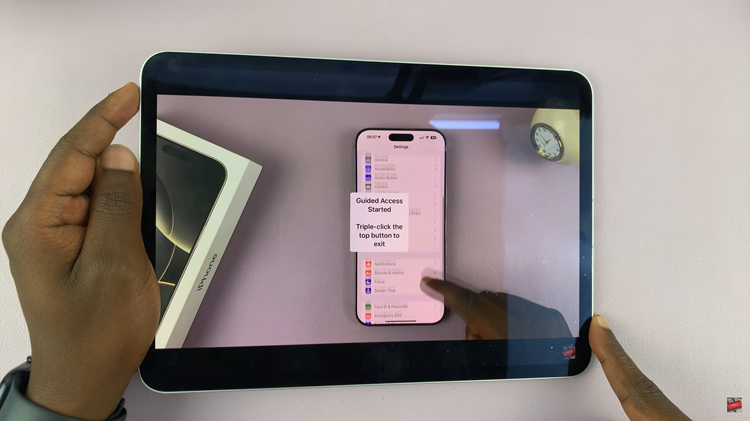
After setting everything up, it’s time to test it out. Exit the Settings app, then open any app of your choice. Once inside the app, triple-press the side button. A pop-up will appear confirming that you have entered Guided Access mode. The iPad will now be locked into this app.
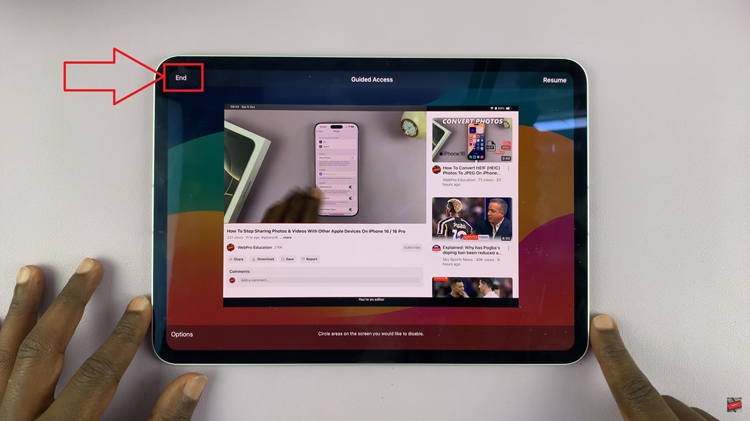
When you’re ready to exit Guided Access, triple-press the side (or home) button again. A passcode prompt will appear. Enter the Guided Access passcode (or use Face ID/Touch ID if enabled), and then tap on End in the top left corner of the screen. The session will immediately conclude.
Guided Access is a powerful tool that helps limit distractions on your iPad. This makes it ideal for both productivity and parental control. By following these steps, you can easily enable, customize, and use Guided Access to suit your needs, ensuring that you can stay focused or limit access to certain features when necessary.
