The iPhone 16 and iPhone 16 Pro brought a set of highly wanted upgrades to Apple devices: creative in-camera features. Of those, one game-changing tool has been Magic Eraser, photo editing capable of letting users remove unwanted objects or people from their photos with the utmost ease.
The Magic Eraser boasts cutting-edge machine learning to identify unwanted objects and intelligently merges the erased area into the background for a natural edit. However, to use this feature, you’ll need to download and install a third-party application: Google Photos.
In this tutorial, we are going to show you how to use the magic eraser tool on your iPhone 16 or 16 Pro. Let’s dive into the step-by-step process of how to use the tool effectively.
Watch: How To Use External SSD With iPad
Use Magic Eraser Tool On iPhone 16/16 Pro
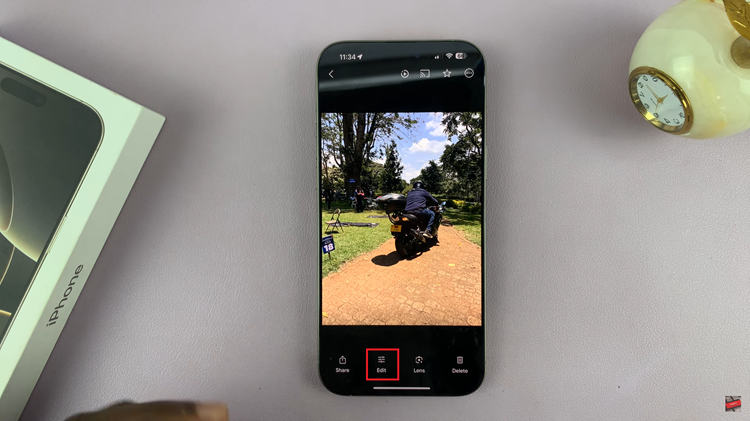
To get started, unlock your iPhone 16 and open the Google Photos app. However, if you don’t have the app installed, open the App Store and install it. Now, locate the photo you want to edit and tap on it to open it. Then, tap the “Edit” button at the bottom of the screen.

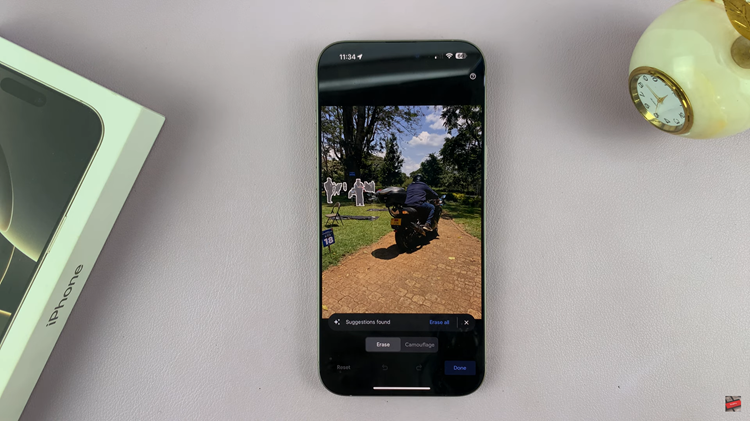
Following this, tap on the “Magic Eraser” option within the edit settings. Here, you’ll see suggestions of the objects that will be removed from the screen. Alternatively, you can manually circle the objects and they’ll be automatically removed.

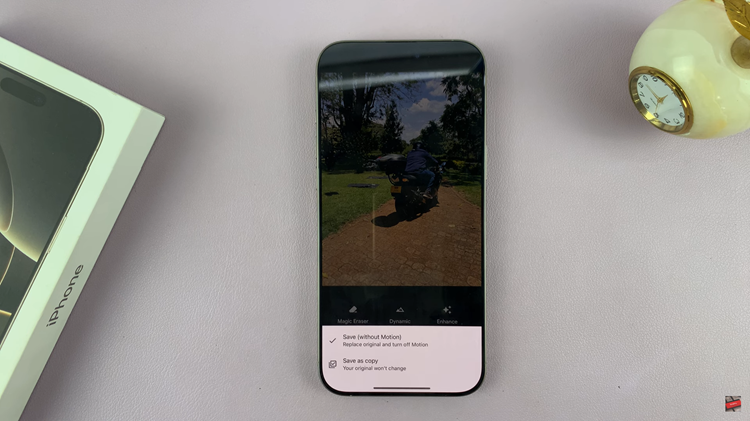
Once done, tap on “Done” then select “Save.” Finally, you’ll be prompted to either “Save As Copy” or “Save (without motion).” Choose the desired option and the changes will be applied.

In conclusion, the Magic Eraser tool of the iPhone 16 and iPhone 16 Pro could be great and fast for enhancing your photo by taking away distractions. And just with a few easy steps, you can turn your shots even into professional-looking, cleaner images. Happy editing!
Read: How To Enable/Disable Assistant Menu On Samsung Galaxy A06
