Upon the update to iOS 17, users were able to create custom stickers from photos. Until now, on iOS 18, users still have this capability, whether they want to liven up your iMessage conversations or create unique stickers for personal use.
In this guide, we’ll walk you through the steps to turn any photo into a sticker on iPhone 16 /16 Pro. Because iPhone 16 runs on iOS 18, this feature is still available to help you transform any of your favorite images from your photo library into a sticker.
You will not need any third-party apps to create fun and custom stickers on your iPhone 16. It is entirely native to any iPhone running at least iOS 17. These stickers can be used on iMessage, Photo Markup or to share with friends, directly from your photo gallery.
It’s possible to use a selfie, pet pic, or a cool design to turn any image into a unique sticker to use in iMessage, WhatsApp, Notes and more.
Read: How To Turn OFF Guided Access On iPhone 16
Turn Any Photo Into a Sticker On iPhone 16
Start by launching the Photos app on your iPhone 16 and find the image you wish to create a sticker from. Make sure the photo has a discernible subject.
Next, tap and hold on the subject you wish to use, then let go of it to reveal a couple of options. You will have the option to copy, add sticker or Share.
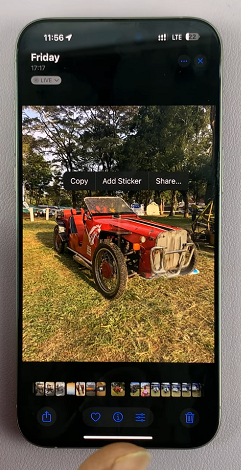
Copy: Select this option, then go to another app like the Notes or Messages app, and paste it there. In the Notes app, open a new note, then release the subject on it. On the Messages app, tap on the text box, then release the subject on it.
Add Sticker: Here, you will be able to add the image to your stickers collection. You will have the chance to add effects to it immediately, or delete it if you don’t like it.
Share: This option allows you to send the image without a background to various platforms, including Airdrop, Mail, Notes, Messages, WhatsApp and many more. You can also copy the image from here, as well as use the image for other options.
Select Add Sticker and wait for it to finish being made.
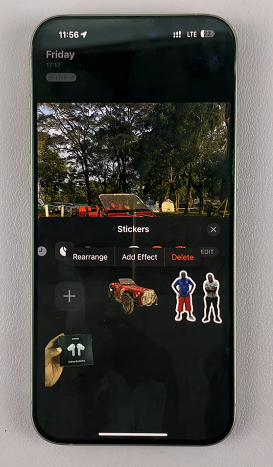
Now, you can go to whatever platform where you want to use it (iMessage, Notes, WhatsApp) and select the Stickers option. From the resulting content menu, select the custom stickers section (second option from the left).
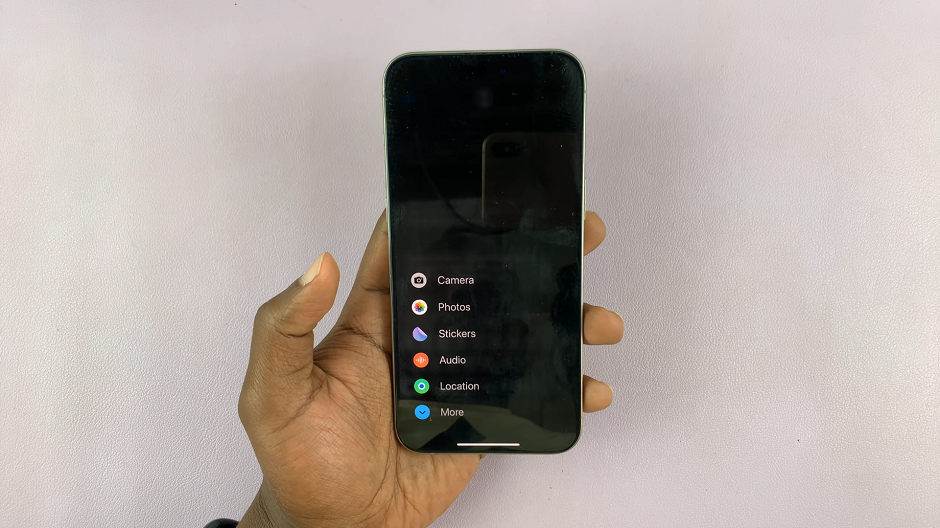
Here, you’ll find all your custom made stickers, that you can use at will.
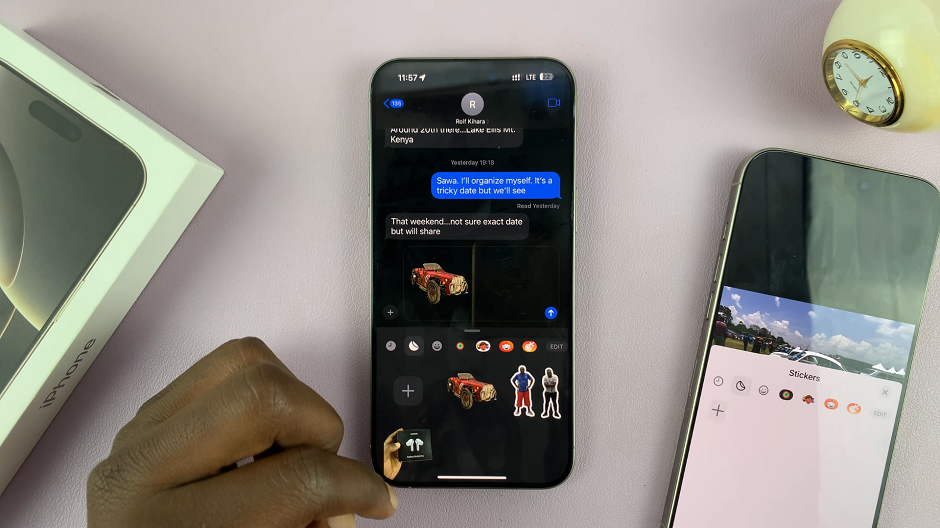
You can also use the stickers to create custom overlays on photos while you’re editing them. Simply open the photo and tap on the Edit icon in the bottom menu.
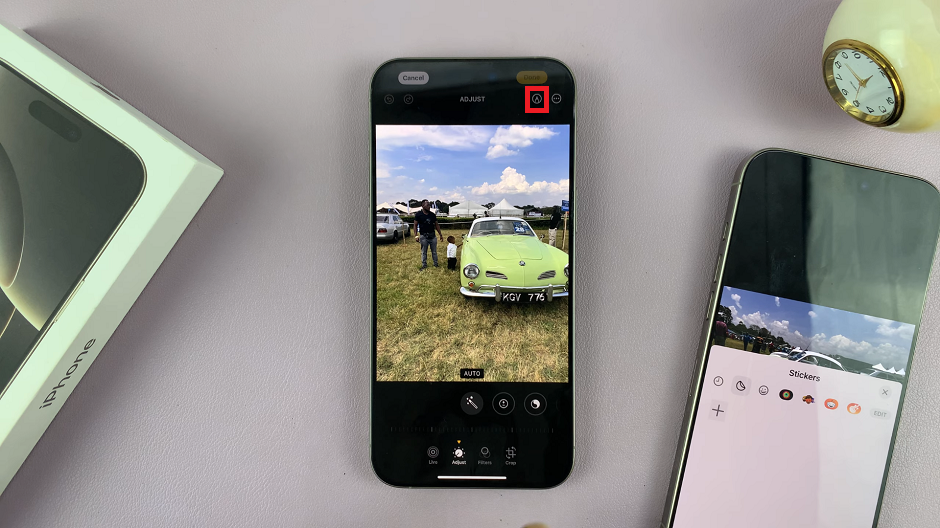
From the editing options, choose the Markup (pen icon) option at the top-right corner of the image. This will reveal a couple of options at the bottom of the page.
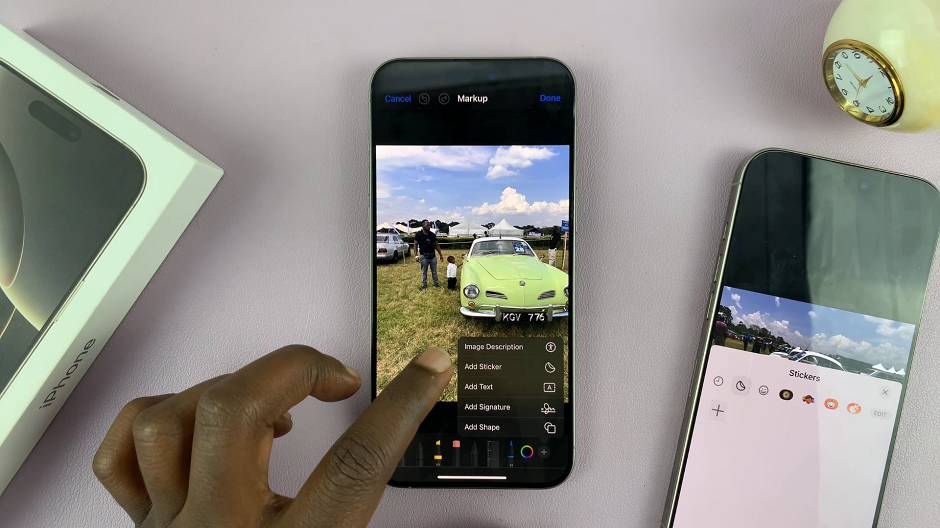
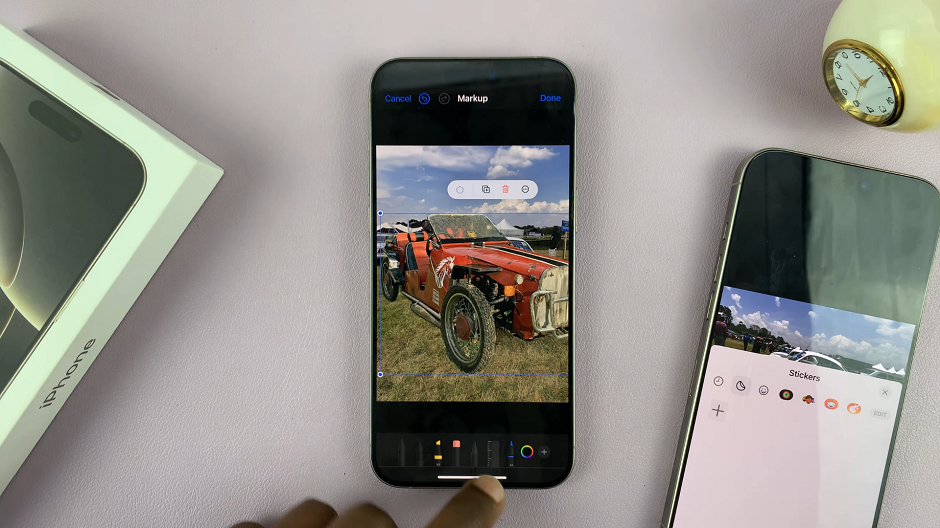
Tap on the + icon and select Add Sticker. The sticker will be added and you can now resize and format it, then tap on Done once you’re through.
Stickers from Live Photos
For an added layer of creativity, iPhone also allows you to create animated stickers from Live Photos. After selecting a Live Photo, follow the same steps to isolate the subject, and your sticker will retain the motion from the original Live Photo, making it dynamic when used in conversations.
