In the age of digital photography, the ability to capture and share images with ease is more important than ever. The iPhone 16 and 16 Pro, with their advanced camera systems, offer users the capability to take stunning photos in various formats.
While the default HEIC (High Efficiency Image Container) format is designed to save storage space and deliver high-quality images, many users still prefer the universally compatible JPEG format.
In this guide, we’ll walk you through the comprehensive step-by-step process on how to take JPEG photos on the iPhone 16 or 16 Pro
Also Read: How To Turn Live Photos To Videos On iPhone 16 / 16 Pro
How To Take JPEG Photos On iPhone 16 / 16 Pro
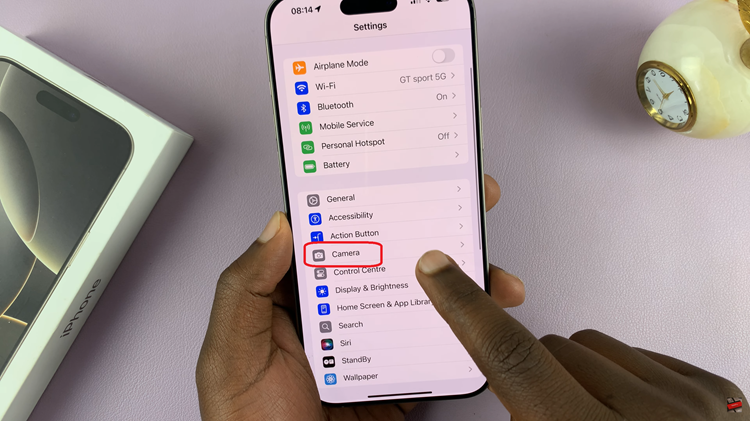
The first step in changing your photo format is to access the Settings app on your iPhone. Look for the gear icon on your home screen and tap to open it. Once inside the Settings app, scroll down until you find the “Camera” option.

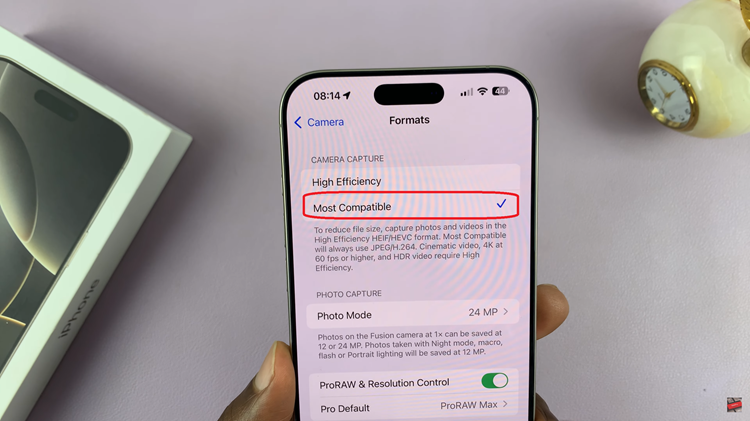
In the Camera settings, you will see a variety of features. Look for the “Formats” option and select it. Under the Formats menu, you will find two options: High Efficiency and Most Compatible. Tap on the “Most Compatible” option. This ensures that all your future photos are taken in JPEG format.

Changing your iPhone 16 or 16 Pro camera settings to take photos in JPEG format is a straightforward process. This simple adjustment not only enhances compatibility with various devices but also simplifies your photo management and sharing experience.
Watch: How To Permanently Turn OFF Live Photos On iPhone 16 / 16 Pro

