In the world of video production, storage space is a precious commodity. High-definition and 4K recordings can quickly fill up your device’s internal storage, causing workflow interruptions and frustration.
Luckily, the Final Cut Camera App allows users to record directly to external storage, providing a seamless and efficient solution for managing large video files.
In this article, we’ll walk you through the steps to set up and use external storage with the Final Cut Camera App, ensuring you never run out of space while capturing those crucial moments.
Why Record to External Storage?
Recording directly to external storage offers several benefits:
Increased Storage Capacity: External drives often have significantly more storage space than the internal memory of mobile devices, allowing for longer and higher-quality recordings.
Enhanced Performance: Offloading recording tasks to an external device can reduce the strain on your device’s internal storage, leading to smoother performance.
Better File Management: With recordings stored externally, transferring and organizing files becomes more straightforward, especially when working across multiple devices.
Read: How To Hide Specific App Notifications From Notification Center On iPad
Record To External Storage In Final Cut Camera App
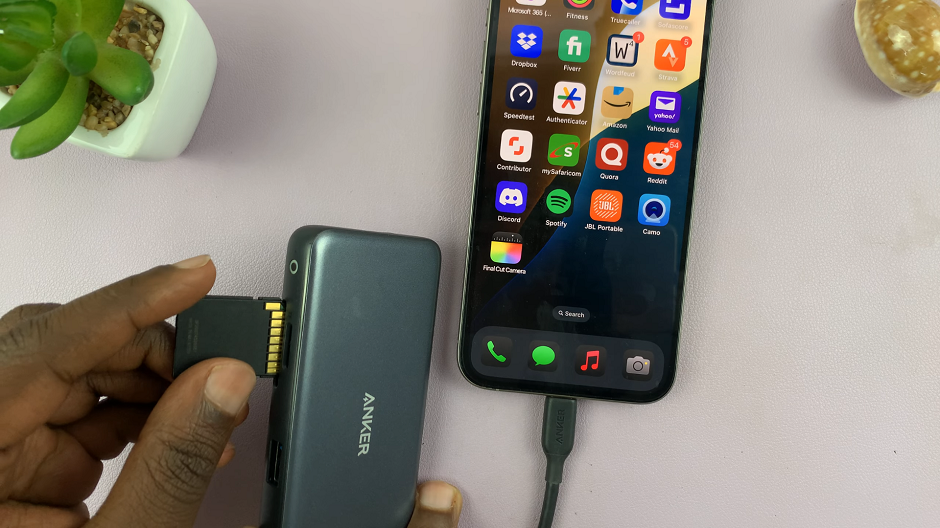
First, connect your adapter to your iPhone. You can use any adapter, that connects the type-C cable to the port on your iPhone. Use the appropriate cable and adapters to ensure a secure connection. You can an adapter from Anker, or any other one that can serve the purpose.
Anker USB-C Hub, 555 USB-C Hub (8-in-1): https://amzn.to/3WK0o66
USB 3.1 to Type-C OTG Adapter: https://amzn.to/3NS9Gc7

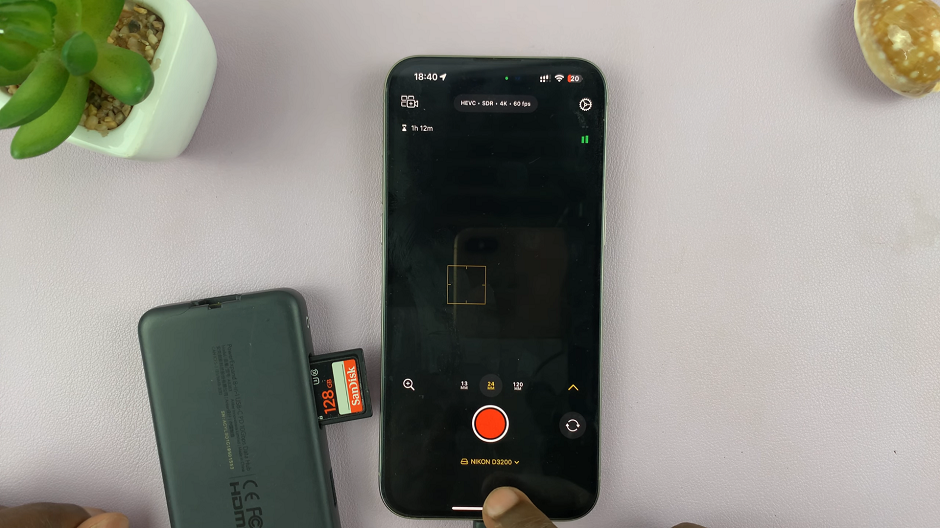
Next, connect your external storage device to the adapter. You can use an SD Card, microSD card, flash drive or external Hard drive. Wait for the external storage device to be detected.

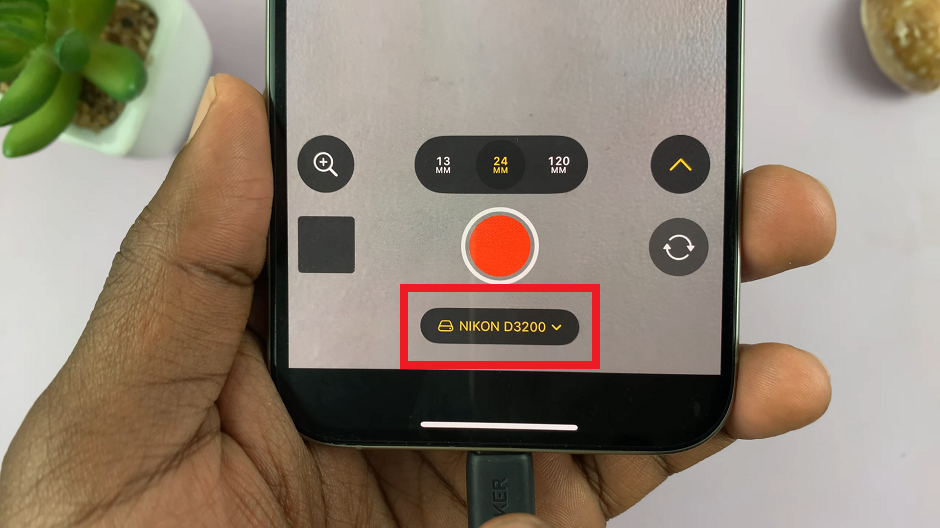
Open the Final Cut Camera App on your device. Upon successful detection, you should see your connected external storage device at the bottom of the screen, below the record button..

With your external storage device selected, you’re ready to start recording. The Final Cut Camera App will now save all video files directly to the external storage, freeing up your device’s internal memory.
To verify the setup, record a short video, then check the external storage device to ensure the video file is saved there.
Recording Tips
To make the most of recording to external storage, keep these tips in mind:
Check Storage Space: Regularly monitor the available space on your external storage to avoid running out during important recordings.
Keep Backup Copies: Periodically back up your recordings to another storage device or cloud service to prevent data loss.
Label and Organize Files: Develop a consistent naming and organizational system for your files to make editing and locating footage easier.
Troubleshooting Common Issues
Connection Problems: Ensure all cables and adapters are securely connected. If the app does not recognize the external storage, try disconnecting and reconnecting the device.
Storage Recognition: If your external storage is not recognized, check for compatibility issues and ensure the device is formatted correctly (e.g., exFAT for cross-platform compatibility).
Performance Issues: If you experience lag or other performance issues, consider using a faster SSD or freeing up space on your external storage.
Recording directly to external storage using the Final Cut Camera App is a practical solution for managing large video files and maintaining optimal device performance. By following the steps outlined in this guide, you can easily set up your device to record to external storage, ensuring a smoother and more efficient video production workflow.
Watch: OnePlus Watch 2: How To Turn ON DO Not Disturb Mode | Enable DND

