Getting the right date and time on your iPad is key for staying organized. First, accurate time settings help keep your appointments, reminders, and notifications in check. By making sure your iPad’s date and time are correct, you’ll avoid any mix-ups and keep everything running smoothly.
In addition, adjusting these settings is a straightforward task that can make a big difference. Whether you need to update the time zone or set it manually, getting these details right will help your iPad stay in sync with your schedule and local time zone, making your daily tasks a bit easier.
Watch:How To Enable ‘Listen To Page’ In Safari Browser On iPad
Change Date & Time On iPad
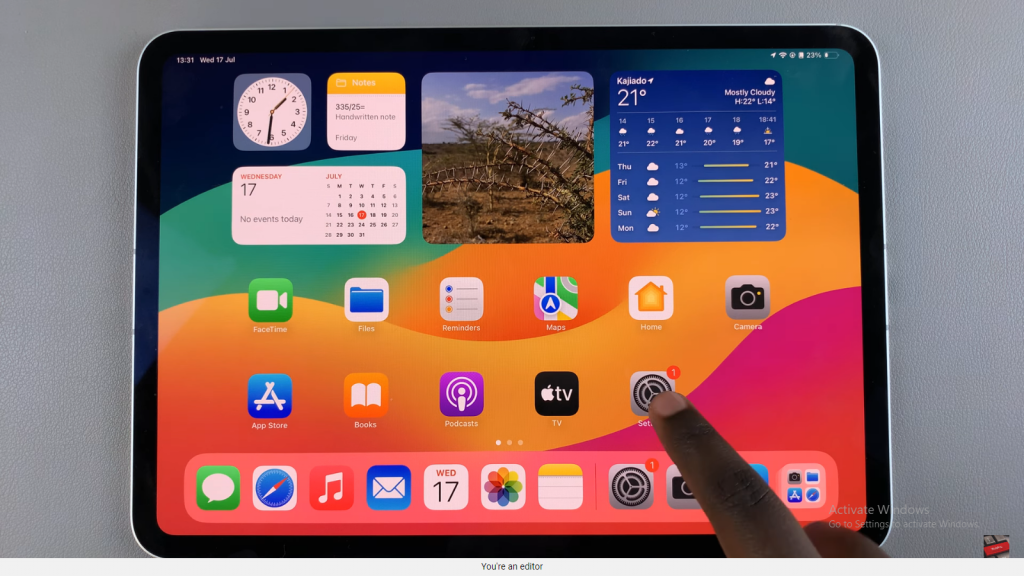
Open the Settings App
Begin by launching the Settings app on your iPad.
Navigate to General Settings
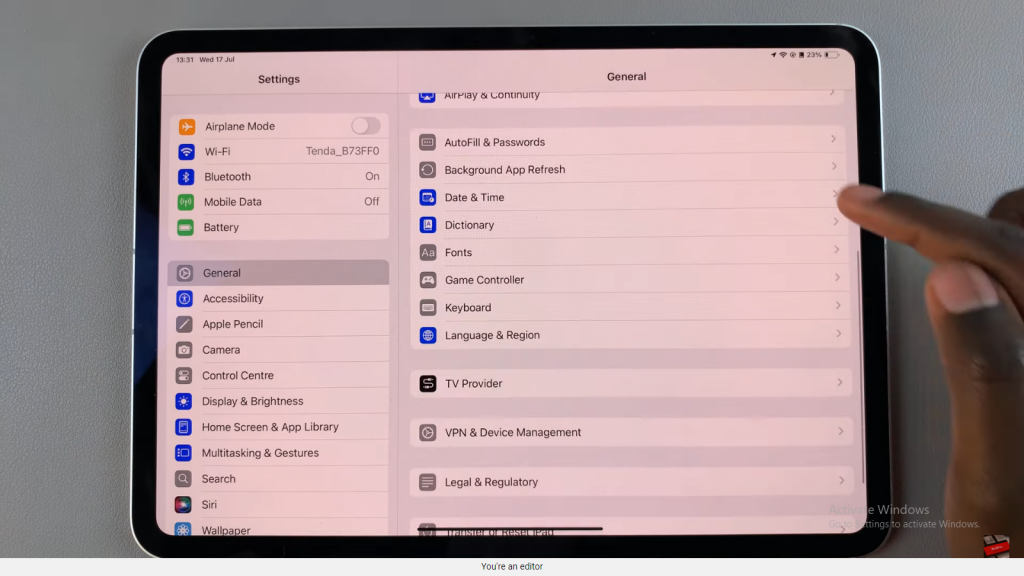
Scroll down and select “General.”
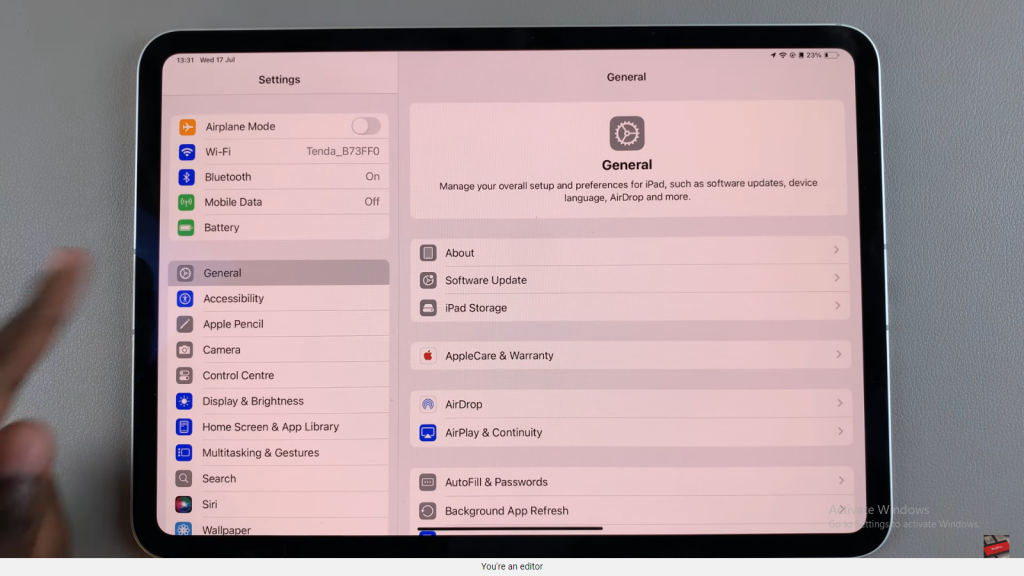
Access Date & Time Settings
Tap on “Date & Time.”
Check Current Settings
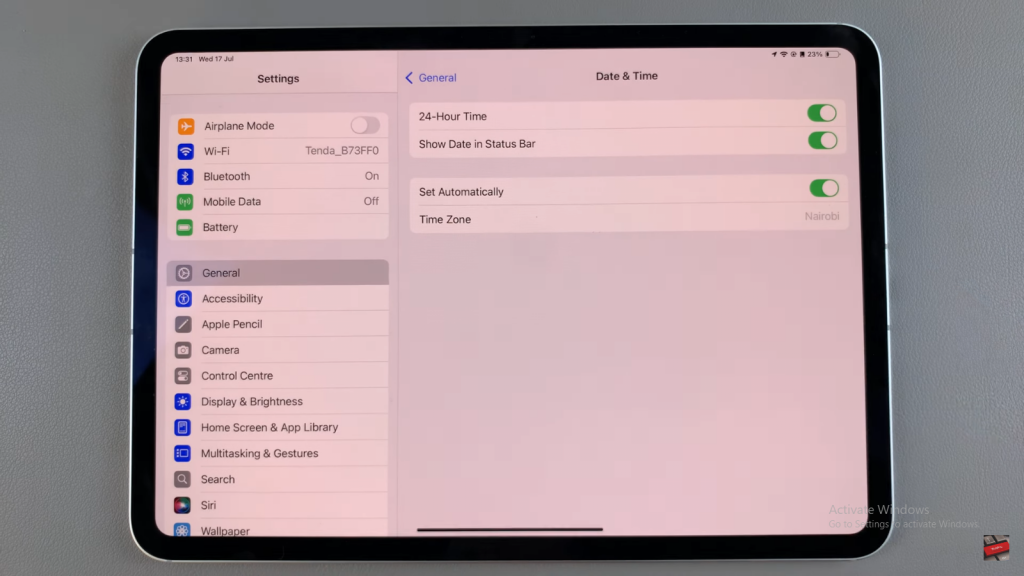
Here, you’ll see options like “Set Automatically” and “Time Zone.” If “Set Automatically” is enabled, your iPad adjusts the time and date based on your location.
Disable Automatic Settings (if needed)
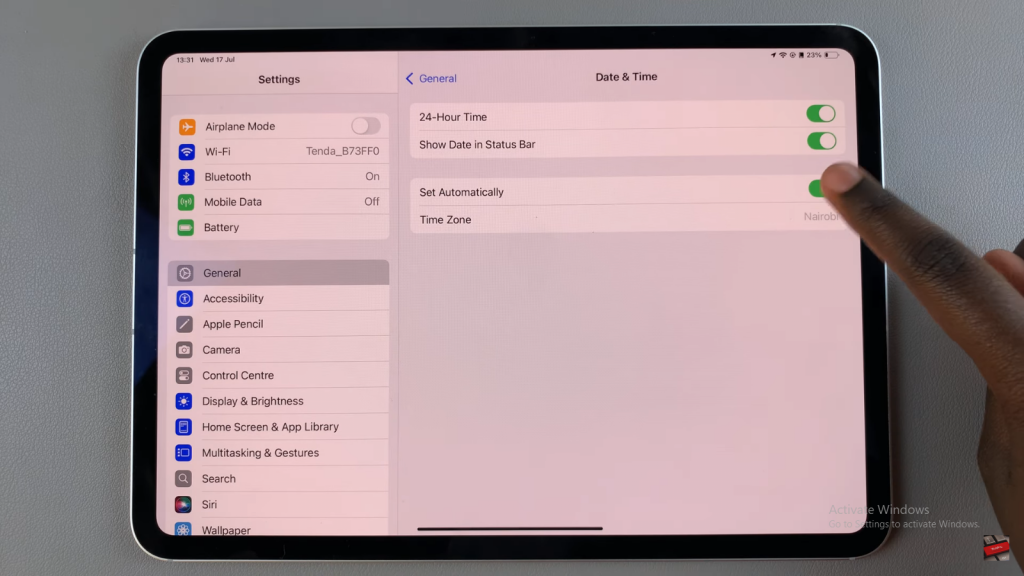
To set the date and time manually, turn off “Set Automatically.”
Customize the Date and Time
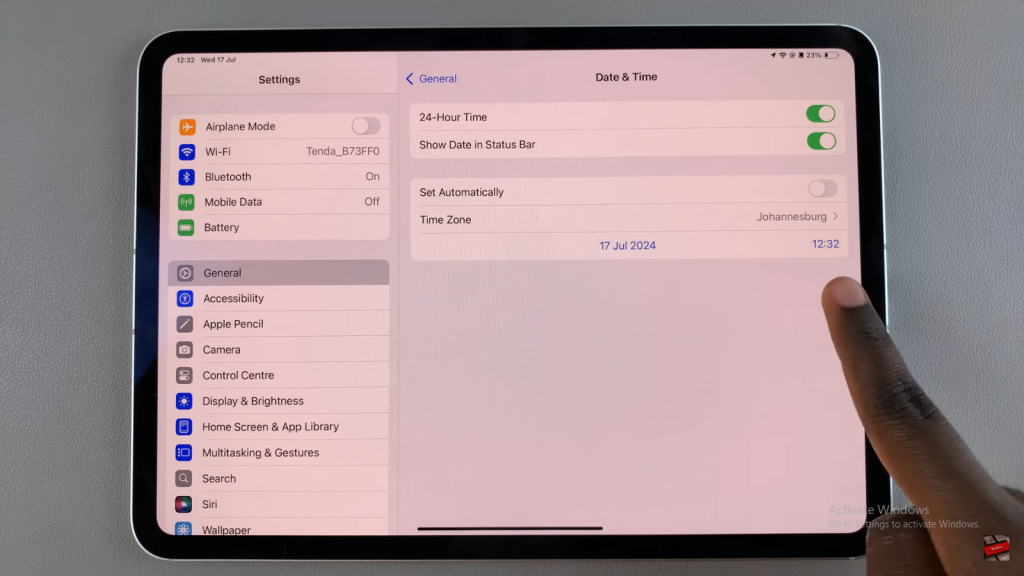
With “Set Automatically” disabled, you can adjust the time and date manually.
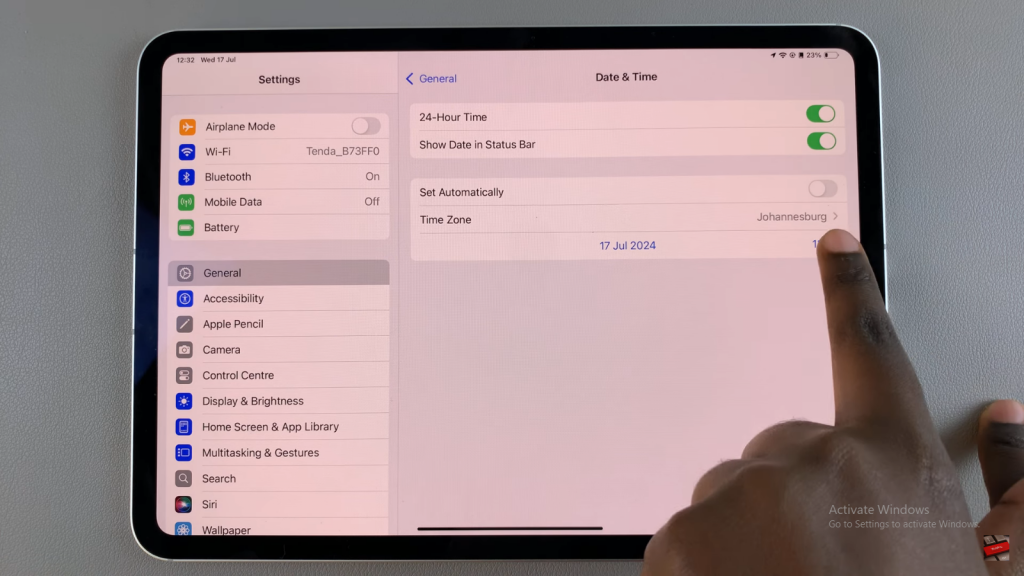
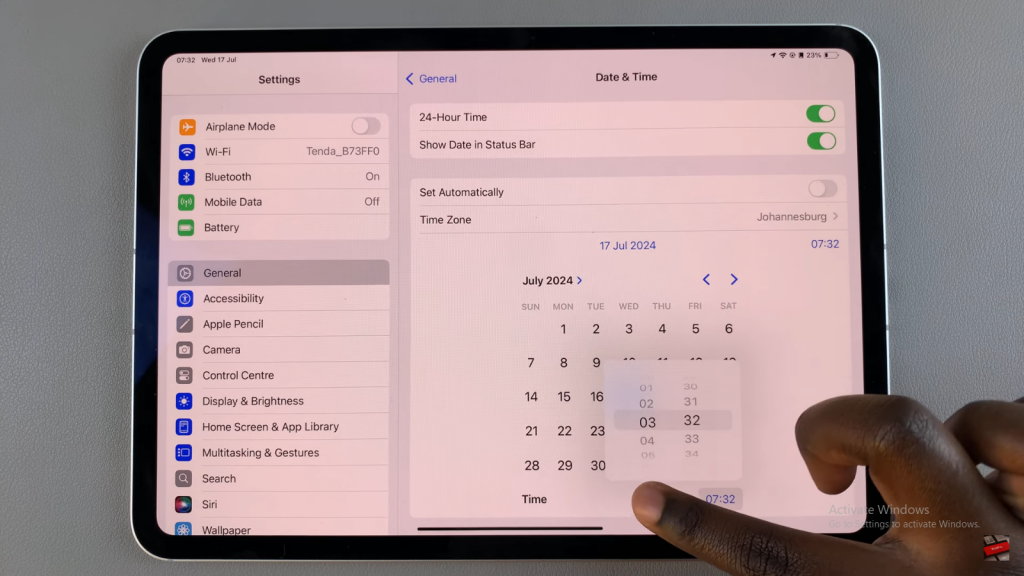
Adjust the Time
Tap the current time displayed and use the scrolling wheel to set your preferred time.
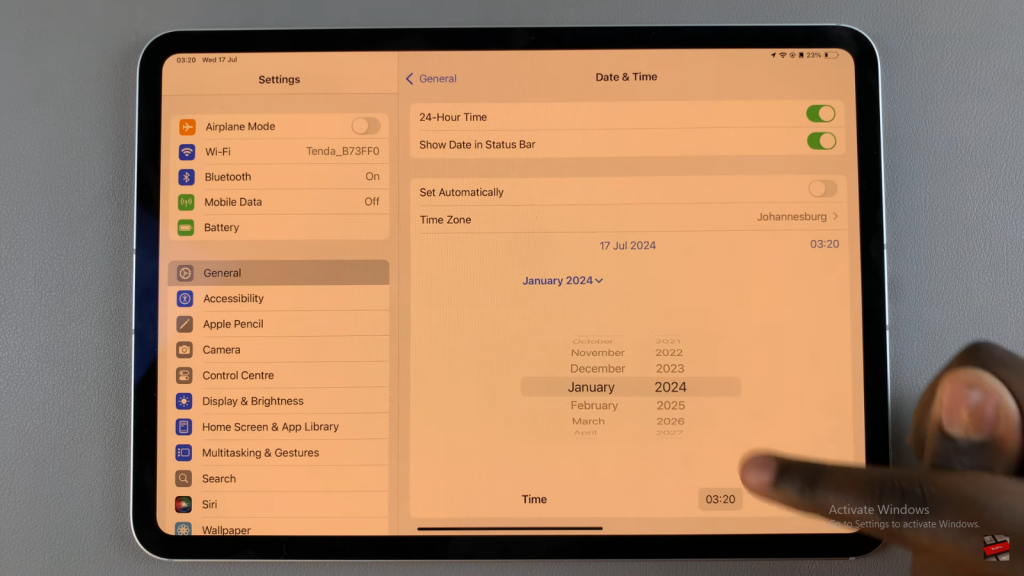
Adjust the Date
Tap the date display and use the calendar interface to select the desired date.
Read:How To Enable ‘Listen To Page’ In Safari Browser On iPad
