Removing your Apple ID from an iPhone can be an essential step whether you’re selling your device, switching to a new account, or troubleshooting issues.
This guide provides a detailed walkthrough of the process, ensuring that you maintain your data security while preparing your iPhone for its next chapter.
There are several reasons you might want to remove your Apple ID from your iPhone:
Selling or Gifting Your Device: Clearing your Apple ID ensures the new owner can set up the device without complications.
Switching Accounts: If you want to use a different Apple ID, removing the old one is necessary.
Troubleshooting: Sometimes, issues related to syncing or iCloud services require a fresh start.
Privacy Concerns: Ensuring your personal data is removed from the device can be crucial when handing it over.
Watch: Save Audio Messages To Voice Memos On iPhone
Important Preparations
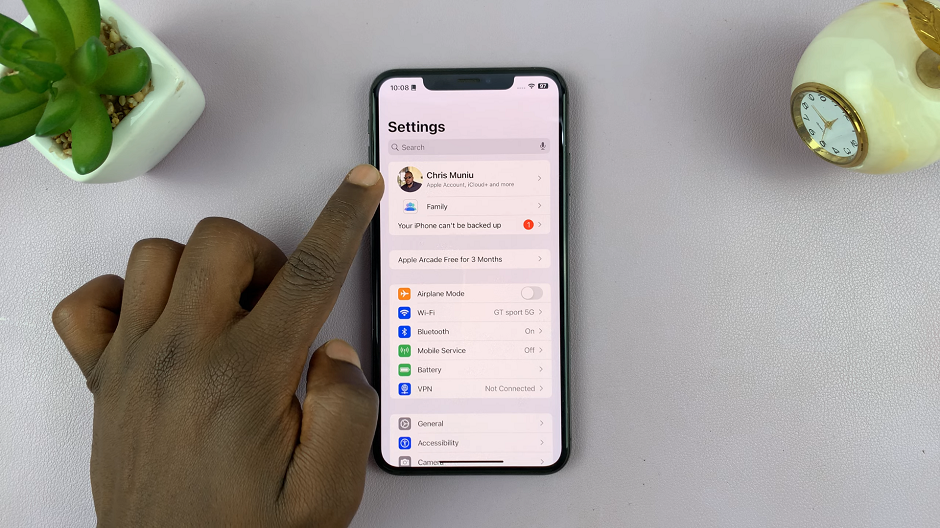
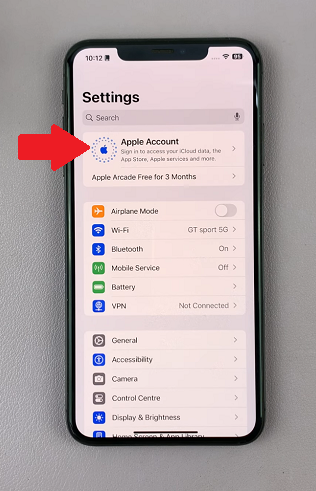
Start by launching the Settings app on your iPhone. At the top of the Settings menu, tap on your name to access your Apple ID settings.
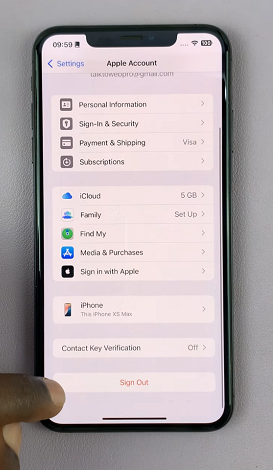
Before you sin out of the Apple Account, ensure you back up your data. Simply tap on iCloud, select iCloud Backup and choose Back Up Now.
Remove Apple ID (Account) From iPhone
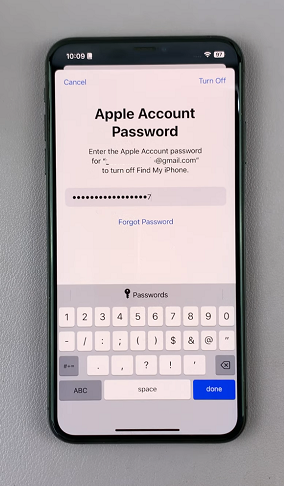
After the backup is complete, go back to the Apple ID settings, scroll to the bottom and select Sign Out. You will be prompted to enter your Apple ID password to disable Find My iPhone. Enter it and tap on Turn Off in the top-right corner.
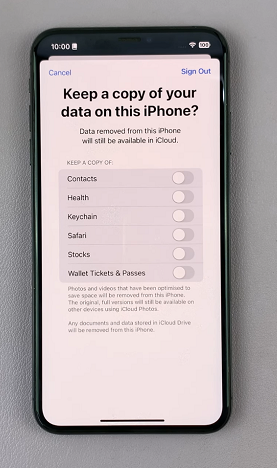
Your iPhone will ask which data (like Contacts, Health, Keychain, Safari, Stocks and Wallet Tickets & Passes) you’d like to keep on the device. Select the items that are important to you. This data will remain on your iPhone even after you sign out. Leave the toggles of if you prefer not to keep the data on the device.
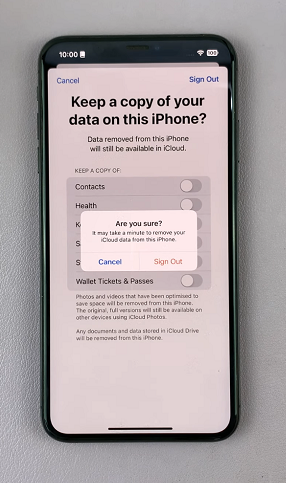
Tap on Sign Out in the top-right corner, then confirm your choice by selecting Sign Out again from the pop-up. Once you confirm, the iPhone will begin the process of removing your Apple ID. This might take a few moments.
Once you’re signed out, go back to the main Settings menu.
Read: How To Save Audio (Voice) Messages To Voice Memos On iPhone


 From iPhone)