Capturing high-quality videos on your iPad is a breeze, especially when you have the power to control the video resolution and frame rate. By setting or changing the default video resolution and frame rate, you can customize your recording preferences and optimize your videos for specific purposes or devices.
In this article, we will guide you through the steps to set and change the default video resolution and frame rate on your iPad. With a few simple steps, you’ll be able to navigate the settings and modify your video recording settings to suit your needs.
Whether you’re a casual videographer or a content creator, mastering these settings will empower you to capture videos that meet your specific requirements.
Watch: How To Turn ON Low Power Mode Automatically On iPad
Change Default Video Resolution & Frame Rate On iPad
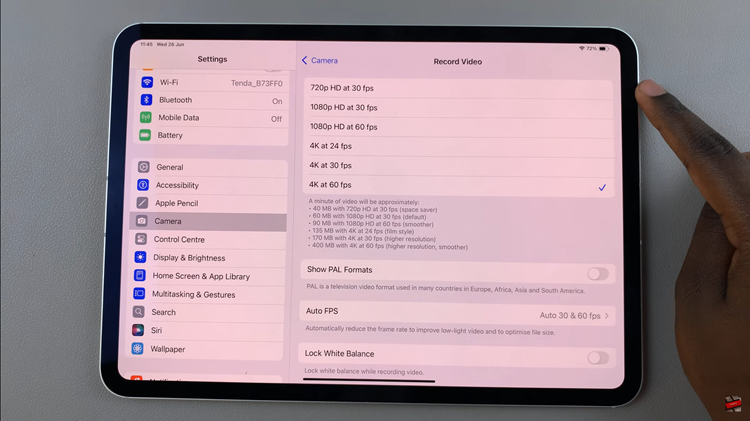
Begin by unlocking your iPad and accessing the home screen. Then, tap on Settings to open the settings menu, where you can customize various features of your device. Scroll down through the options until you find and select the Camera option from the list.
Inside the Camera settings, find and tap on the Record Video option. This will display various resolution choices tailored to different preferences and needs. You can opt for high-definition resolutions like 4K at 30 fps or 4K at 60 fps for sharper details and clarity.

After selecting your desired resolution, exit the Settings app to save your preferences. Your iPad will now automatically record videos at the chosen resolution unless you adjust it manually during a recording session.
By following these steps, you can easily customize and adjust the default video resolution and frame rate (FPS) on your iPad, ensuring your recordings meet your specific quality and performance requirements.

