Suppose your Mac started acting a little slower or you are getting notifications about low storage space. If any of these applies, it’s time for a space-check on the machine. How to check an available storage space on your Mac is crucial on maintaining how well your Mac performs and how much space remains to receive new files, applications, and system updates.
Regardless of whether you are using a MacBook or iMac, or Mac Mini, macOS usually has a built-in method which makes monitoring your storage utilization very easy. With this article, we will guide you on how you are supposed to check storage on a Mac, what type of files can occupy space, and help you out on clearing out unnecessary data.
This guide will be able to help you in keeping your Mac running efficiently. Now, let’s dive in!
Watch: How To Disable Sleep Mode On Mac
Check Storage Space On Mac
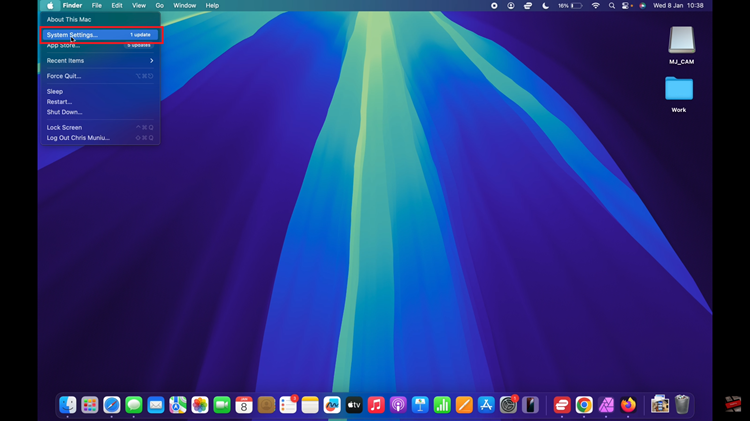
Begin by accessing the settings on your Mac. To do this, click on the Apple icon located at the menu bar (top left corner) and click on ‘System Settings‘ from the menu that appears. Alternatively, click on the ‘Settings‘ app in the app dock.

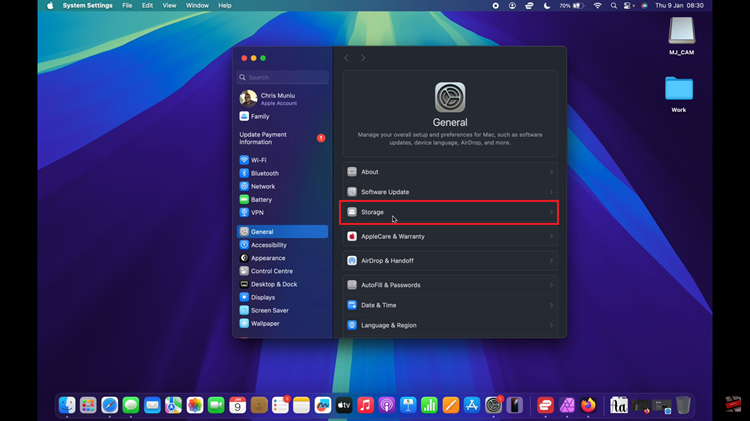
Following this, you’ll be taken to the ‘General‘ option by default. However, in case you dont, simply scroll through the left side menu, find the General option and click on it. Within the general settings, click on the ‘Storage‘ option.

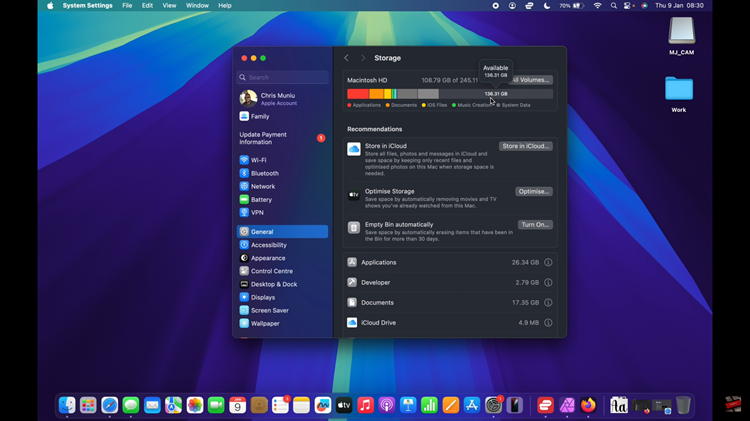
At this point, you’ll see how your storage is distributed accross your Mac. You can check the capacity occupied by apps, music, system apps, and the available storage space. Additionally, you can scroll down and see a list of how the storage is distributed. Here, you can decide to free up space and monitor your storage space to suit your needs.

In conclusion, regularly checking your Mac’s storage space is a simple yet essential task to ensure your system runs efficiently. By following the steps outlined in this guide, you can easily monitor your available storage, identify what’s taking up space, and take action to optimize your storage.

