If you’re using a Mac, you might have noticed that the default scrolling direction feels a bit different compared to other operating systems. Apple uses a feature called Natural Scrolling, which simulates the touch-based scrolling experience found on devices like the iPhone or iPad.
While some users find this intuitive, others prefer the traditional scrolling method. Fortunately, macOS allows you to easily customize the scrolling direction to suit your preference.
In this guide, we’ll walk you through the comprehensive step-by-step process on how to change the scrolling direction on a Mac.
Also Read: How To Install VLC Media Player On Mac
How To Change Scrolling Direction On Mac
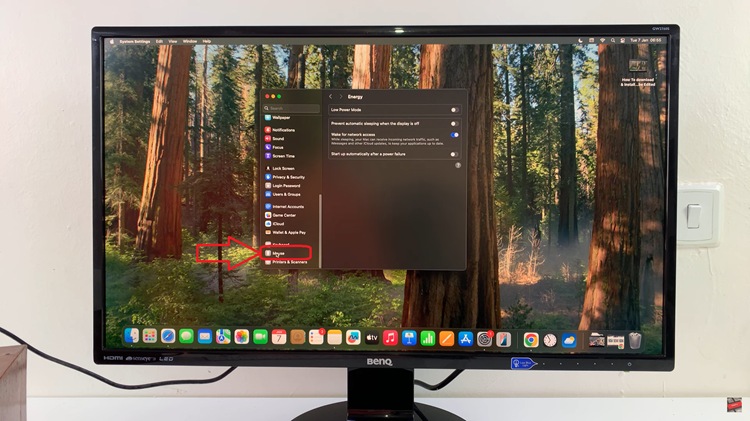
To begin, locate the Settings app on your Mac. You can find it in your Dock or by searching for it using Spotlight (press Command + Space and type “Settings“). Once opened, scroll through the list of options to find and select Mouse.

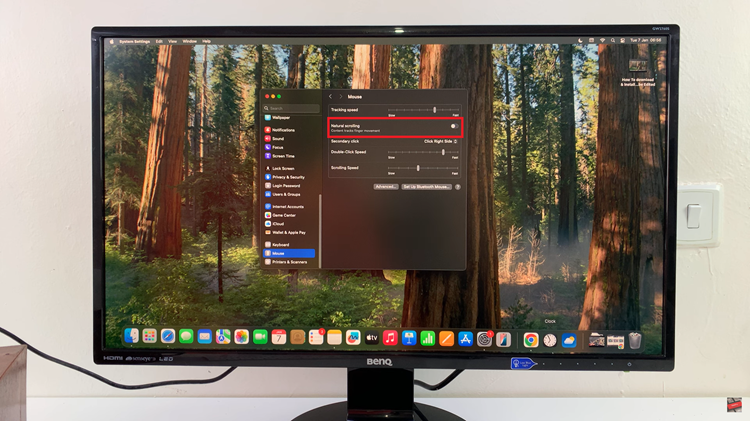
Within the Mouse settings, you’ll see a section called Natural Scrolling. When Natural Scrolling is turned on, the scroll direction will moves in the direction of your finger. If you prefer the traditional scrolling behavior, simply toggle the switch to turn off Natural Scrolling, and the direction will revert to the conventional method where you scroll the opposite way of your finger swipe.

Once you’ve made your selection, you can test the new scrolling direction by simply scrolling through any page or app. If it doesn’t feel quite right, you can always return to the settings and adjust it again. By following these simple steps, you can quickly switch between the natural scrolling direction and the traditional one on your Mac.

