In today’s world, professional audio is required for everything. In case you have a Chromebook and want to improve the quality of your audio, look no further than the Hollyland Lark M2 Wireless Microphone.
Whether you’re a content creator, educator, or simply need better audio for video calls, this microphone delivers professional-grade performance in a compact and easy-to-use package.
In this guide, we’ll walk you through the comprehensive step-by-step process on how to connect the Hollyland Lark M2 wireless microphone to Chromebook.
Also Read: How To Screen Mirror Android Phone To Google TV Streamer 4K
How To Connect Hollyland Lark M2 Wireless Microphone To Chromebook
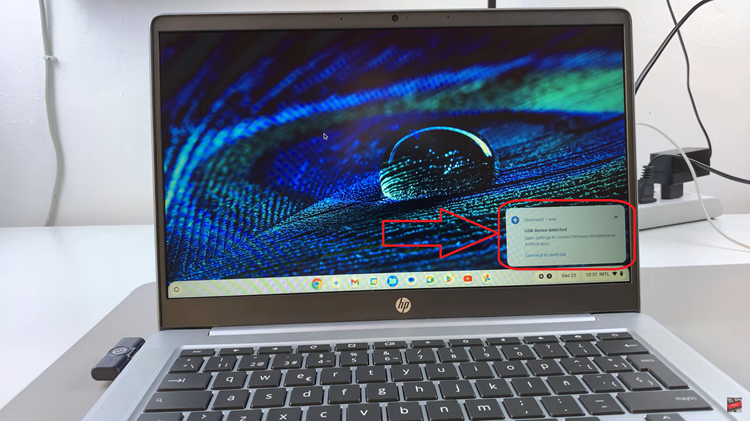
The first step is to connect the receiver of the Hollyland Lark M2 to your Chromebook. Take the receiver and plug it into the USB-C port of your Chromebook. Once properly connected, you should receive a notification that a USB device has been successfully detected and connected to your device.
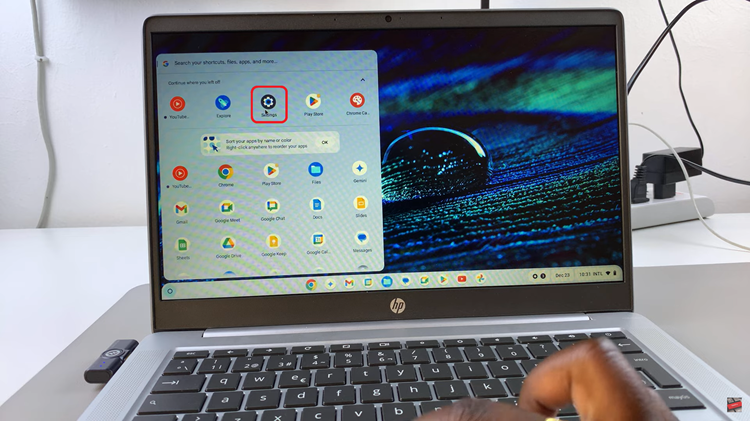
Next, you’ll need to ensure that the microphone is correctly recognized. To do this, click on the time in the bottom-right corner of your screen to access the apps screen, then select the “Settings” gear icon to open the Settings app.
Within the Settings menu, look for the “Device” section on the left sidebar. Click on “Device,” and then select “Audio.” In the Audio settings, locate the “Input” section. Here, you’ll see the “Microphone” dropdown menu. Click on the dropdown arrow, and select “Wireless Microphone” as your input device.
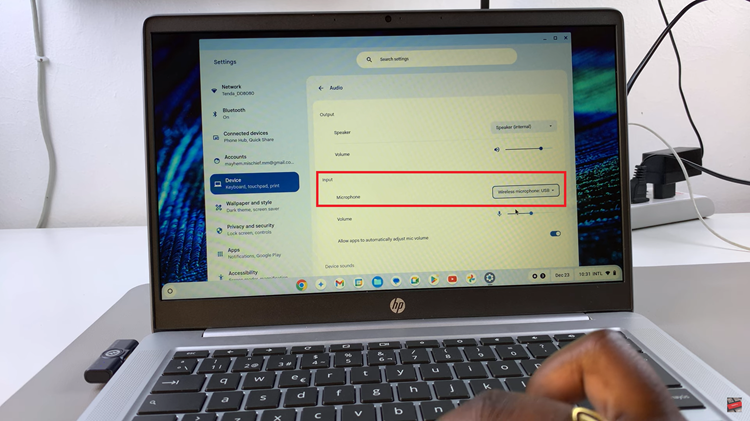
Once you’ve selected the Lark M2 as your microphone, you’re ready to go! Your Chromebook will now use the Hollyland Lark M2 wireless microphone for audio input. Whether you’re recording videos, making video calls, or streaming, you can now enjoy high-quality, clear audio with ease.
