Generally, the Logitech MX Master 3S has been widely regarded as one of the best productivity mouse, packed with various features aimed at enhancing workflow, comfort, and efficiency. Among its several striking features, there’s one on the sidewall known as the Thumb Wheel.
This wheel could be personalized for different functionality, hence granting greater control and preciseness when working your way through a task. Be it for horizontal scrolling, switching between applications, or even controlling particular software, managing the Thumb Wheel function effectively can make all the difference in how you interact with your computer.
Below are the steps on how to customize the thumb wheel function on Logitech MX Master 3S. Let’s get started!
Watch: How To Change Scroll Wheel Direction On Logitech MX Master 3S
Customize Thumb Wheel Function On Logitech MX Master 3S
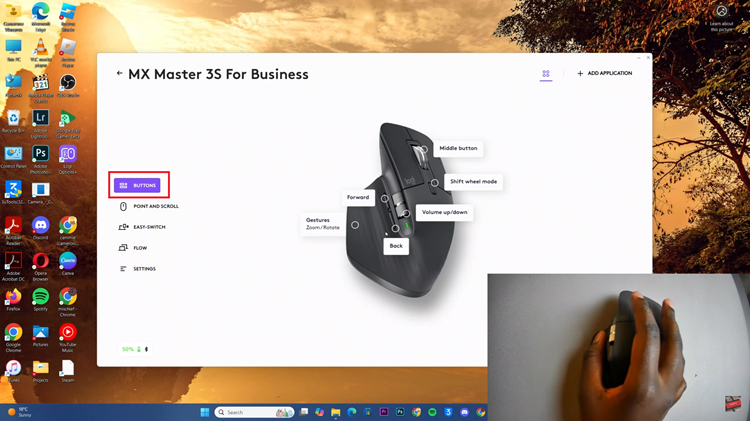
Beforehand, you’ll need to install the ‘Logi Options+ App‘ on your PC. Head to the Logitech software download site and install the software. Once installed, launch the app and select your mouse on the home page. Then, click on the ‘Buttons‘ option from the menu that appears to proceed.

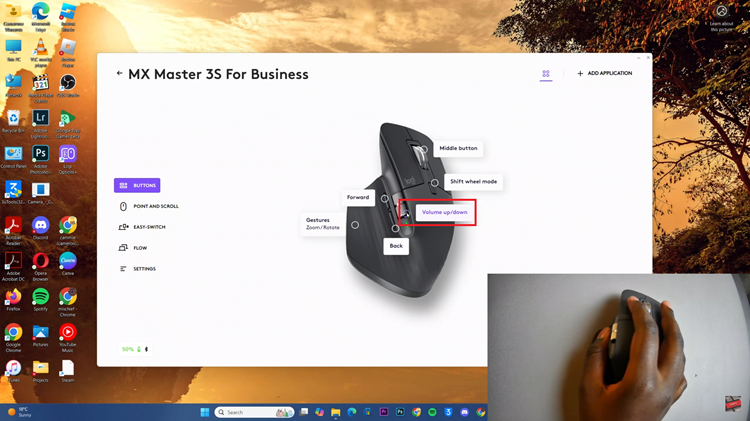
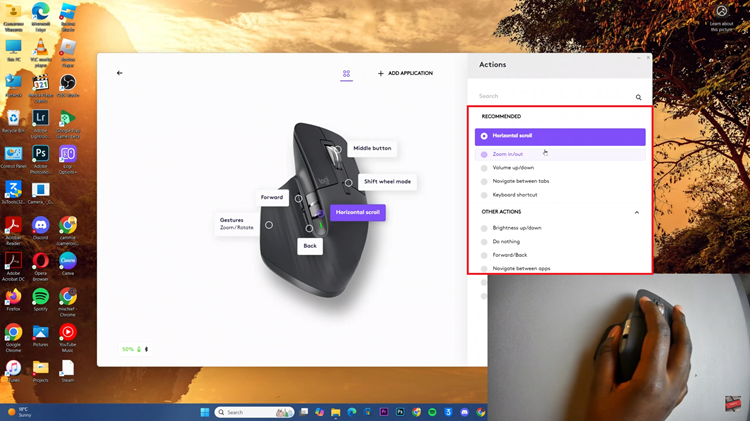
At this point, choose the ‘Thumb Wheel‘ option on the picture of your mouse. From here, you’ll see a list of all available actions that can be performed. Choose the desired action that you’d like your thumb wheel to perform.

Additionally, you can test out different functions that can be performed with the thumb wheel. Once done, exit the app and the change will be applied.

In conclusion, customizing the Thumb Wheel on Logitech MX Master 3S is an effortless and at the same time powerful way to boost productivity by enhancing your general user experience.
Read: How To Change Default Messaging App On Samsung Galaxy A16

