The Logitech MX Master 3S is known for its precision, comfort, and customization, making it a favorite among both professionals and gamers. Among the prime ways to enhance your experience with the MX Master 3S lies adjusting the pointer speed to match your needs.
Whether you’re working on intricate design projects that require precision or navigating quickly through spreadsheets and documents, customizing your cursor’s speed can greatly improve your workflow. In this guide, we will show you how to change the pointer speed on the MX Master 3S using the Logitech Software.
Let’s dive into how to adjust pointer speed on the MX Master 3S!
Watch: How To Disable SmartShift On MX Master 3S
Change Pointer Speed On MX Master 3S
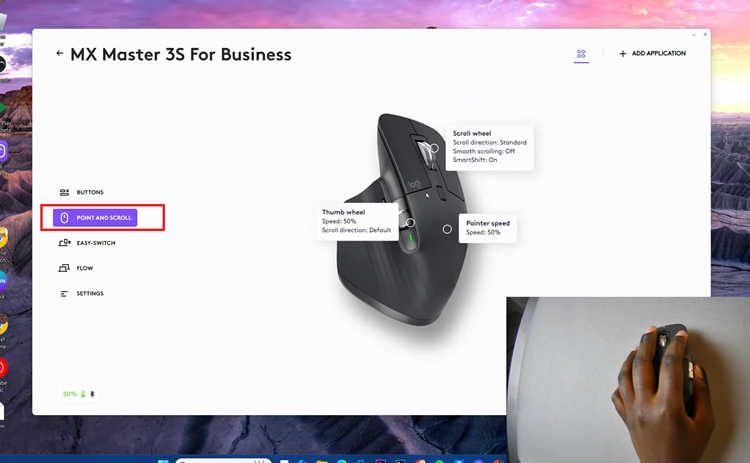
Beforehand, you’ll need to install the ‘Logi Options+ App‘ on your PC. Head to the Logitech software download site and install the software. Once installed, launch the app and select your mouse on the home page. Then, click on the ‘Point & Scroll‘ option from the menu that appears to proceed.

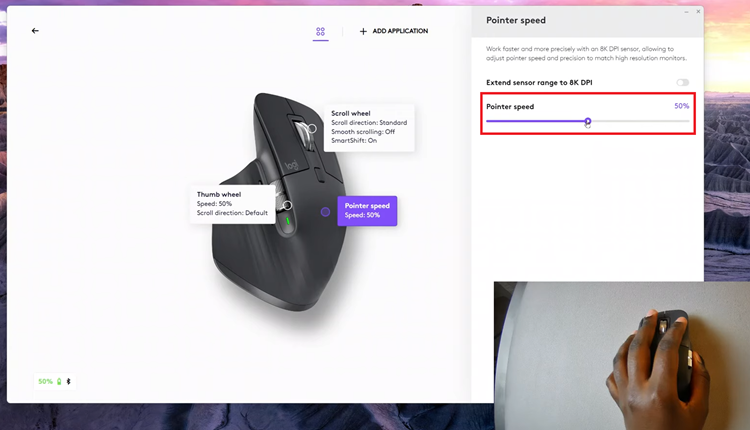
Following this, click on the ‘Pointer Speed‘ option to proceed. From here, you’ll see a slider appear where you can adjust the pointer speed of your mouse. Now, use the slider to either increase or reduce the pointer speed of your mouse.

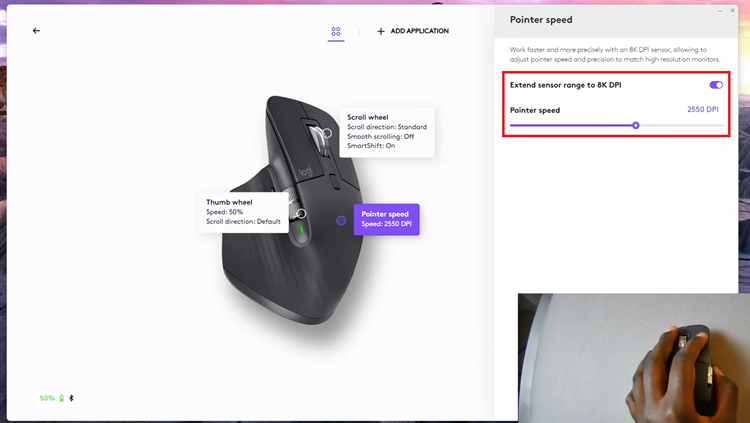
Additionally, you can enable the ‘Extend Sensor Range to 8K DPI‘ and then adjust the pointer speed of your MX Master 3S mouse. As you adjust, you can move your mouse pointer around to preview the speed of your mouse. Once done, exit the app and the changes will be applied.

In conclusion, changing the pointer speed on your Logitech MX Master 3S is an easy but great way to tailor your mouse to what you want: either for speed, accuracy, or comfort. You can set the responsiveness of your cursor with full control by using Logitech Options software.

