In the world of gaming, capturing and sharing your best moments is part of the fun. Whether it’s a spectacular victory, a hilarious glitch, or simply a beautiful scene, being able to transfer screenshots and video clips from your Nintendo Switch to your Windows PC allows you to preserve and share these memories with ease.
If you’ve been wondering how to do this, we’ve got you covered with a simple guide that covers the wired method.
One of the most straightforward ways to transfer media from your Nintendo Switch to your Windows PC is through a USB connection. Here’s how to do it:
Watch: How To Link Nintendo Account To Nintendo Switch User Account
Transfer Screenshots & Video Clips From Nintendo Switch To Windows PC
To begin, ensure you have a USB cable compatible with both your Nintendo Switch and your PC. Insert the USB-C end into your Switch and the other end to your PC.
Navigate to the System Settings on your Switch and select Data Management from the left side menu. Here, scroll down and choose Manage Screenshots and Videos.
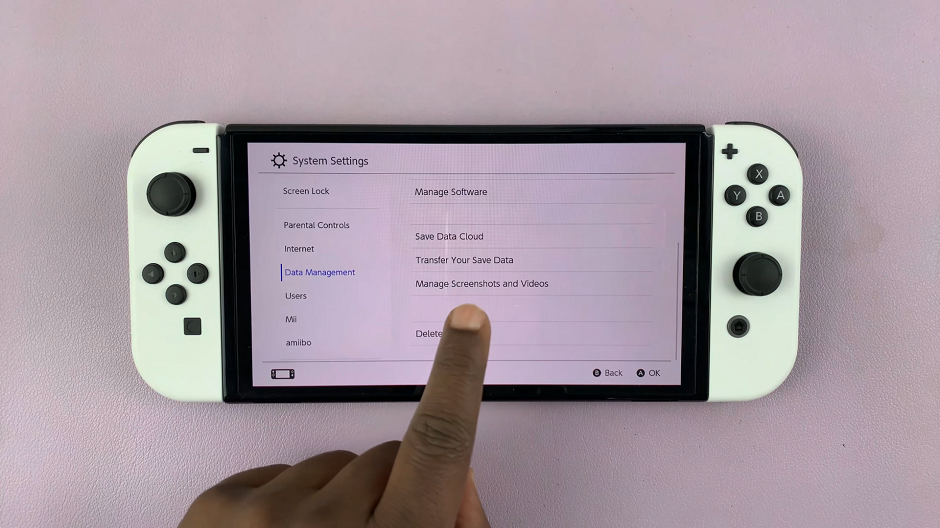
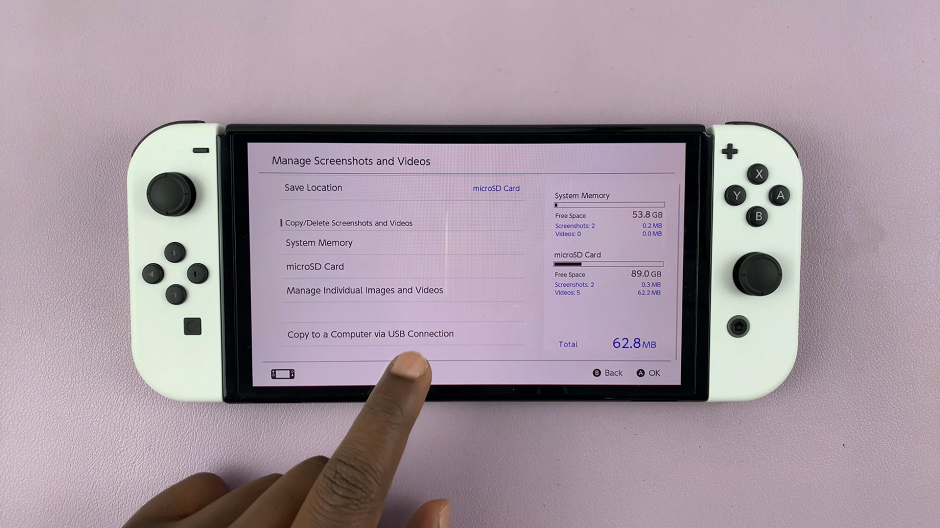
Under Manage Screenshots and Videos, select Copy to a Computer via USB Connection. Nintendo will then create a virtual storage drive on your computer.
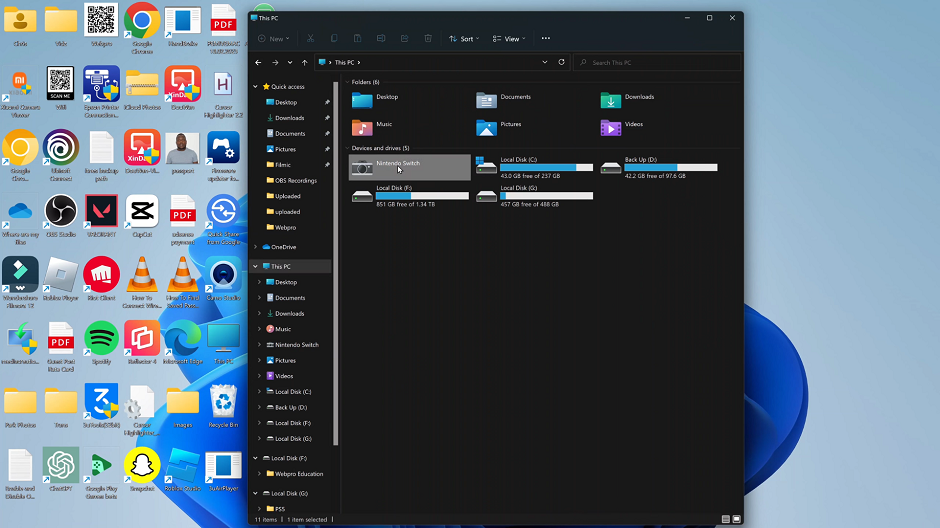
Open the File Explorer on your Windows PC and navigate to the This PC menu. Here, you should see the Nintendo Switch virtual drive. Double click on it to open.
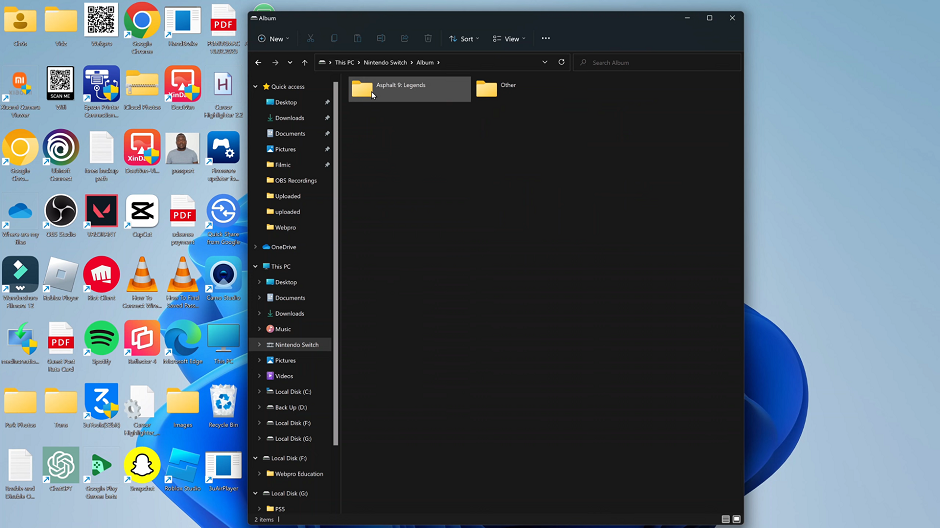
Double click on the Album folder to access the screenshots and videos organized in their respective folders. The folders are mainly named by game name. Open the folder you want to copy the files from.
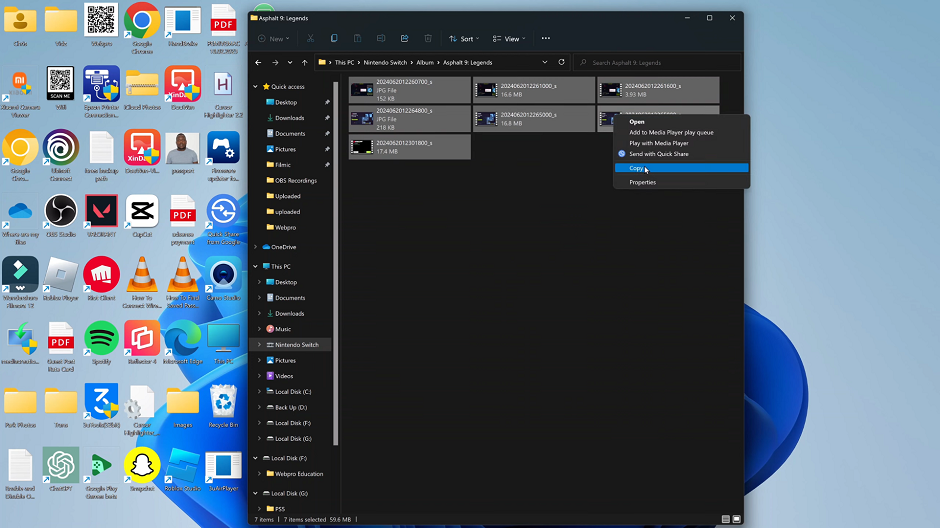
Choose the media you want to transfer, right click and select Copy.
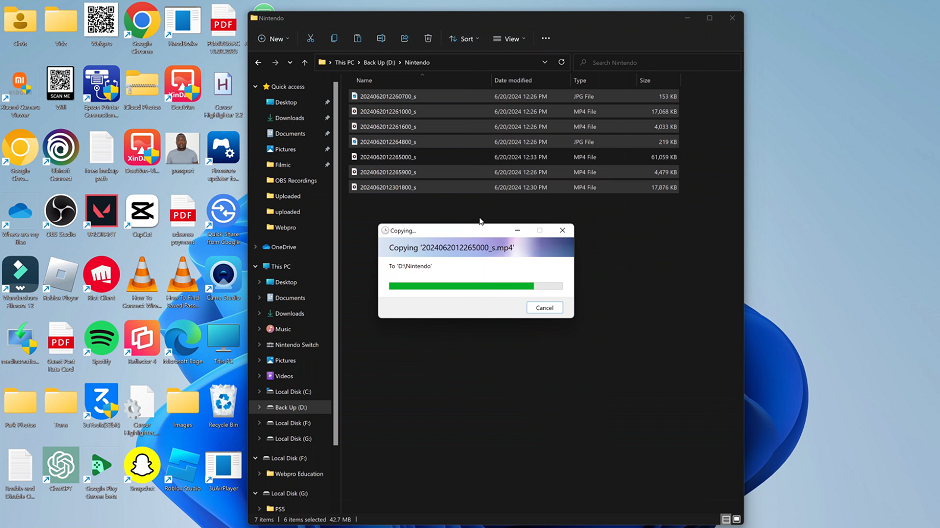
Once copied, navigate to the folder on your Windows PC, where you want to save the files. Right click and paste the screenshots and video clips there.
Tips for Smooth Transfer
Organize Your Media: Create folders on your PC to categorize screenshots and video clips for easier access.
Regular Backups: Periodically transfer your media to avoid filling up your microSD card and to keep your gaming memories safe.
Troubleshooting: If you encounter issues with file transfer, ensure your USB cable or microSD card adapter is properly connected, and check for any updates on your Nintendo Switch.
By following these straightforward methods, you can seamlessly transfer screenshots and video clips from your Nintendo Switch to your Windows PC, preserving your gaming highlights and making them readily shareable with friends and fellow gamers. Whether you’re an avid gamer or just starting out, capturing and transferring these moments enhances your gaming experience and allows you to relive your favorite gaming memories anytime, anywhere.
Now, go ahead and start preserving those epic gaming moments on your PC!
Read: How To Customize Do Not Disturb Mode On OnePlus Watch 2
