In this article, we’ll guide you through the process you can use to add a contact poster on your iPhone 11. One of the ways Apple allows you to personalize your iPhone is through custom contact posters, where you can set images or designs for individual contacts.
Although newer iPhone models might have more enhanced features, you can still enjoy this functionality on the iPhone 11.
A Contact Poster is a personalized visual display that appears when you receive a call or message from a specific contact. It can include a photo, Memoji, or other images that help you quickly identify who’s calling. This feature is not only functional but adds a creative touch to your contacts.
Read: How To Change Bluetooth Name On iPhone 11
Add Contact Poster On iPhone 11
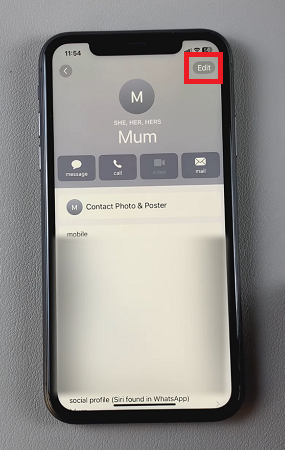
First, launch the Contacts app on your iPhone’s home screen and tap to open it. You can also access the contacts via the Phone app, in the Contacts tab. Browse through your contacts and select the specific contact for which you want to create a contact poster.
Next, tap on Edit at the top right corner, then select Add Photo to access the Contact poster templates on your iPhone.
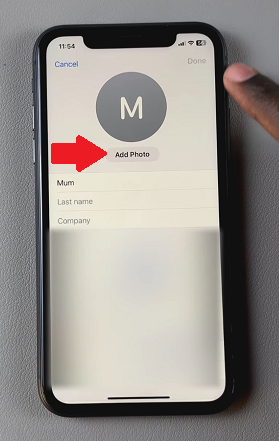
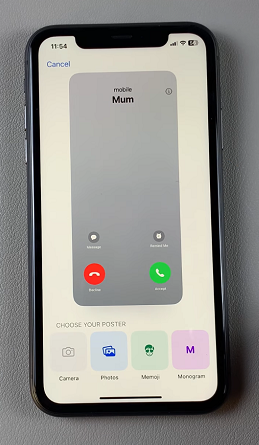
On the Contact poster template, look through the options and find the one you’d prefer. You have the following options to choose from:
Camera: Take a photo with the Camera app.
Photos: Choose an already existing photo from the Photos library.
Memoji: Select a Memoji for the contact from a catalogue of Memoji.
Monogram: Choose an alphabet lettered monogram from a selection of them.
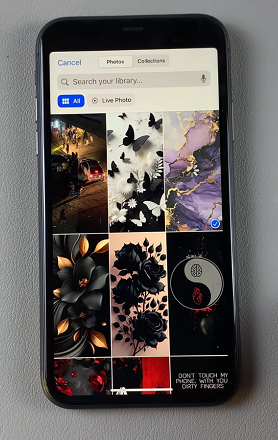
Once you choose the option you want, say, an existing photo, you can now make adjustments to it.
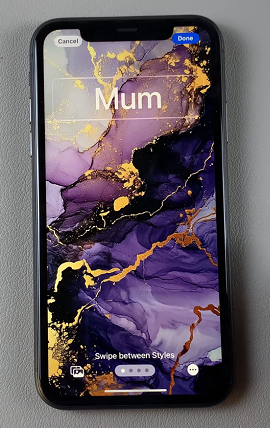
At this stage, you can customize the appearance of the contact poster. You’ll have options to pinch to crop, filters to use and enable or disable depth effect. Make your preferred selections to personalize the contact poster.
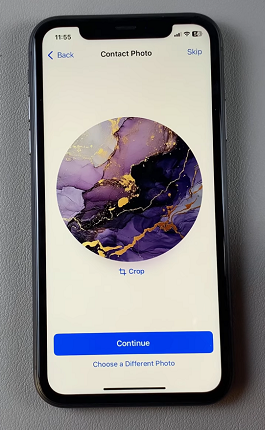
Once you’re satisfied with the customization, tap on the Done button to save the contact poster to your device. After saving, you’ll be able to see a preview of what it looks like. Tap on Continue and this will be applied to that particular contact.
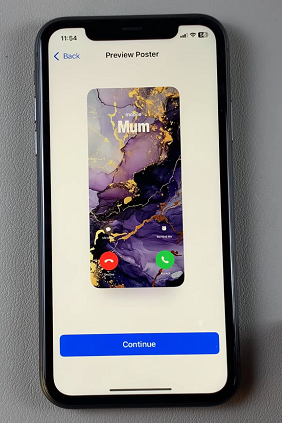
You can decide to add a contact photo as well, if you’d like. To do so, tap on Choose a Different Photo and follow any on-screen instructions that will appear or simply tap on Continue once again to use the one from the contact poster. If you’d like to have the poster alone, you can tap on Skip.
Finally, in the selected contact’s page, tap on Done to save the changes you have made. You can go back into the contact details anytime to change or remove the poster.
The poster will be visible only on your phone when the contact calls or messages you. However, if you share your contact with others, they may see the image you’ve set for yourself.
You can also follow the same steps to add a poster to your own contact info. This will be the image people see when you share your contact with them.
