The default settings on your iPhone 11 will already have the video resolution set, providing you with full control over the quality and size of the file for whatever your video capturing needs may be. Choosing the right video resolution will be key, from casual social media clips to professional-grade recordings.
The higher the resolution, such as 4K, the clearer the video quality will be, but it can eat up your device’s storage. Meanwhile, lower resolutions, like 720p or 1080p, have smaller file sizes, which are easier to share and store, but at the expense of image clarity.
In this tutorial, we’re going to go through the easy steps involved to change the default video resolution on your iPhone 11, so you have more flexibility when shooting.
Watch: How To Set Up Gboard On iPhone 11
Change Default Video Resolution On iPhone 11
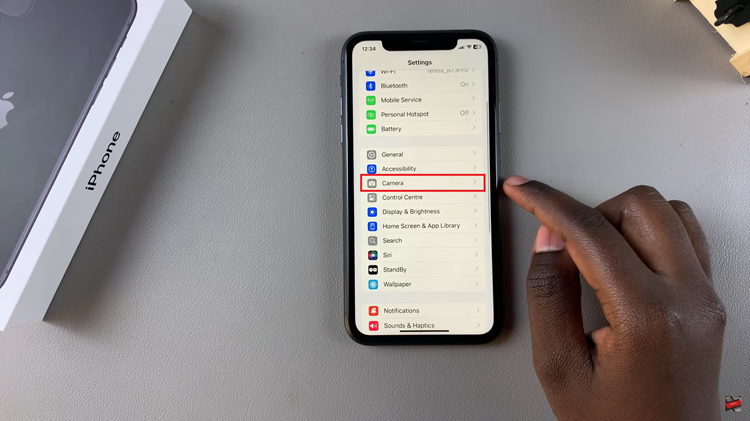
Firstly, locate and tap the “Settings” app, represented by a gear icon, typically found on your home screen. Then, scroll down the settings menu and look for the “Camera” option. Tap on it to proceed.

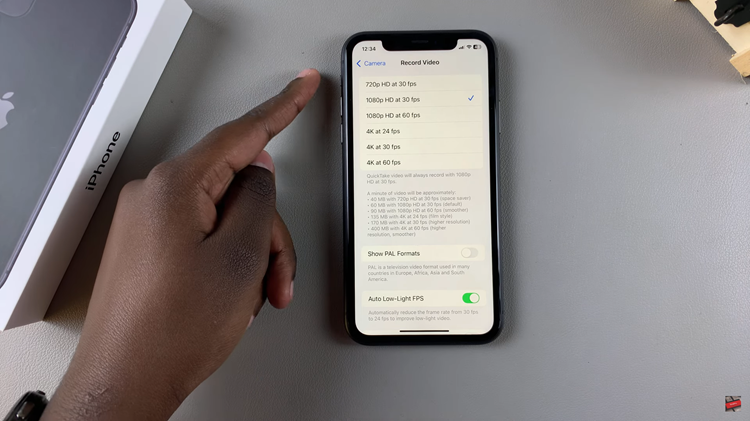
Following this, tap on “Record Video” under the camera settings. This will open the video resolution settings. You will see a list of video resolution options such as:
- 720p HD at 30 fps (lower quality, smaller file size)
- 1080p HD at 30 fps (standard quality)
- 1080p HD at 60 fps (smoother video)
- 4K at 24 fps
- 4K at 30 fps
- 4K at 60 fps (highest quality, largest file size)
Select the resolution and frame rate that best suits your needs. Once you have made the changes, exit the settings page and launch the camera to test your settings.

In conclusion, you can set up most of your default settings in video recording on your iPhone 11. You will get options to select from higher quality to save storage space in recordings. You can now have full control over video quality and file size in just a few easy steps to always get it right for the balance of your content.

